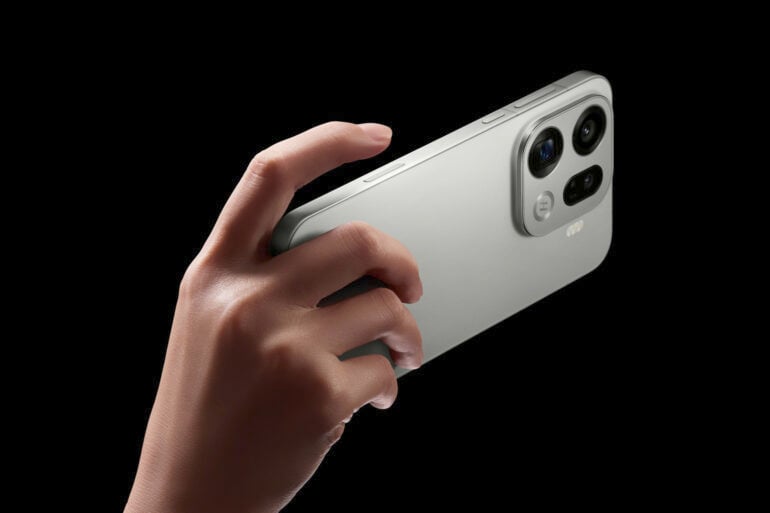
With how much every phone brand has rushed to promote AI features as the next big thing, you’d think that meant lots of people really cared about it, wouldn’t you? Not so, according to Oppo research, which found that a mere four per cent of Australians rank AI as an important phone feature.
That tasty morsel comes from Alex Choros’ reporting at WhistleOut Australia, who quizzed Oppo Australia’s Managing Director, Michael Tran, on local preferences when buying phones. Tran said that “consumers are saturated with so much AI stuff”, which likely contributes towards widespread apathy towards the technology.
Instead, Oppo’s research found that Australians consider battery life to be the most important deciding factor, followed by value for money, camera quality, and device quality. That’s probably why the new Oppo Find X9 phones include massive batteries up to 7,500mAh in capacity.
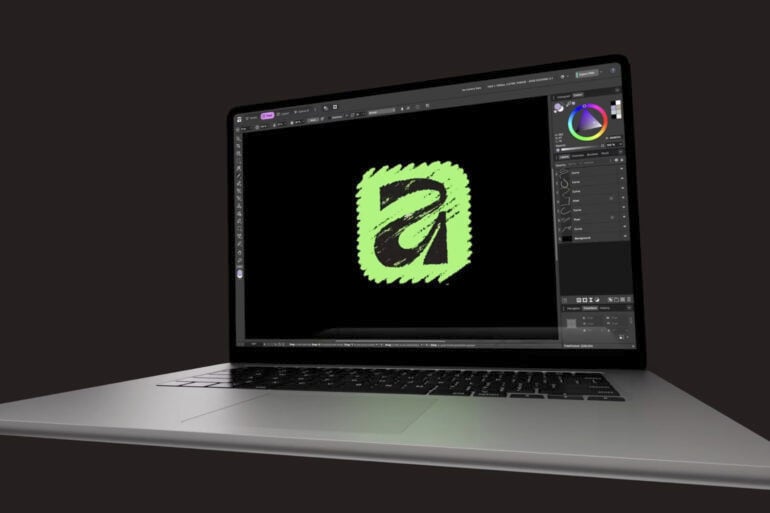
For years, I’ve used Affinity Photo as my go-to photo editor. It used to be a one-off purchase, a soothing balm in the face of Adobe’s increasingly expensive subscription-based apps. I say “used to be” because Affinity has now re-launched as a free, all-in-one design app under its Australian-based owners.
Another major change is the consolidation of multiple programs into a single app. Previously, Affinity offered three separate apps: Designer, Photo, and Publisher. Made for distinctly different purposes, much like Adobe Photoshop and InDesign, each app varied between pixel-based and vector-based editing.
Now, there’s just one app, simply called “Affinity”, which now requires a Canva account to access. Windows and Mac versions are available now, with an iPad version to follow. Opening the app, you can swap freely between ‘vector’, ‘pixel’, and ‘layout’ editing modes. It’s designed to let you illustrate, edit photos, or arrange print designs without swapping between separate programs.
Then there’s the elephant in the room: Canva AI. Alongside the subscription concerns, a lot of creatives feared that they’d face a wave of generative AI features under Canva’s new direction. Those features, including generative fill and background-removing tools, are present, albeit gated behind a Canva Pro subscription.
“We know that transparency around AI use and data handling is essential, and your creative work will always remain yours,” said Ash Hewson, Affinity’s CEO, in an official blog post.
According to Hewson, any work produced in Affinity “is not used to train AI features”. Unfortunately, the V2 versions of Affinity’s apps, which still operated under the buy-once model, won’t get any more updates. At least they’re still available to use, if you have an existing licence.
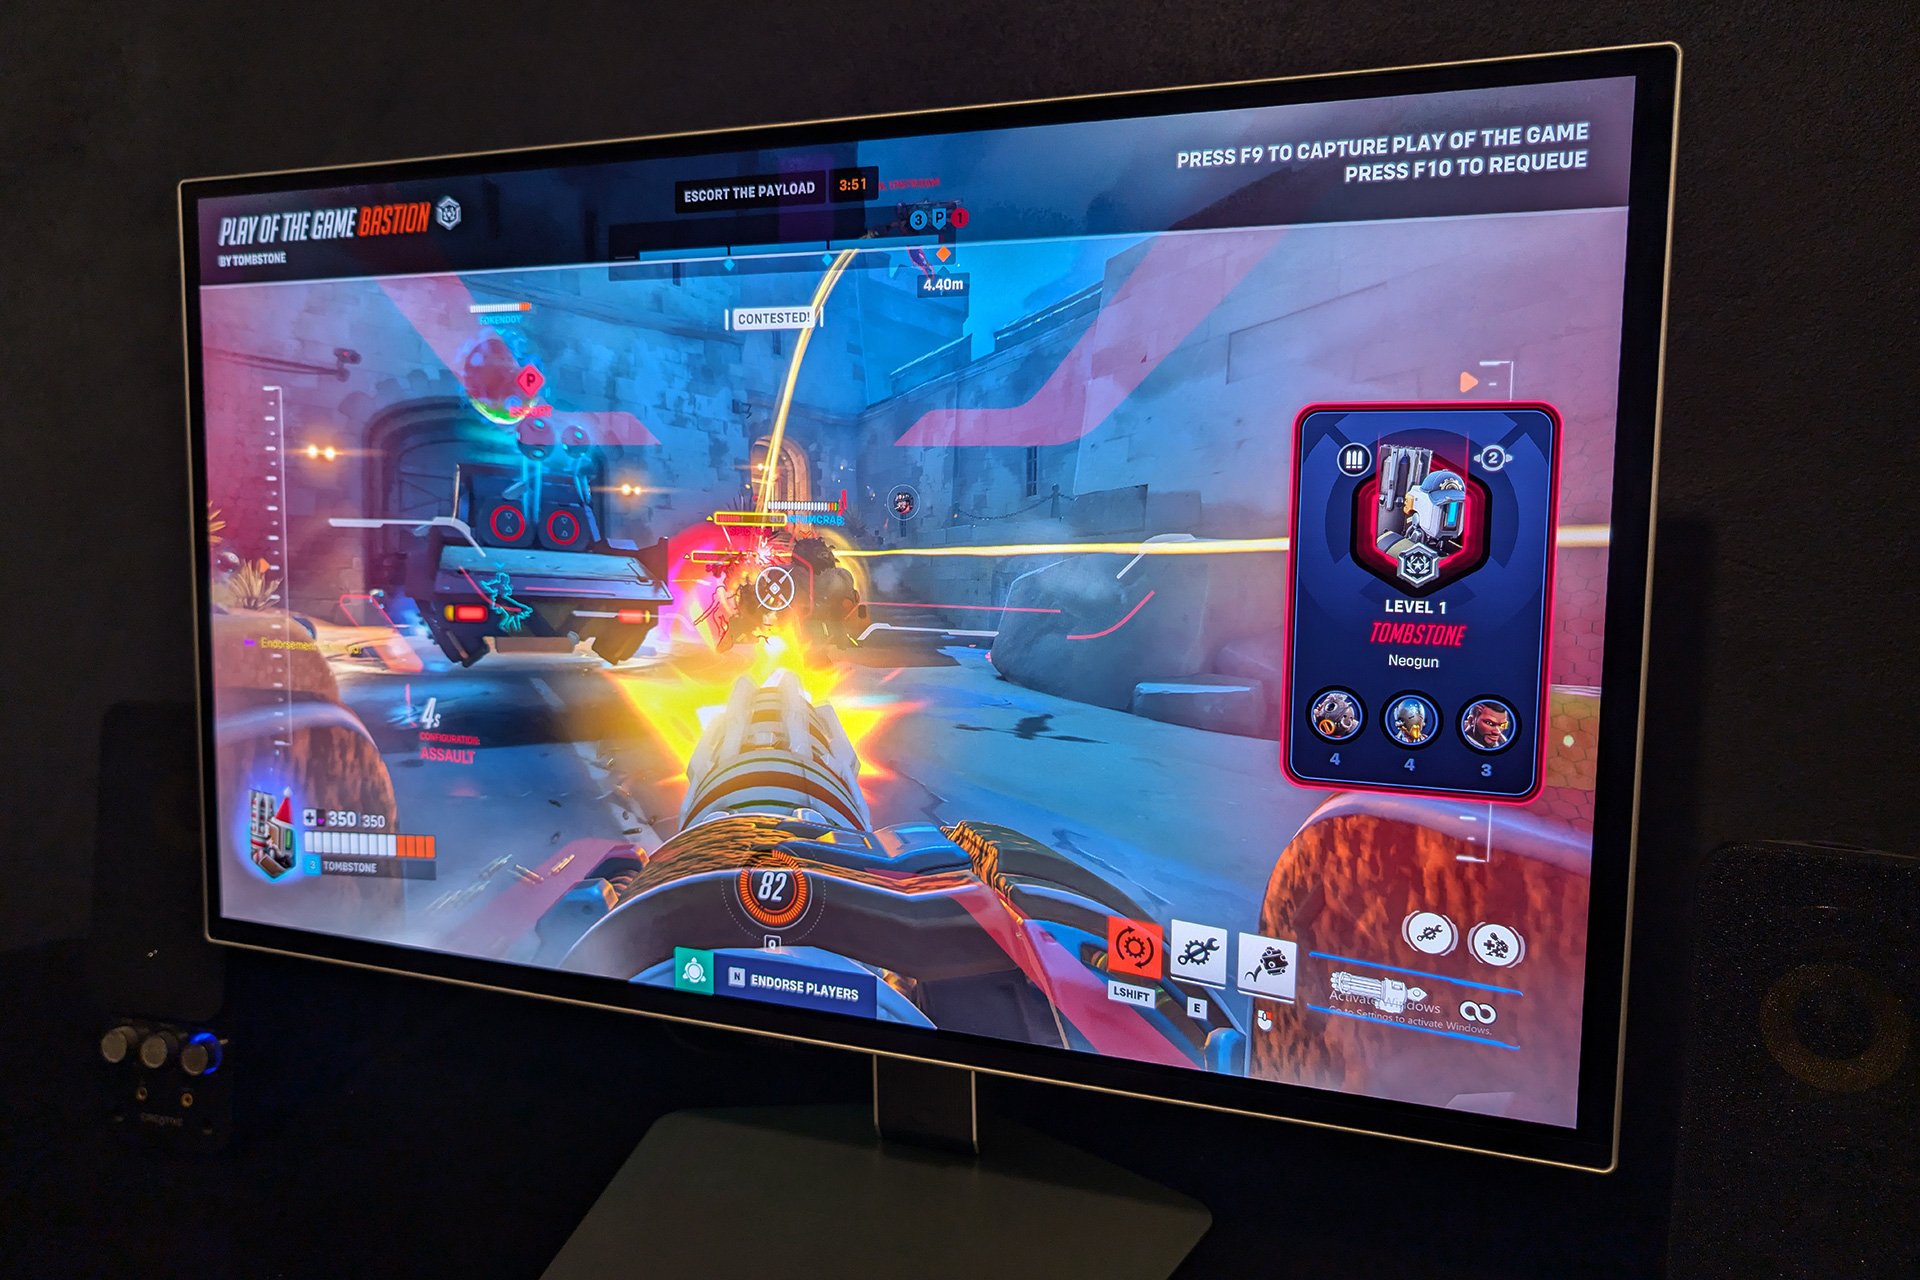
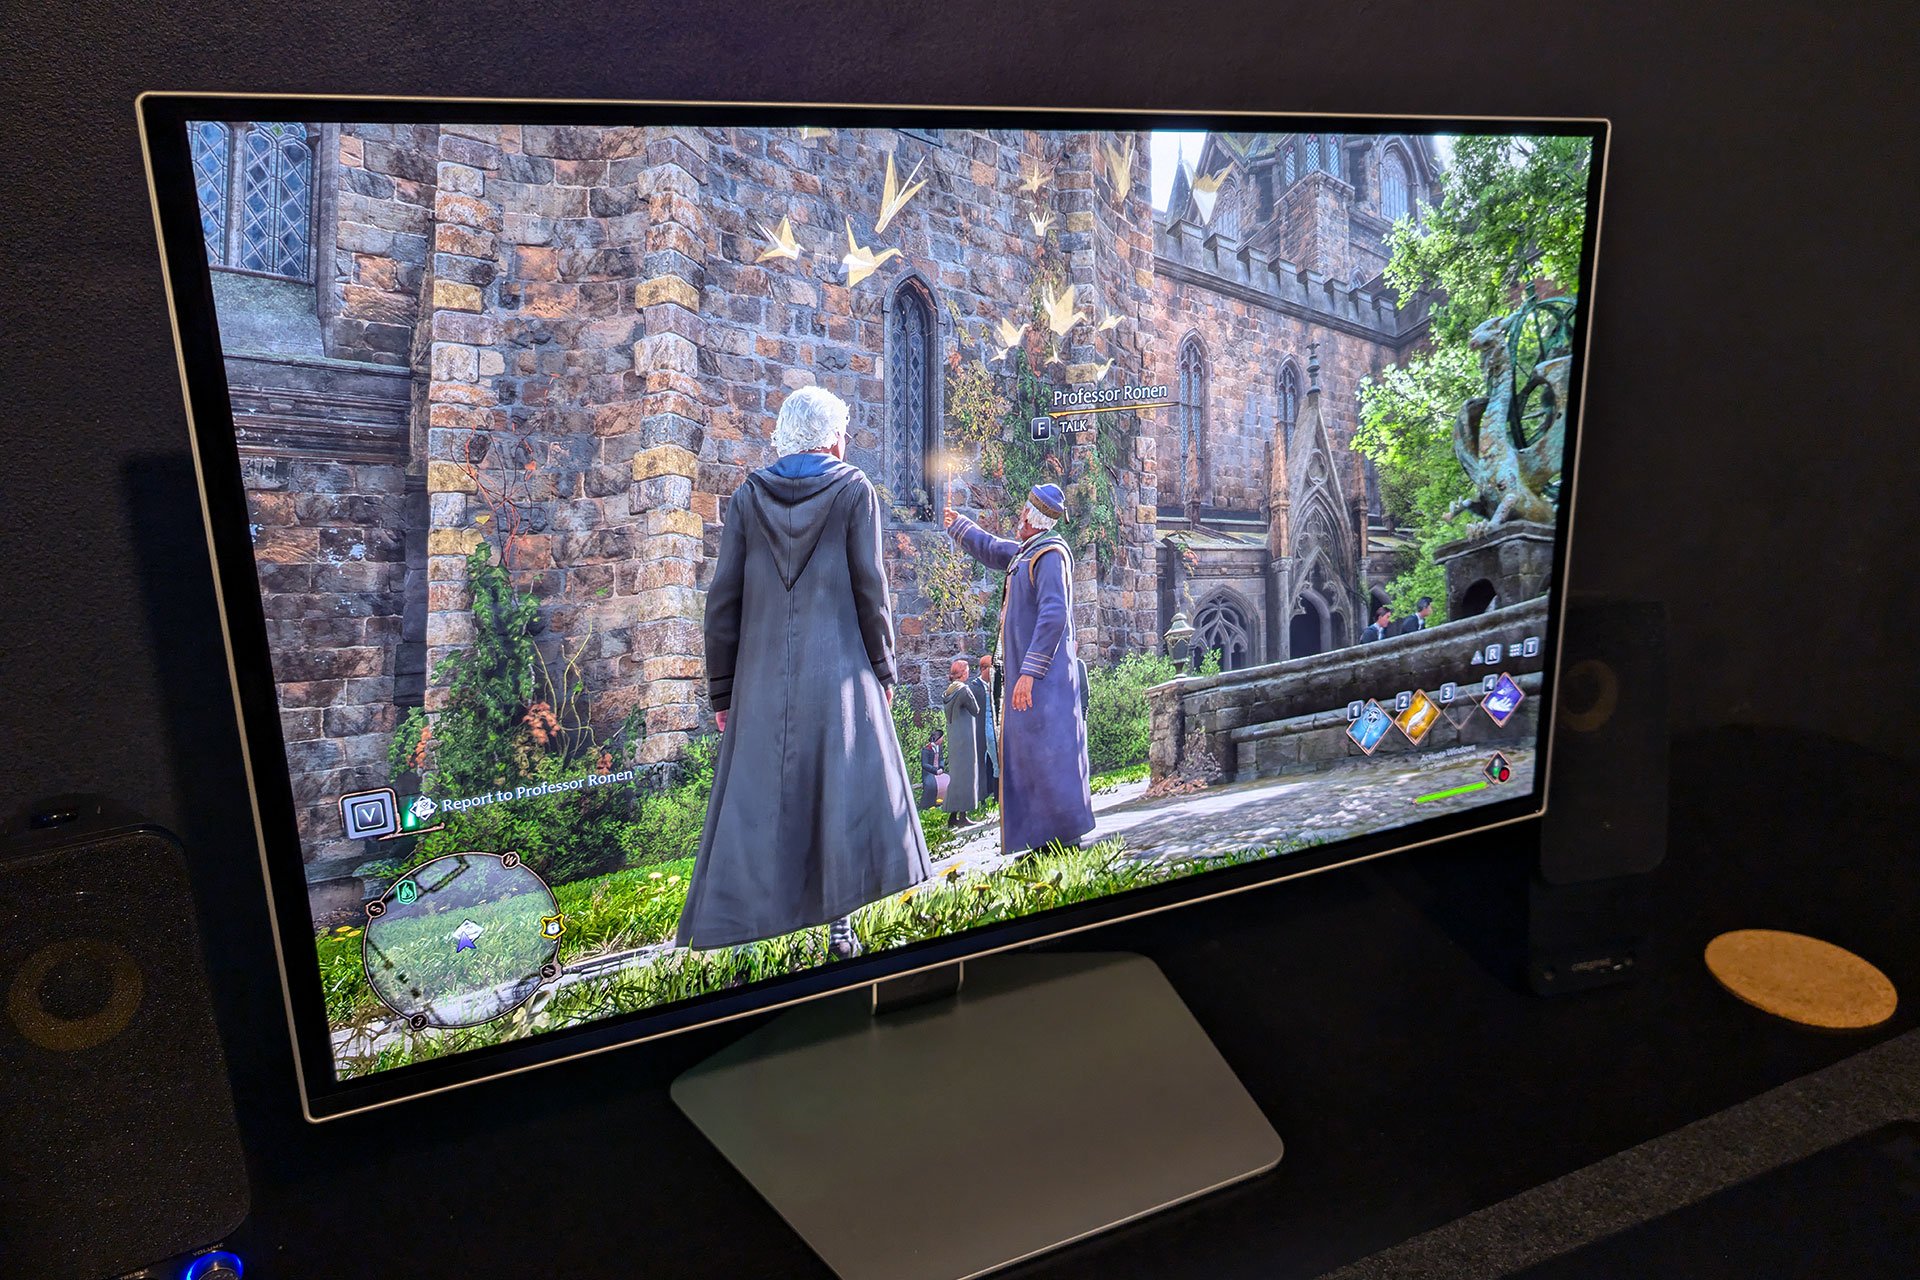
Back at it again with another gaming monitor review. This time, I am checking out a somewhat new addition to the G8 range, a 27-inch Samsung Odyssey OLED G8 gaming monitor. That means I have to spend hours upon hours playing games — what a hard life!
Having just reviewed a very similar monitor — the Samsung Odyssey G6 — I’m uniquely positioned to directly compare the two. Although they are very similar in appearance, there are some key specs that set them apart, so hopefully I can help you choose the one that suits your needs.
Right away, I can dive into the biggest advantage of the G8, which is its 4K resolution. This means the resolution across the 27-inch monitor is 3,840 x 2,160. That’s huge for those looking for super high-quality images, allowing for all of those small details to be crisp.
In a gaming sense, a high-resolution screen enhances visibility and heightens immersion through its greater pixel count. The resulting clarity boost (as long as you have a device capable of playing 4K games) is nice on the eyes.
On a big screen, like a TV, the difference between Full HD and 4K is pretty impressive. On a smaller gaming monitor, like this 27-inch model, the difference isn’t as huge. But it is still a noticeable improvement, especially because of how much closer you sit to a monitor than a TV.
Image: Jay Marshall.
For comparison, the G6 has QHD resolution, which is a little higher than Full HD at 2,560 x 1,440. I wouldn’t say this is a deal breaker for the G6, as both of these monitors are primarily built for gaming. I would suggest that QHD was easily good enough to provide a clear and sharp gaming experience. For those with their heart set on 4K, the G8 is the way to go.
Refresh rate and response time
Another big selling point for a gaming monitor is the refresh rate. In simple terms, refresh rate is the amount of time a monitor updates the image per second. This is measured in Hertz (Hz), and the higher the refresh rate, the smoother and output looks and feels. Cheaper generic monitors usually support 60Hz, while gaming monitors typically start at 144Hz or above. The Samsung G8 lands right in the sweet spot at 240Hz, on the higher end of the scale.
Images: Jay Marshall.
There are monitors with higher refresh rates these days, such as the Samsung G6 with 500Hz, yet I found there is certainly a point of diminishing returns. 500Hz is crazy, and Samsung is certainly pushing boundaries with those high-end specs. But I found the 240Hz refresh rate on the G8 to be super smooth and not a whole lot different from the G6.
You need a pretty powerful machine to push games beyond 240Hz anyway. I wouldn’t say I lost any competitive advantage by having the lower (in the relative sense) refresh rate, as the G8 is still super impressive.
When it comes to response time, the Samsung G8 spares no expense. The G8 and G6 are identical with a 0.03ms response time, which again is extremely quick. To be clear, a super-fast response time like this is mostly vital to reduce things like motion blur and ghosting in fast-paced games. Ghosting is when faint blur trails or shadowy-looking effects appear behind fast-moving objects or characters on your screen. Anything under 2ms is great for gaming, so 0.03ms is exceptional.
Image: Jay Marshall.
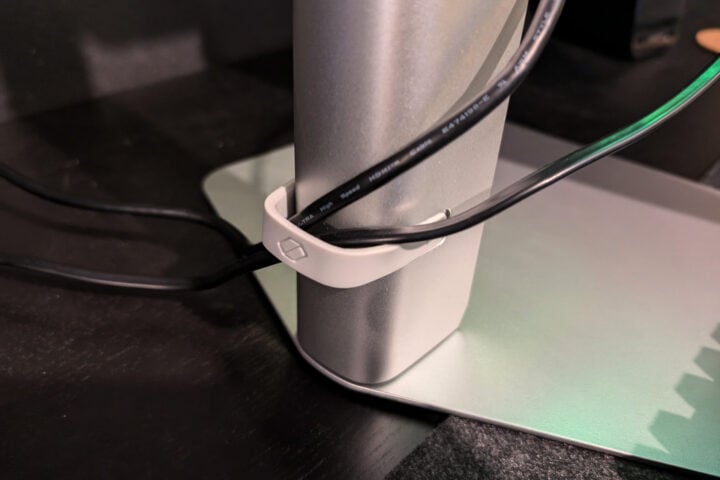
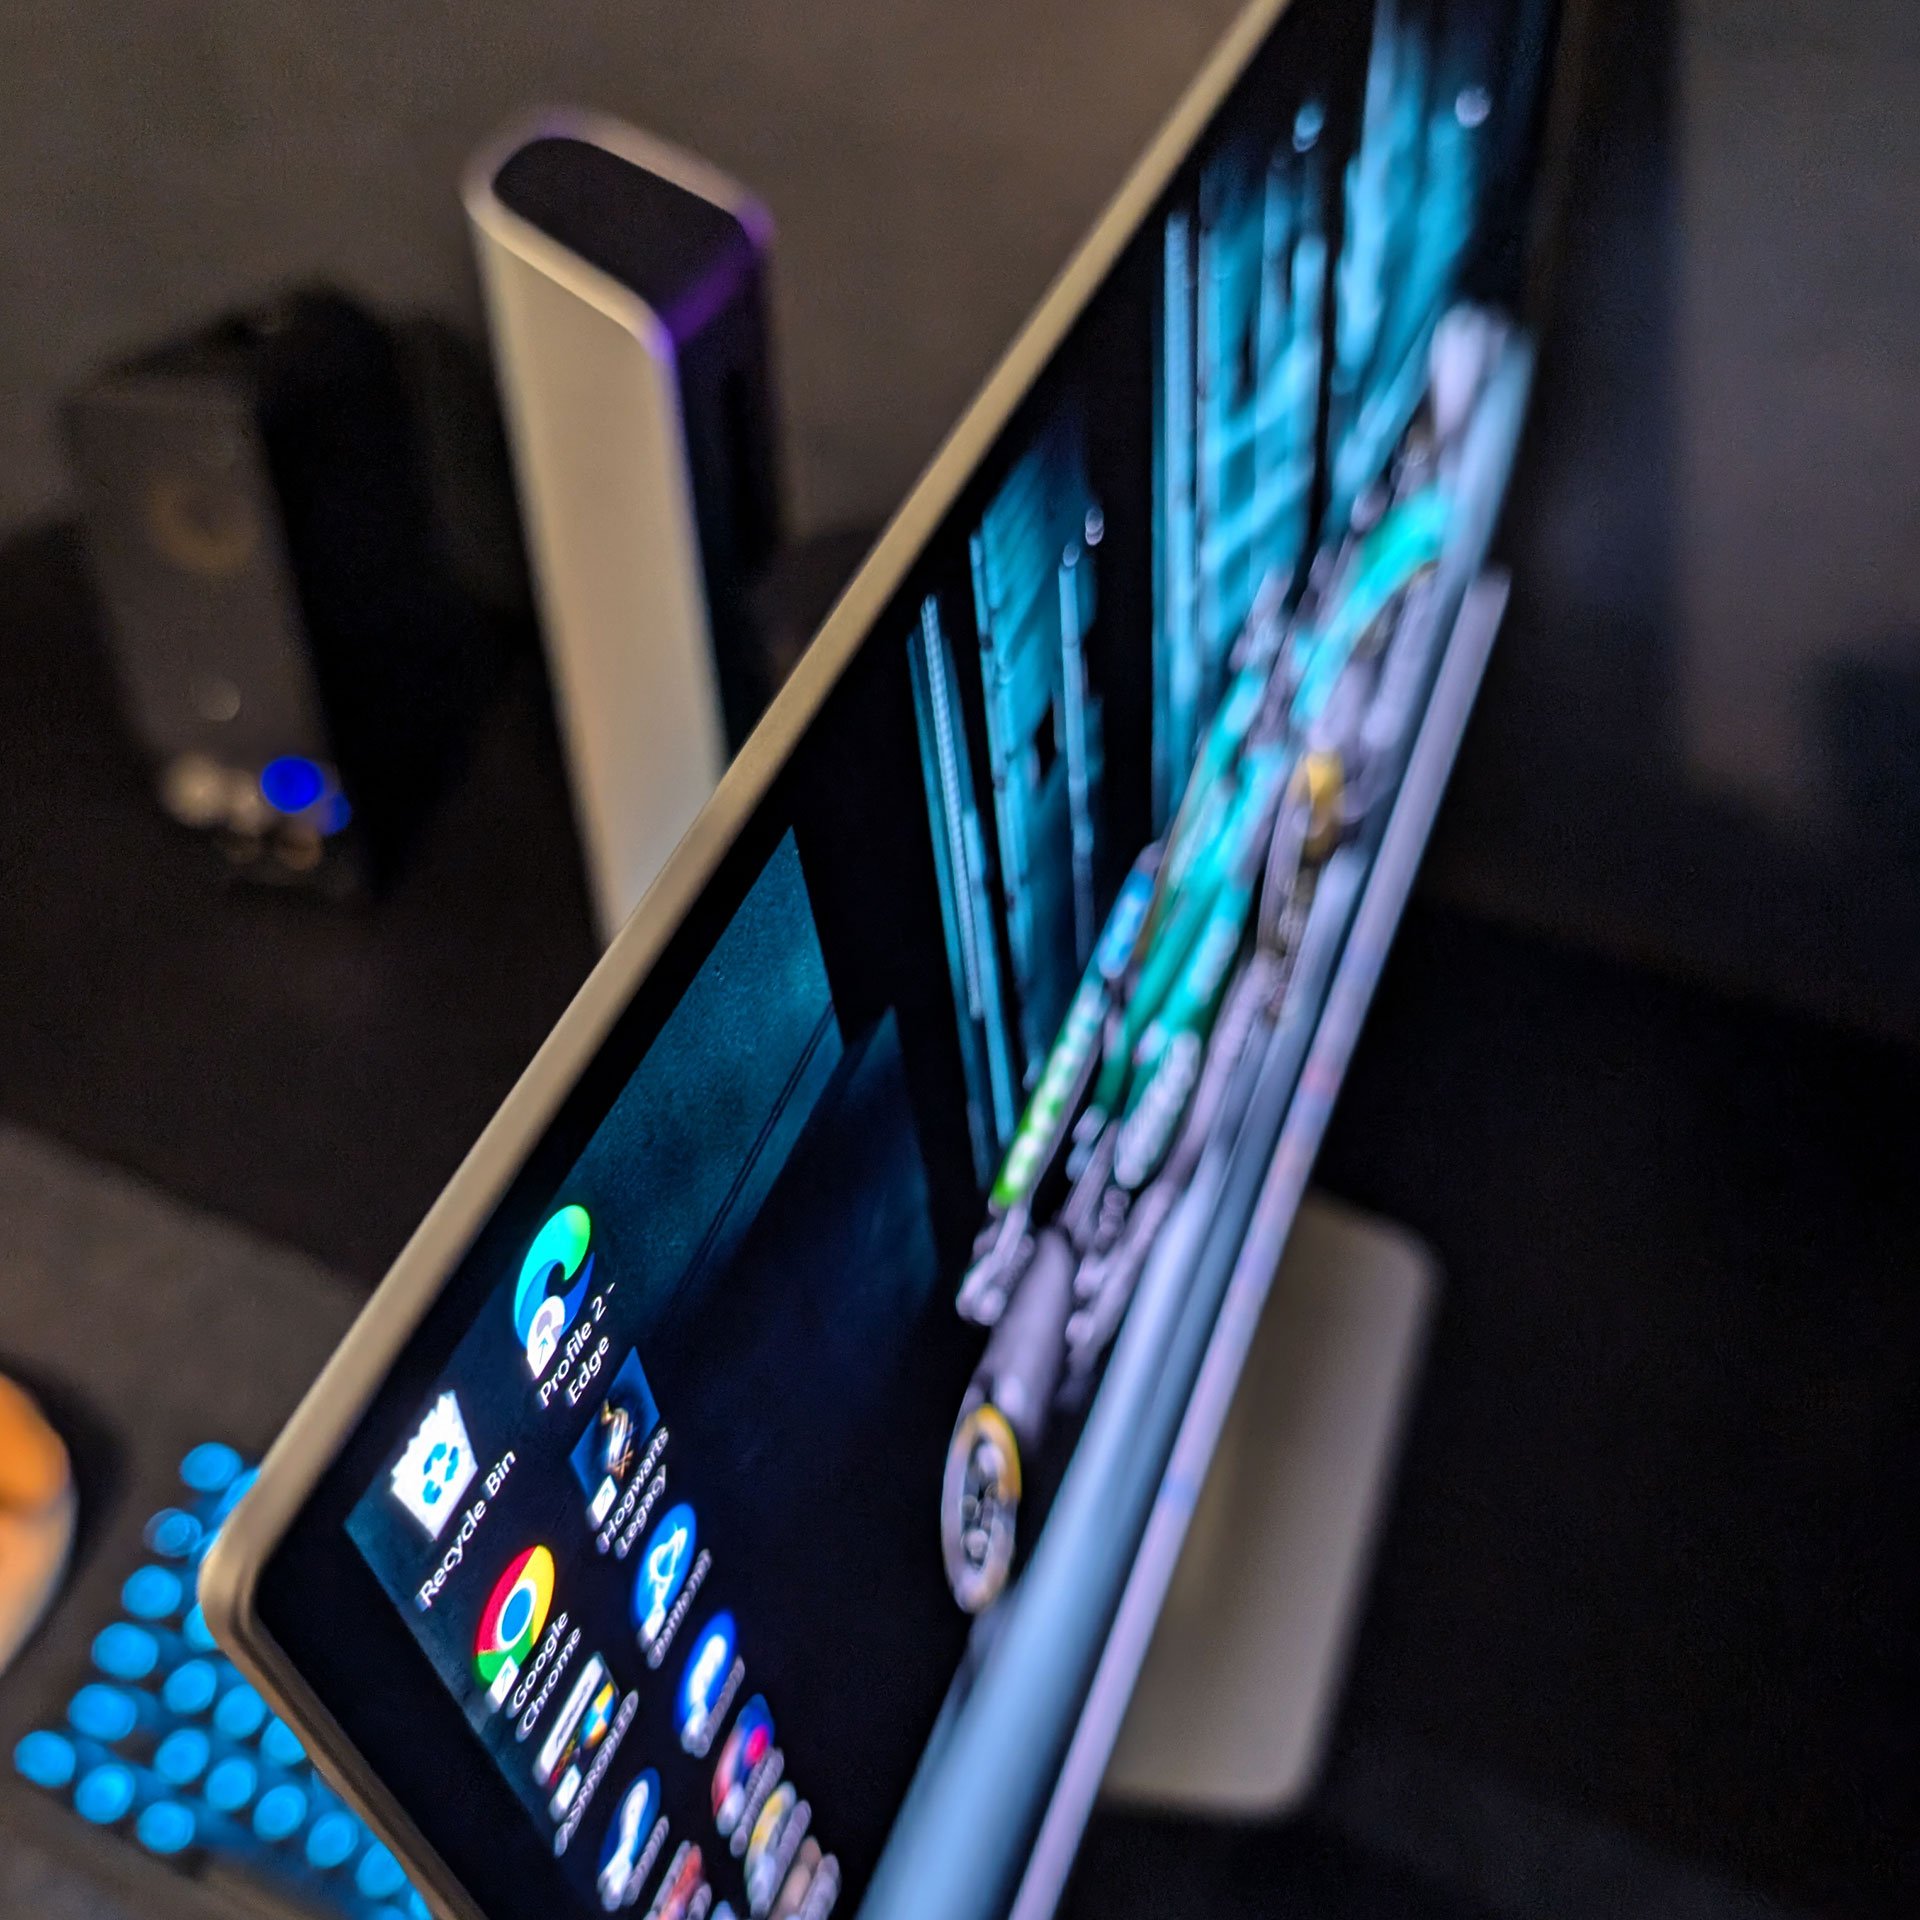
Build quality and design
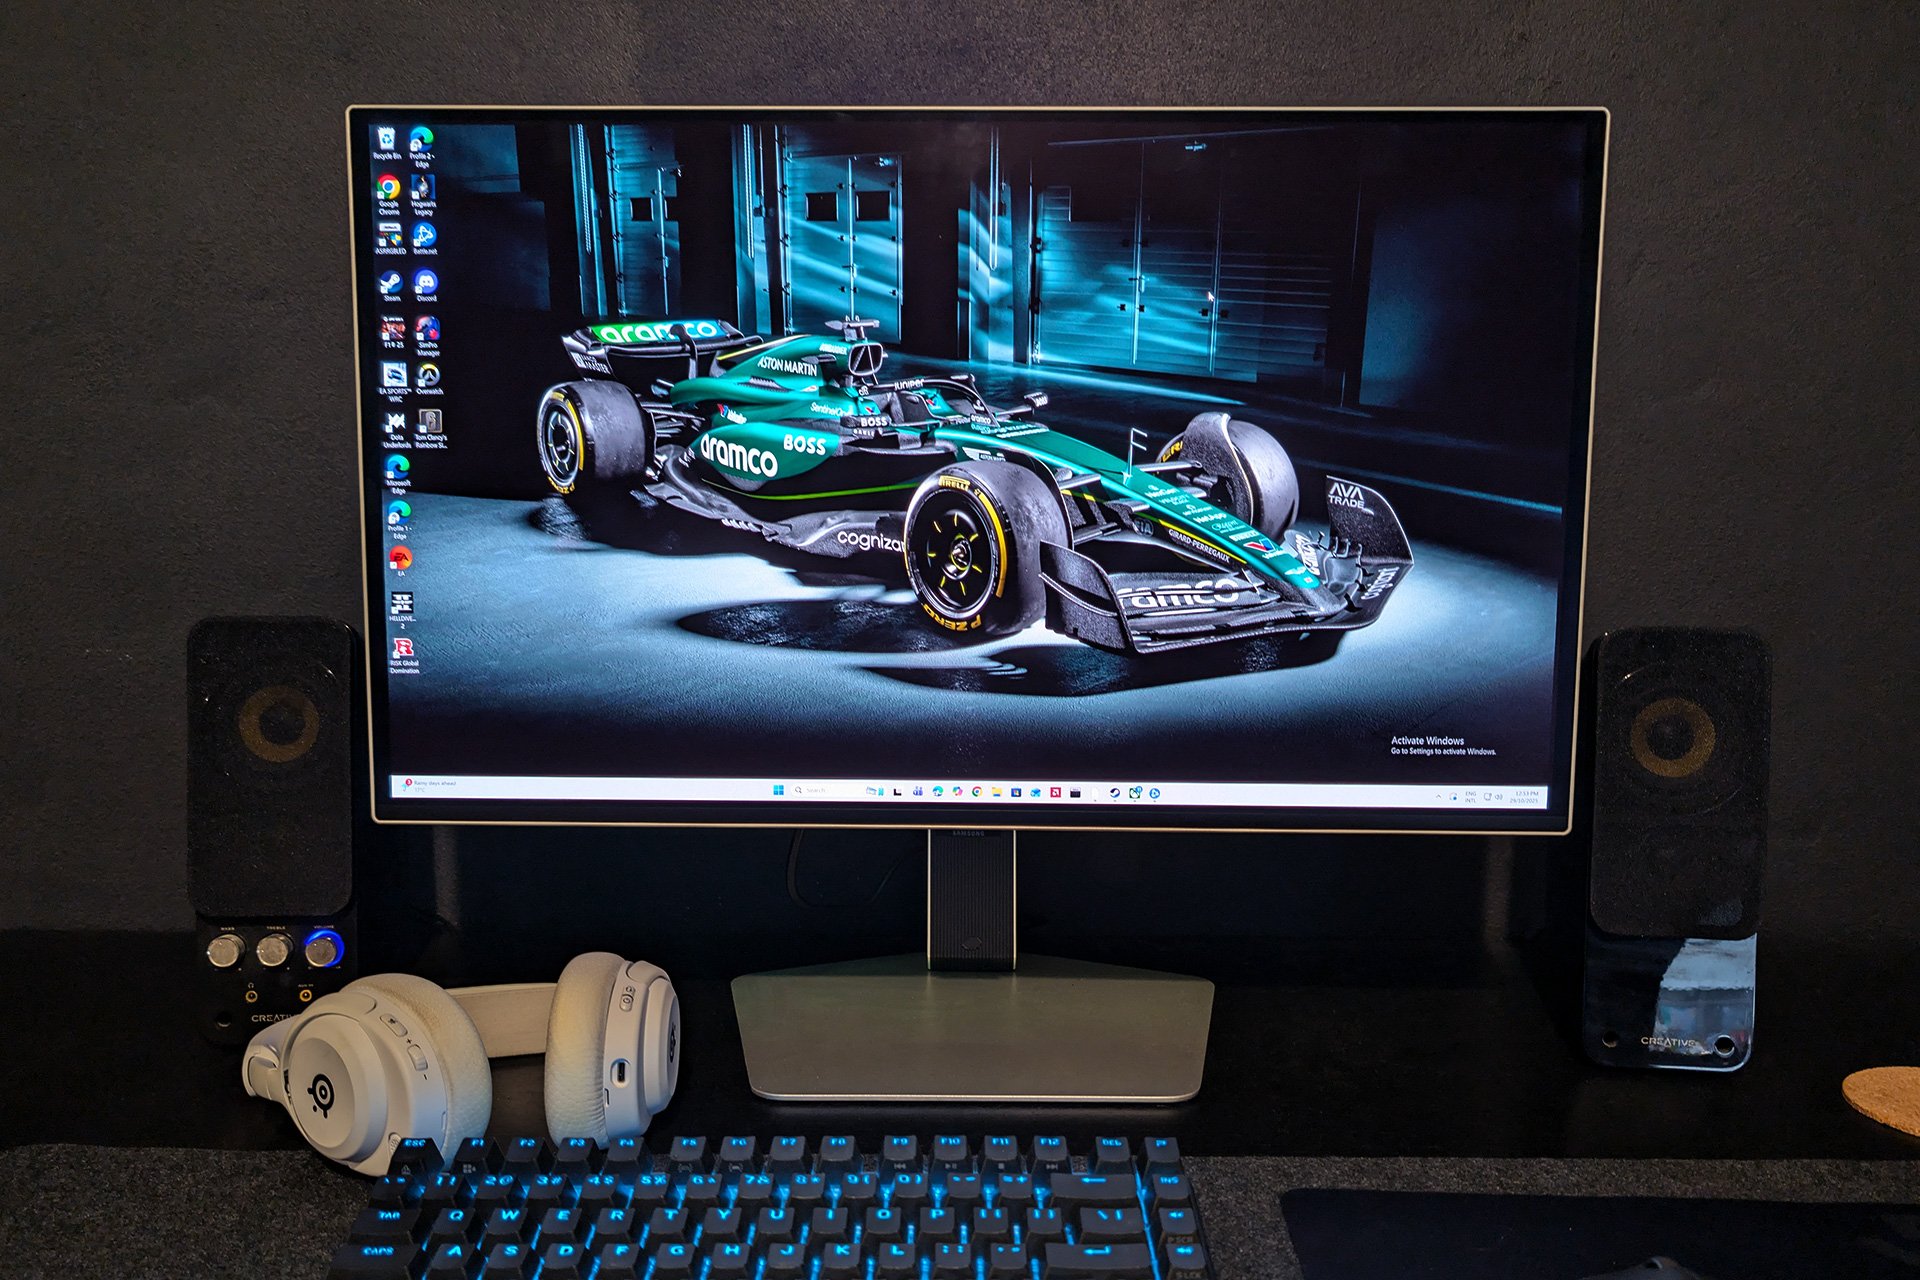
I am conscious of the fact that I am constantly comparing the G8 to the G6, but this is one area where it’s completely justified. The two monitors look — as far as I can tell — identical. The G8 has a fantastic slim metal design that looks super modern and premium. I love the silver colour of the monitor, making it stand apart from some of its competitors that are always the standard black, black and more black.
Images: Jay Marshall.
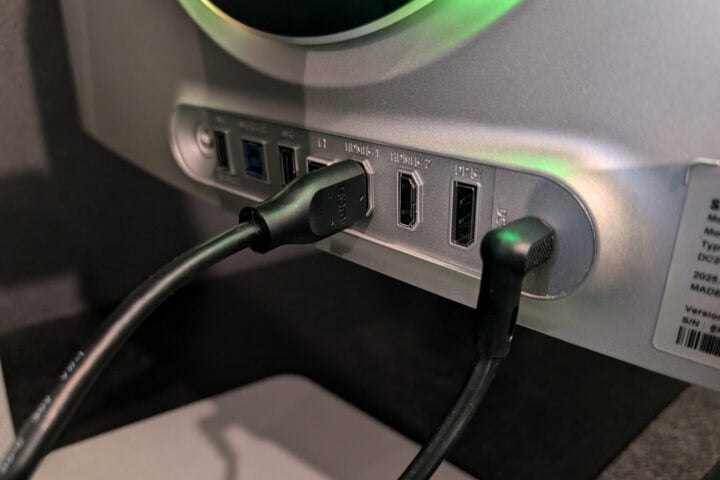
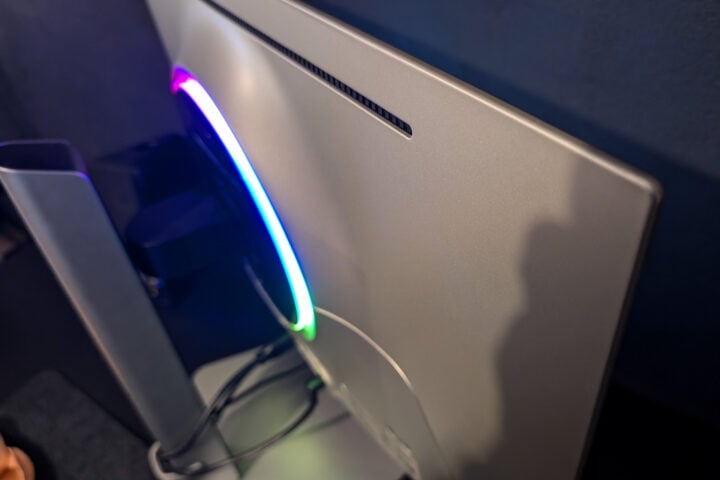
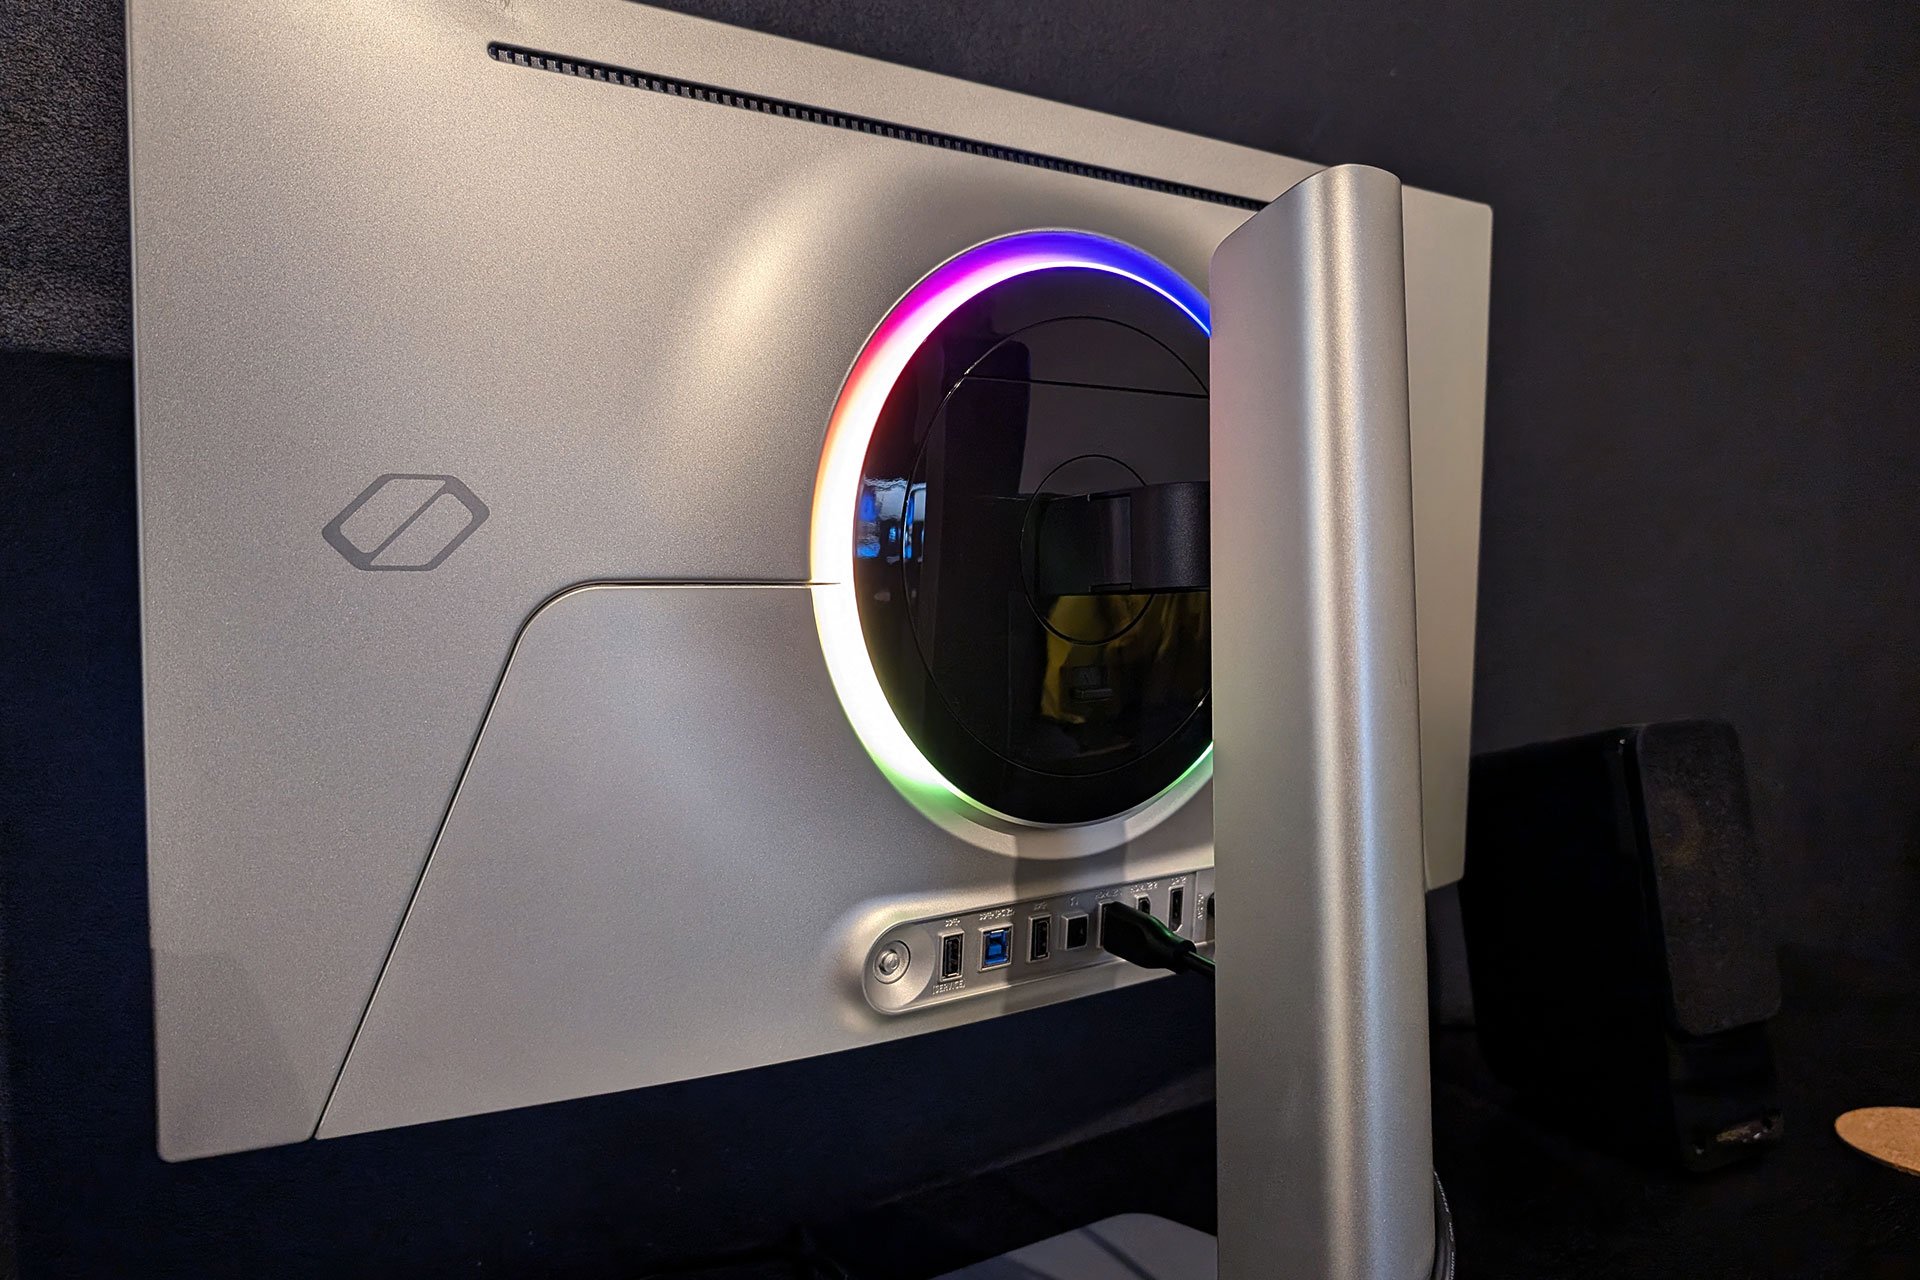
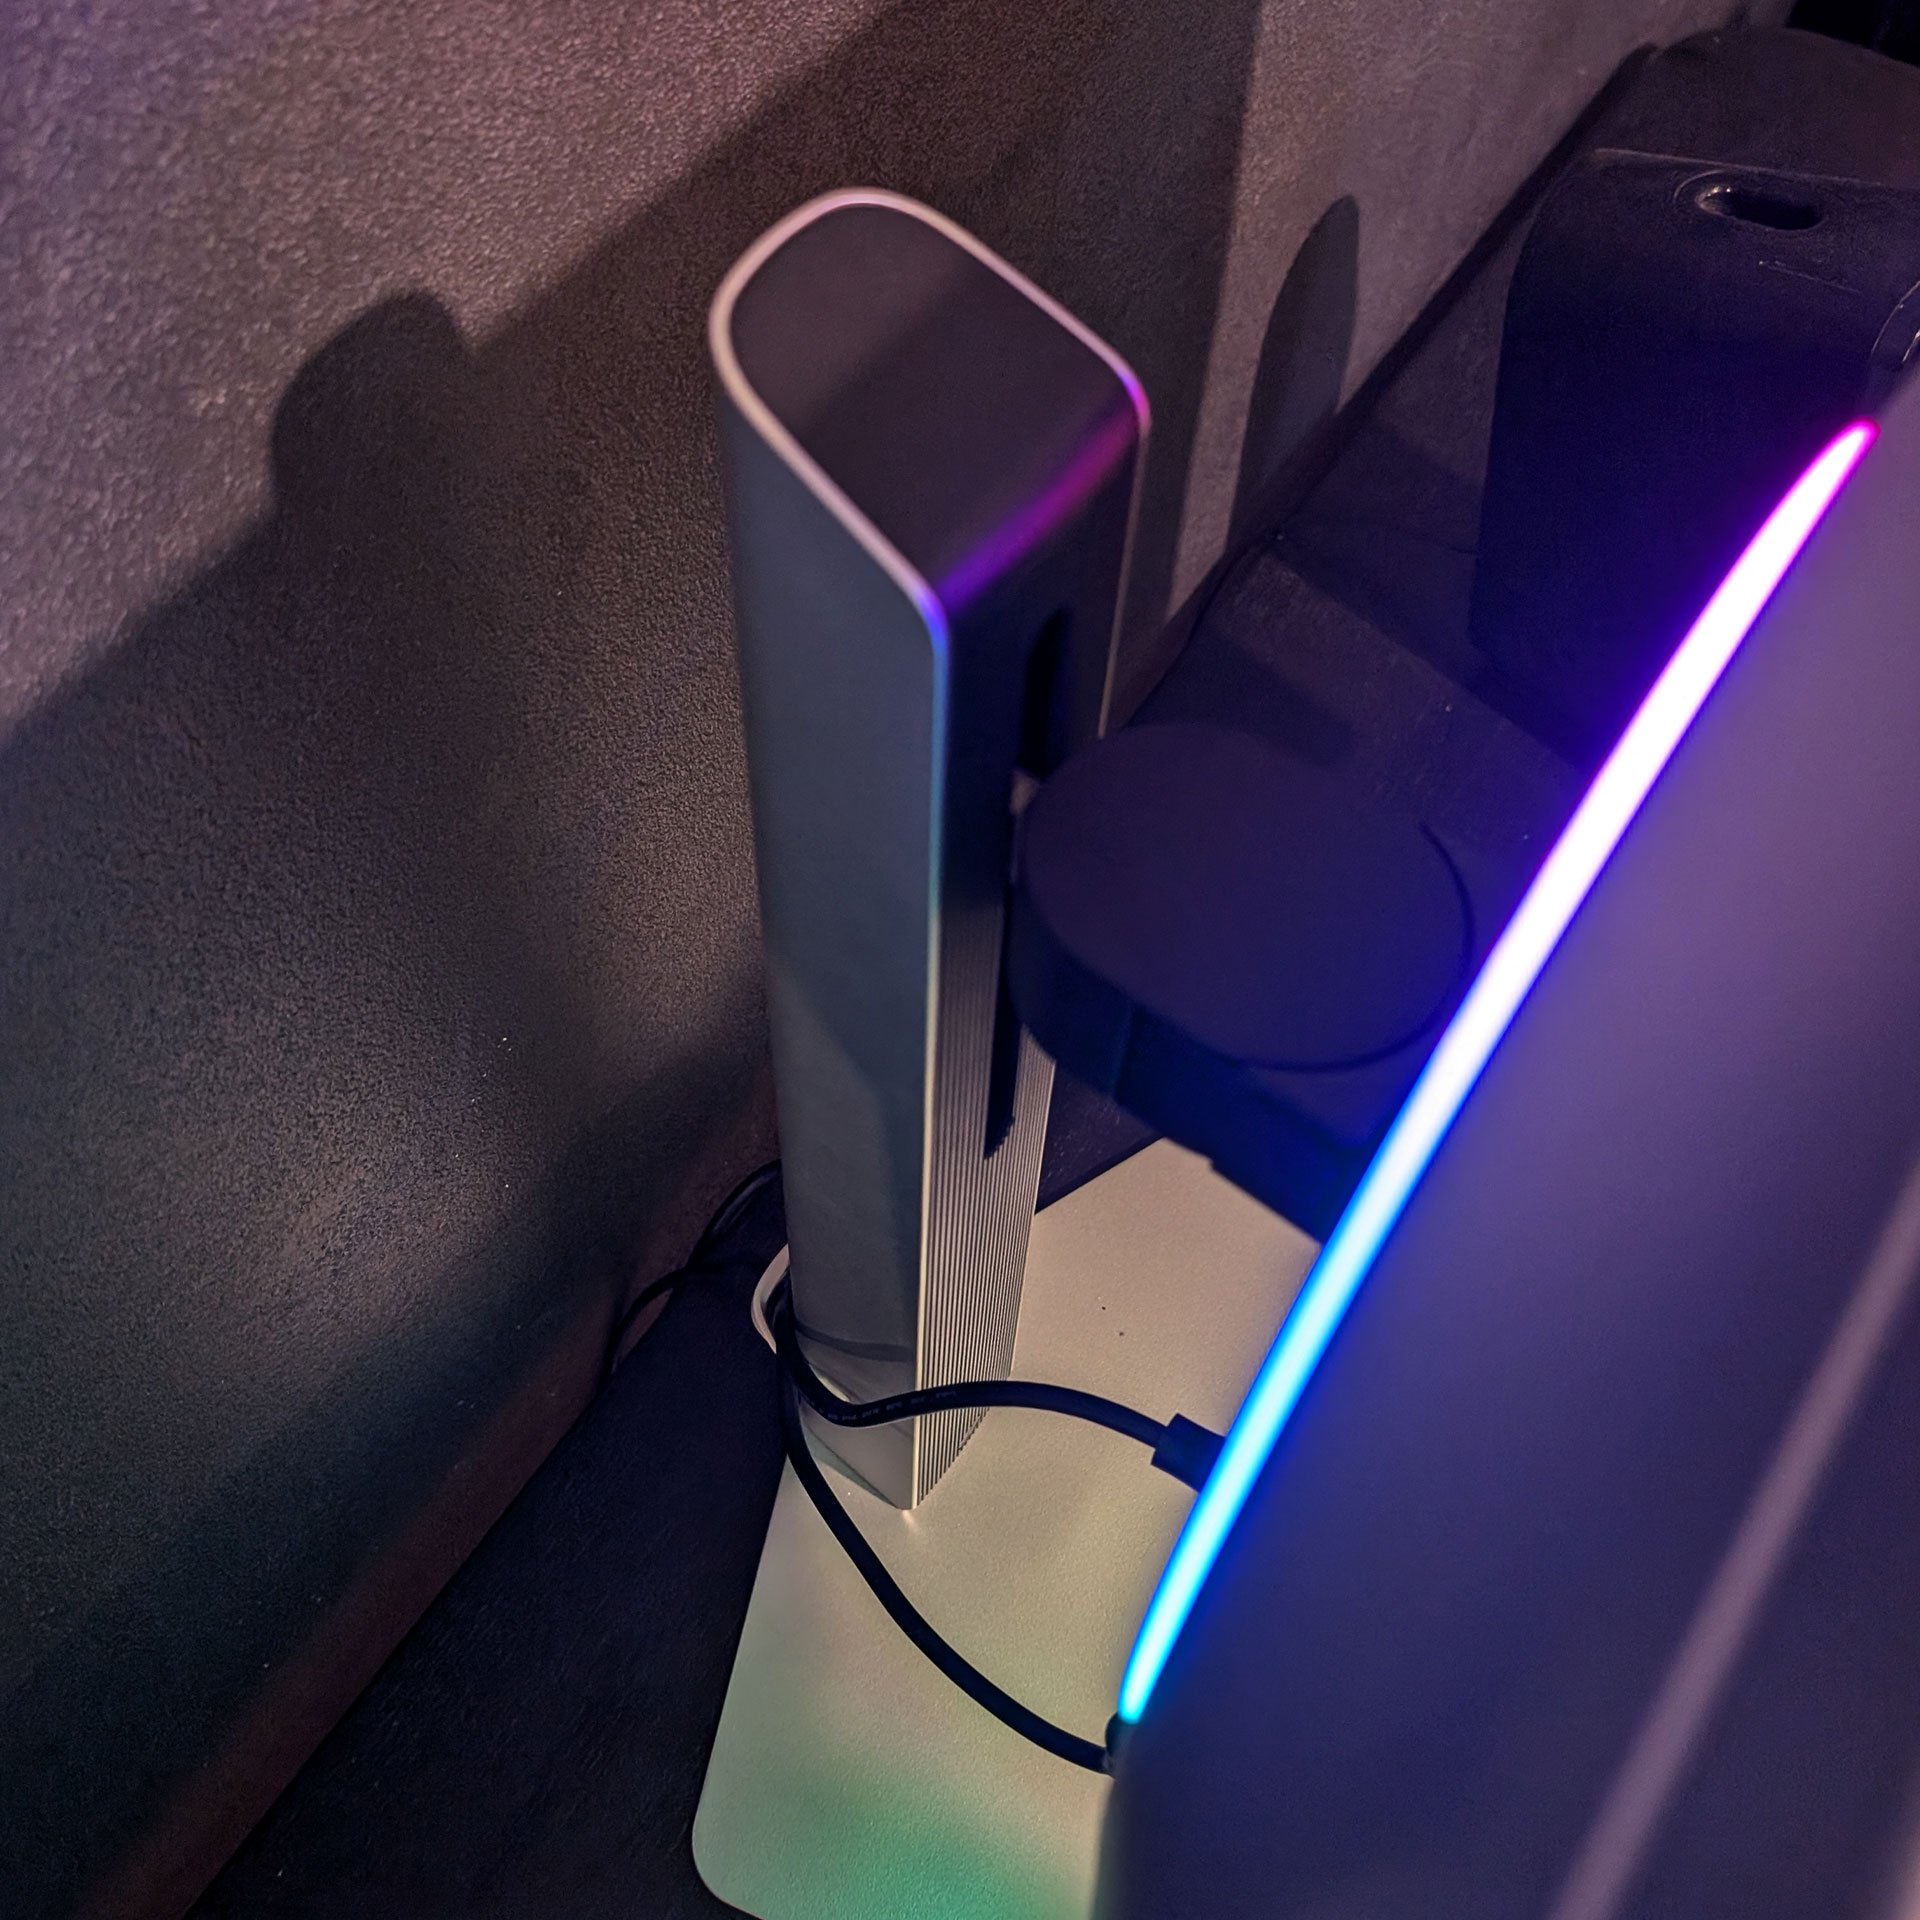
Around the back, and once again, you will find basically the same inputs across both models. Two HDMI 2.1 ports, two USB Type-A ports, one USB-B port, one DisplayPort 1.4 port and a headphone jack. The RGB lighting ring is similar, yet it seems the G8 has the additional CoreLighting+, which gives you more lighting effects.
Overall, the lighting is a welcome addition to the minimal and sleek styling of the monitor, giving it just a little bit of flair without overdoing it. CoreSync also allows you to match the lighting to your games’ on-screen colours, adding some harmony to the whole setup.
Images: Jay Marshall.
Performance testing
This is the big drawcard for the Samsung G8. To test the monitor thoroughly, I wanted to make sure to experience a variety of games. Fast-paced first-person shooters with a lot of action and fast-moving objects were first on the list. But I didn’t neglect to also test the more visually appealing games that are more about storytelling and beautiful graphics.
I started off with some Counter-Strike 2 and Overwatch 2. Both of these games are high-paced games, especially Overwatch. The incredible refresh rate and response time performed very well, keeping me engaged with a smooth picture that never felt clunky.
My experience was comparable to the G6, as I didn’t notice the difference in fresh rate very much. It takes a very trained eye to spot the difference between 240Hz and 500Hz, and other hardware factors contribute, too.
Another benefit of testing the monitor on Overwatch 2 is that it’s a rather colourful and bright game. Once again, the QD OLED panel of the G8 did an amazing job, delivering great detail on its 4K screen that includes glare reduction and fantastic contrast. The only small note is that I noticed the brightness falling a little short of the G6, with 250 cd/㎡ (or ‘nits’) compared to the G6’s 300 cd/㎡. There was a clear difference, yet not a deal breaker, as the G8 still looked great in my dark office setup.
Image: Jay Marshall.
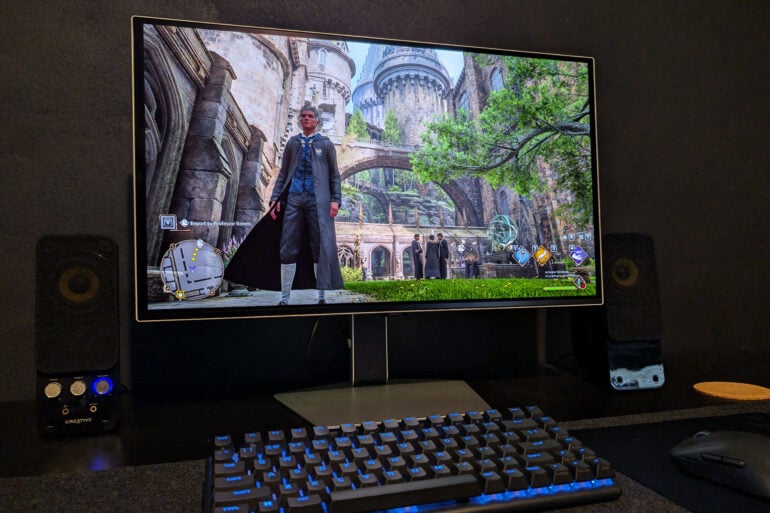
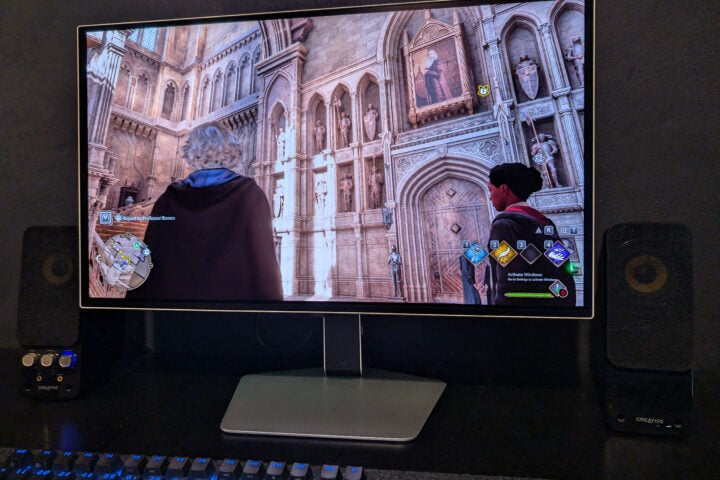
Moving on to some more cinematic and story-based games, the G8 excelled. This is where the 4K screen shines, providing clarity and detail in the worlds that I explored. Having a powerful PC helps get the most out of a 4K gaming monitor, so you can run high-end games in 4K with the best graphical settings.
I very much enjoyed my time playing titles such as Sea of Thieves and Cyberpunk 2077. Hogwarts Legacy was another title I felt got the best out of a high-quality gaming monitor like the G8. The mixture of both bright and dark environments, paired with very detailed buildings and rooms, highlighted the strengths of the 4K monitor. The crisp details, smooth movement and seamless battle scenes made for a great experience.
Images: Jay Marshall.
Who is the Samsung Odyssey G8 for?
The big upside of the G8 is its high refresh rate and response time paired with a 4K QD OLED panel. This combination makes for a super immersive gaming experience that is sure to have you hooked for hours on end.
This is very much a monitor aimed at competitive gamers, yet I think it has a much wider appeal. The stylish, minimal design is attractive, while the 4K resolution makes this gaming beast a must-have.
Samsung Odyssey OLED G8 Gaming Monitor
Not just for competitive gamers, the Samsung Odyssey OLED G8 monitor makes any visually stunning game shine in 4K.
Adobe has given Premiere a major boost in AI powered tools, especially around masking and finding the right clips faster. The company also confirmed that it has dropped the “Pro” in Premiere, as it’s becoming a family of apps across desktop and mobile, and possibly a future web or companion product.
However, Premiere on desktop is still very much aimed at professional creators, but the update is designed to save time and make complex edits feel a lot more achievable. I just attended a demo of the latest features at AdobeMAX in Los Angeles, here’s what I saw:
AI Object Mask is the headline upgrade
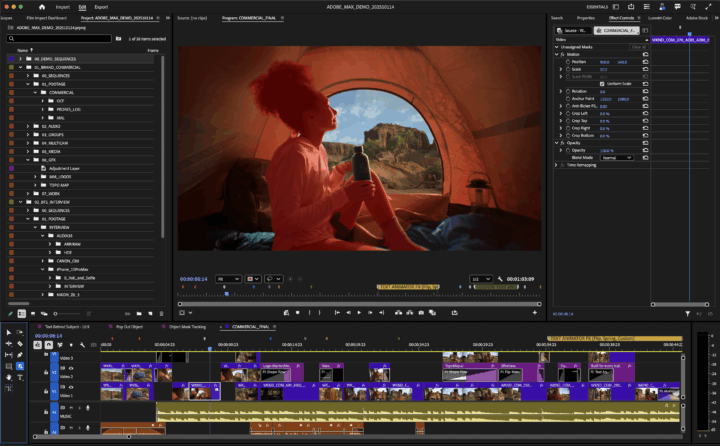
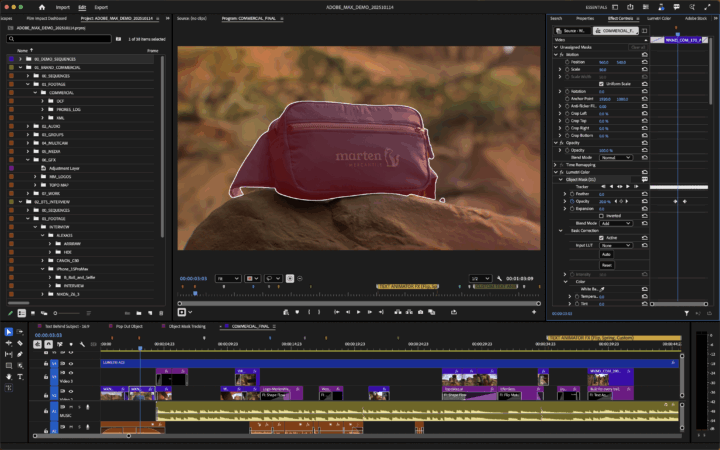
The new AI Object Mask can isolate people or objects in a shot automatically and track them accurately through complex motion. It replaces a lot of the manual rotoscoping that editors would normally need to spend hours on.
The masking engine under the hood has been completely rewritten with vector based tracking, which Adobe says is between four and twenty times faster depending on resolution. During the briefing, it worked cleanly and quickly on 4K Arri Alexa footage originally shot in LOG and colour converted.
Editors can:
Apply masks that stick to clothing and body edges through movement
Choose object or shape-based masks
Remove backgrounds or isolate subjects quickly
Add looks like sky replacements or character focused grading
Track in both directions with a single click
All masks now support different blend modes, so you can add or subtract shapes to fine tune the area correctly.
You can use the shape mask to isolate a person from the surroundings. Credit: Adobe
As an example, let’s say you have a scene where there are some people outside hiking and want to brighten the sky in behind them. With the rectangle mask, you can draw a shape over the sky, soften the edges, increase saturation and highlights, then subtract the separately masked subjects so skin and clothing do not shift in colour.
Great for colour adjustments and fine tuning while leaving the background as is. Credit: Adobe
As a long-time user of Premiere, the AI Mask feature is a very welcome, and necessary edition, as DaVinci Resolve has had this feature (Magic Mask) for quite some time.
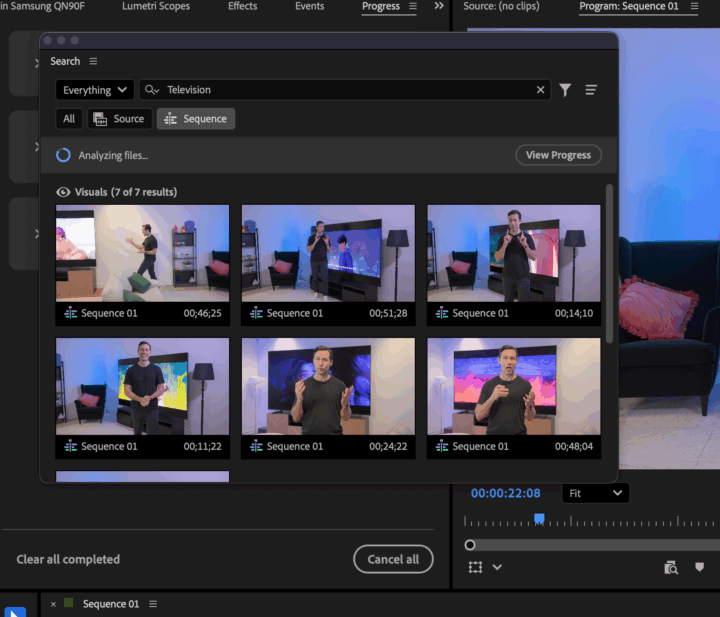
Search your media by what you can see and hear
Media Intelligence search has been expanded. Last year, Premiere could search based on:
What was said
Metadata
Object recognition
Now, it also recognises sounds. That means you can look for clips where someone laughs, a car door slams or a dog barks. It can also find similar images to a frame you select. AI-processing is done locally upon import which keeps footage private.
You can choose whether to search in the bin or only the sequence you are working on which keeps things fast and relevant.
Now you can search for sounds using the Media Intelligence to find footage in your library. Credit: Valens Quinn
While sound is a welcome edition to Media Intelligence, you still don’t have the ability to train the system based on something specific in your video. Adobe says that this could be a feature in the future.
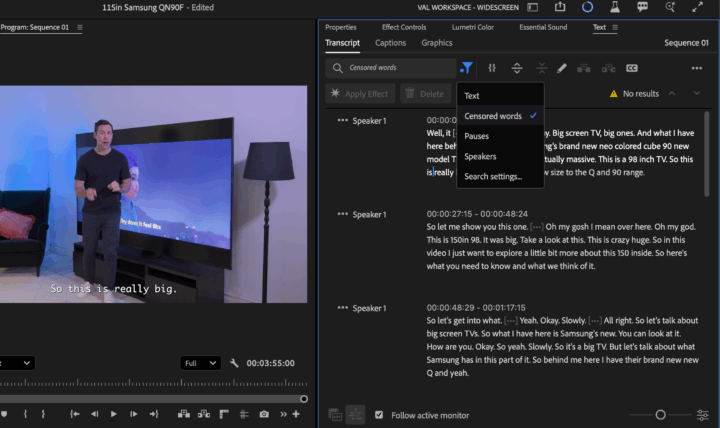
Auto Bleeping keeps content safe for publishing
You can now search for specific words and censor them automatically. This is an addition to the audio-transcription system, making it possible to bleep out profanity, names, brands or anything sensitive. You select a replacement sound like a beep, quack or dog bark, or bring in your own.
You can choose which words to censor and Premiere will bleep them for you. Credit: Valens Quinn
Once reviewed, you can choose to mute or delete instead. It is a simple tool for creators publishing to platforms with strict content rules.
Premiere mobile gets YouTube Shorts tools
While the Premiere desktop app does not yet have YouTube integration, Adobe highlighted the new mobile workflow. You can tap “Edit in Adobe Premiere” inside YouTube Shorts and open a dedicated creative space with exclusive effects, transitions and templates. There’s also a button to do this in the new Premiere for mobile edition. Finished clips can be shared back to YouTube in one tap.
Valens Quinn attended the AdobeMAX conference in Los Angeles as a guest of Adobe Australia.
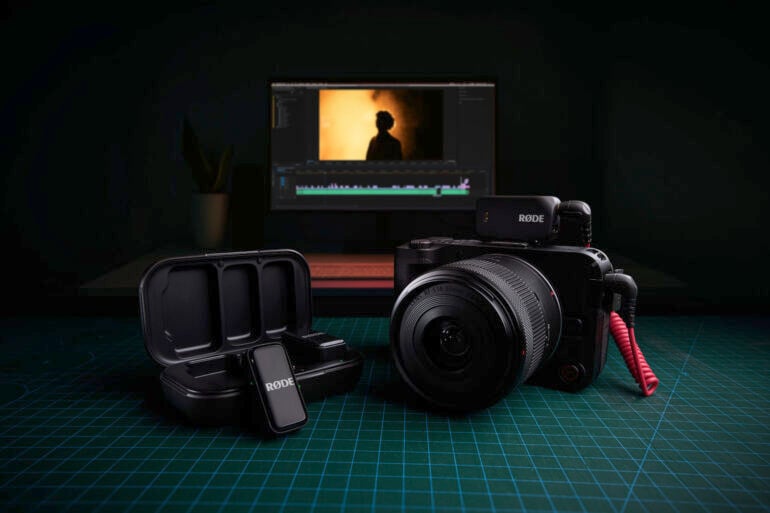
Rode makes great portable microphones; there’s little disputing that. I’ve got a set of the Australian company’s second-gen Wireless Go mics, and they’re great. But now I’m side-eyeing the smaller Rode Micro mics, which now come with the option of a camera kit that makes connecting to external devices easier.
As much as I love my Wireless Go mics, connecting them to a DJI Osmo Pocket 3 for quick filming sessions is a bit fiddly. Connecting the receiver to the camera via USB-C quickly gets messy, which is what makes the seamless wireless connectivity of DJI’s microphones appealing.
With its latest release, Rode is closer to removing the aforementioned friction entirely. Sold as a $240 bundle, the Wireless Micro Camera Kit includes two small transmitters, a USB-C dongle for phones, and a new on-camera receiver. That’s still cheaper than what the Micro used to cost before Rode permanently dropped a bunch of prices.
Rode’s camera receiver includes both USB-C and 3.5mm TRS outputs, and a 1.1-inch AMOLED screen that shows battery and gain levels. Previously, the Wireless Micro didn’t come with a display, so now you can see more information while recording to help make adjustments. Although Rode is confident that you shouldn’t need to manually interfere too much, the mics adjust gain automatically to keep audio balanced.
However, unlike most of Rode’s wireless microphone range, the Micro doesn’t support on-board recording. If, for whatever reason, the recording fails on whichever device you’re connected to, you have nothing to fall back on. Plus, there’s no 3.5mm mic input on the transmitters, eliminating the option of a lavalier mic if the need arises.
In better news, a charging case comes bundled with the Wireless Micro Camera Kit, with Rode quoting up to 21 hours of battery life. It’s available to order now via Rode’s website, set to arrive in Australia by December. At this stage, the kit only comes in black, not the Micro’s new fun colours.
GadgetGuy occasionally uses affiliate links and may receive a small commission from purchased products.
Inheriting even more features from the Pro range, the new base model Apple iPhone 17 is far from standard.
Gadget makers have always loved the concept of Pro models, reserving a few premium features for the more expensive option in the hope that you’ll hand over more cash. Of course, the trick is to get the feature mix just right – encouraging some people to go Pro without driving away those who can only afford the base model.
Apple’s first Pro-model phones arrived back in 2019 with the iPhone 11 Pro and iPhone 11 Pro Max. The standout Pro feature has always been the triple-lens rear camera array featuring a telephoto lens, which is still the case with this year’s iPhone 17 range.
This aside, a surprising number of Pro features have trickled down to the new standard iPhone 17 model, all while retaining the $1,399 price tag. In comparison, the iPhone 17 Pro starts at $1999.
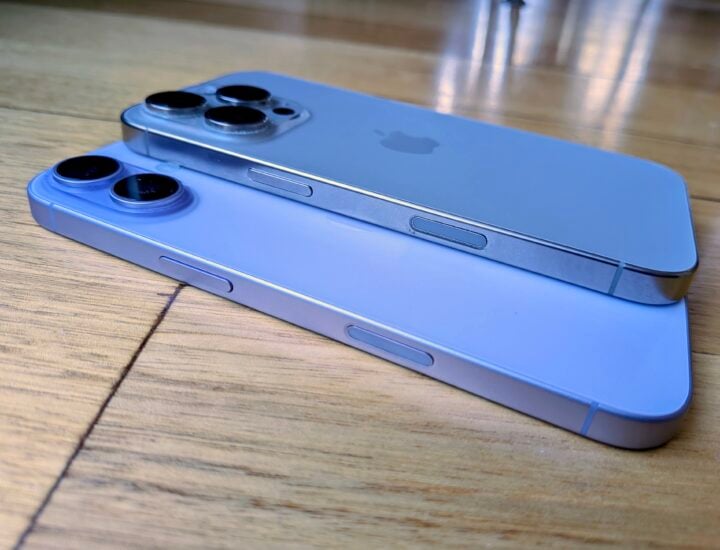
At first glance, the Apple iPhone 17 looks practically identical to the iPhone 16/17 Pro models, apart from the expected lack of a third telephoto camera lens at the rear.
The standard Apple iPhone 17 is more Pro than ever. Image: Adam Turner.
Compared instead to last year’s standard iPhone 16, this year’s standard iPhone 17 sports some impressive improvements. It steps up from a 6.1 to 6.3-inch display, while bumping up to 2622-by-1206-pixel resolution to maintain 460 pixel-per-inch sharpness.
As a result of the larger screen, it’s a tad taller, thicker and heavier than the iPhone 16, yet somehow a fraction thinner.
All of these changes bring the iPhone 17 practically into line with the Pro range, except that Pro models are a little thicker and heavier again, courtesy of their third rear telephoto lens.
Camera array aside, this year’s iPhone 17 (bottom) is identical to last year’s iPhone 16 Pro (top). Image: Adam Turner.
By dropping the same display into the iPhone 17 and iPhone 17 Pro, Apple has produced the first non-Pro iPhone to feature an always-on display and ProMotion technology with adaptive refresh rates up to 120 Hz.
Cameras aside, up until now, these high-end screen features are what have helped make the Pro line more appealing. Apple would never admit it, but pressure to improve the screen on the base model iPhone was growing when these features come standard in many mid-range Android handsets.
If you’re after an even larger display but without all the other bells and whistles of the Pro, you’ll be disappointed to hear that Apple hasn’t released an iPhone 17 Plus to follow on from the iPhone 16 Plus. It has, however, delivered a plus-sized iPhone 17 Pro Max, along with the super-slender iPhone Air 17.
Some improvements available with this standard iPhone 17 weren’t inherited from the Pro models, but are instead an upgrade for the entire new iPhone 17 line-up.
This year, the display on the entire iPhone 17 range steps up to 3000-nit brightness, so it’s easier to read in direct sunlight. The entire range also upgrades to Durable Ceramic Shield 2 glass on the front, which offers three-times better scratch resistance and feels a little different under your fingerprints compared to the first-generation Durable Ceramic Shield used on the iPhone 16 line-up.
The standard iPhone 17 retains the aluminium frame and colour‑infused glass back, while the iPhone 17 Pro switches from titanium to aluminium, adding a Durable Ceramic Shield glass back for extra ruggedness.
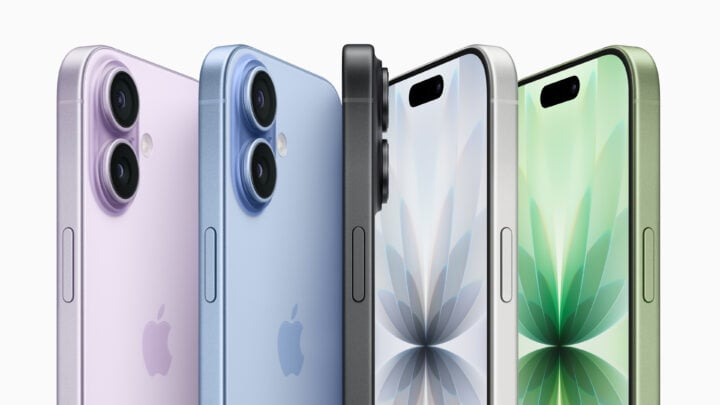
The Apple iPhone 17 comes in a choice of five colours. Image: Apple.
The handset delivers stereo sound in landscape mode by taking advantage of the earpiece as a second speaker. It goes surprisingly loud, but you shouldn’t push it past 70 per cent unless you particularly enjoy super-brash and distorted audio.
As you’d expect, the standard iPhone 17 also retains Apple’s Action and Camera Control buttons, which trickled down from the Pro range to the standard iPhone 16 models last year.
Look closely and you’ll notice that the SIM card slot on the left has changed – now lower and wider – because the SIM card slots sideways into the phone.
Most people will be pleased to see that Apple has retained support for physical SIM cards in Australia, as it moves some devices to eSIM-only (including US iPhones). When upgrading from an old iPhone, the iPhone 17’s setup process tries to convince you to transfer the details from your old physical SIM to the new phone’s eSIM (which received a hard pass from me).
Apple iPhone 17 specifications and price
Display size
6.3 inch, 19.5:9 aspect ratio
Display resolution
2622×1206 pixel, 460 ppi
Display technology
OLED Super Retina XDR display
Always-on
3,000 nits peak brightness
ProMotion up to 120Hz
HDR + Wide Colour P3
2,000,000:1 contrast ratio
1,000 nits max brightness (typical); 1,600 nits peak brightness (HDR); 3,000 nits peak brightness (outdoor); 1 nit minimum brightness
Bands
5G (sub-6 GHz) with 4×4 MIMO
Gigabit 4G LTE with 4×4 MIMO
CPU
Apple A196‑core CPU with 2 performance and 4 efficiency cores
16‑core Neural Engine
Hardware-accelerated ray tracing
GPU
5‑core GPU with Neural Accelerators
Rear cameras
48MP Fusion Main:
26 mm, ƒ/1.6 aperture, sensor-shift optical image stabilisation, 100% Focus Pixels, support for super-high-resolution photos (24MP and 48MP). Also enables 12MP optical-quality 2x Telephoto: 52 mm, ƒ/1.6 aperture, sensor-shift optical image stabilisation, 100% Focus Pixels
Lavender, Sage, Mist Blue, White and Black
Front camera
18MP Center Stage:
ƒ/1.9 aperture, Autofocus with Focus Pixels
RAM
8 GB
Onboard storage
256 or 512 GB
microSD slot
N/A
SIM
nanoSIM + eSIM (dual eSIM support)
Charging
USB-C 2.0
MagSafe wireless charging up to 25W
Qi2 wireless charging up to 25W
Battery
Up to 27 hours video playback
Up to 50% charge in 20 minutes with 40W adapter or higher (available separately) paired with USB‑C charging cable
Wi-Fi
Wi‑Fi 7 (802.11be) with 2×2 MIMO
Connectivity
Bluetooth 6.0
Thread
Apple second-generation Ultra Wideband
Under the bonnet, the Apple iPhone 17 packs the new A19 chip, which is still blessed with a six-core CPU: two performance and 4 efficiency cores. The 5-core GPU now features Neural Accelerators to support Apple Intelligence.
The A19 powerplant is accompanied by 8 GB of RAM, whereas this year’s Pro models pack 12 GB. It is good to see that Apple has stepped up to 256 GB of storage in the entry-level $1,399 iPhone 17 model, which only bought you 128 GB this time last year.
Put to the test, all that Apple Silicon doesn’t disappoint, delivering Geekbench 6 results of 3,520 single-core, 9,057 multi-core and 37,161 GPU. That mostly outguns the old iPhone 16 Pro, which delivers 3,562, 8,862 and 33,052 running iOS 18 on an A18 Pro chip.
Dig around inside the iPhone 17, and you discover all of the onboard chips and sensors remain the same, except for the upgrade to Bluetooth 6.0 and Precision dual-frequency GPS, the latter of which is also coming to Android devices like the Google Pixel Watch 4.
The battery life also gets a boost, with roughly a 30 per cent jump in terms of video playback time to 30 hours. You also benefit from faster charging, delivering a 50 per cent charge in 20 minutes if using a 40W AC adapter. Make that 30 minutes for a 30W AC adapter or a MagSafe Charger. As usual, there’s no charger in the box, only a USB-C to USB-C cable.
As expected, the iPhone 17 retains the dedicated camera button below the power button. Image: Apple.
The new hardware is accompanied by the launch of iOS 26, making the leap from iOS 18 to get all of Apple’s devices on the same number OS. It comes with the promise of at least five years of software updates. That’s very good, but not as impressive as some Android handsets, which stretch it to seven years.
With iOS 26 comes the bubbly and translucent “Liquid Glass” look and feel. It’s certainly an acquired taste and feels to me like a distracting step backwards.
It impacts every aspect of the UI, right down to the look of the desktop icons, which have a little more depth, but to me, it’s all too cutesy and child-like, without actually enhancing the user experience. Everything also looks a little washed out, with pure whites looking a little soft and creamy.
Many design elements wobble and pulsate for no good reason, like it’s aimed at toddlers enthralled by shiny things. Liquid Glass is coming to practically all Apple devices; I can already see it on the Apple Watch, and I’m dreading the day it comes to macOS (here endeth the old man rant).
A taste of Apple’s bubbly “Liquid Glass” UI. Image: Apple.
Without diving into all the fine details, iOS 26 highlights include Call Screening for unknown callers and Hold Assist, which listens in while you’re on hold and alerts you when the person on the other end comes back to the call.
Apple Intelligence also gains a few extra features, including Live Translations and improved Visual Intelligence when searching with your camera.
Photography features
In terms of hardware, apart from the display, the biggest improvements on the standard iPhone 17 are reserved for the cameras, once again straying into Pro territory.
Instead of the iPhone 16’s “Advanced dual-camera system”, which combines a rear 48MP Fusion Main and 12MP Ultra Wide, the iPhone 17 sports a “Dual Fusion camera system” combining a 48MP Fusion Main and 48MP Fusion Ultra Wide.
Once again, that brings the iPhone 17 into line with the Pro range, except that you miss out on the Pro’s third dedicated telephoto lens. This means you get .5x, 1x and 2x optical zoom options but miss out on 4x and 8x.
As part of iOS 26, the new camera app interface is stripped back, with more features hidden away in menus, which will frustrate some people.
Put to the test, the iPhone 17 delivers impressive photos which are on par with the iPhone 16 Pro in terms of vividness, detail and low light performance. Upgrading from the 12 MP ultrawide sensor in the iPhone 16 to the 48 MP ultrawide from the Pro ensures that it doesn’t dial back the detail when you switch to the ultrawide view.
The iPhone 17 does a great job during the day… Image: Adam Turner.
… and reveals impressive detail after dark. Image: Adam Turner.
The iPhone 17 offers sharp and natural selfies. Image: Adam Turner.
Macro mode on the iPhone 17. Image: Adam Turner.
New with the entire iPhone 17 range is Dual Capture, recording video from the front and rear cameras simultaneously at up to 4K Dolby Vision at 30 fps. (To be fair, this is old hat in Android world).
Once in video mode, Dual Capture is easy to launch from the six-dot menu icon at the top right of the screen. The view from the front camera appears picture-in-picture, and you can drag it around the screen while recording, as well as zoom in and out on the view from the rear camera.
Dual Capture is a handy and intuitive feature that video content creators are likely to quickly embrace, plus it lets videographers drop themselves into home videos rather than always hiding behind the camera.
Dual capture mode puts me in the shot when taking video of Lucy. Image: Adam Turner.
Surprisingly, you can’t flip things around, so the view from the rear camera is picture-in-picture. Nor can you use it when taking still photos.
Thanks to the new 18 MP “Centre Stage” front camera, the entire iPhone 17 range can automatically zoom, pan and change the aspect ratio to keep you centred during video calls, as well as automatically adjust the frame when taking group selfies or videos. The new front camera also adds support for ultra-stabilised video.
Who is the Apple iPhone 17 for?
Of this year’s new Standard, Air, Pro and Pro Max iPhones, this Standard iPhone 17 is certainly the pick of the bunch when it comes to value for money, encroaching further and further into Pro territory while retaining the base model price tag.
Rather than the Pro versions tempting people to step up, I’d argue that the Apple iPhone 17 will tempt people to step down from a Pro model.
Current Pro owners who are ready to upgrade but currently tight on cash will have to seriously consider whether they make enough of the Pro’s remaining extra features like the telephoto lens, ProRAW support and larger battery to justify the extra expense.
GadgetGuy occasionally uses affiliate links and may receive a small commission from purchased products.
Apple iPhone 17
Inheriting even more Pro features, the standard Apple iPhone 17 offers the most bang for your buck.
Features
9
Value for money
9
Performance
9
Ease of use
9
Design
8.5
Positives
Larger, brighter, always-on Pro display with 120 Hz ProMotion