
I’ve always dreamt of building a racing simulator. I love Formula 1, a sport that has gained so much attention since the release of the Netflix series Drive to Survive. Inspired by the release of the recent F1 25 game, I thought now’s the perfect time to take the leap and build an F1-inspired racing simulator.
This is such an exciting endeavour, but no doubt an expensive one. Over the past couple of months, I spent countless hours researching and building a simulator to call my own. I learnt a lot along the way, which I hope helps you in your racing sim quest.
In writing this guide, I aim to provide an overview of the different paths available. Maybe there’s something I found out that can help you build your simulator that best fits your budget and racing preferences.
My plan was simple. I aimed to build a relatively realistic Formula 1 racing simulator. I wanted to make sure it was immersive enough to recreate the excitement of being on track as you get lost in the competitive nature of racing. The seat position and display would be crucial, along with a formula-specific steering wheel.
On a more practical note, I wanted to keep the setup as simple as possible so it didn’t take up too much of my lounge room. This has the added benefit of allowing my son to have a turn if I ever needed a break, which is very unlikely…
Table of contents
- Planning your setup
- Overview of the core components
- Seat or cockpit
- Wheel base
- Racing wheel
- Pedals
- Screen
- Accessories and add-ons
- Software setup
- Final thoughts
Planning your setup
There is so much to consider when planning a racing simulator build. None is more important than your budget. The amount you have to spend will ultimately dictate the level of gear you will be targeting and, consequently, the level of immersion the end product will deliver.
A simple way to break down any simulator build is with four major categories: the seat, display, driving hardware, and the platform. Of course, there are lots of other items that fall outside of these major groups, but I highlight these to provide a basis for making some crucial early decisions.

PC vs console
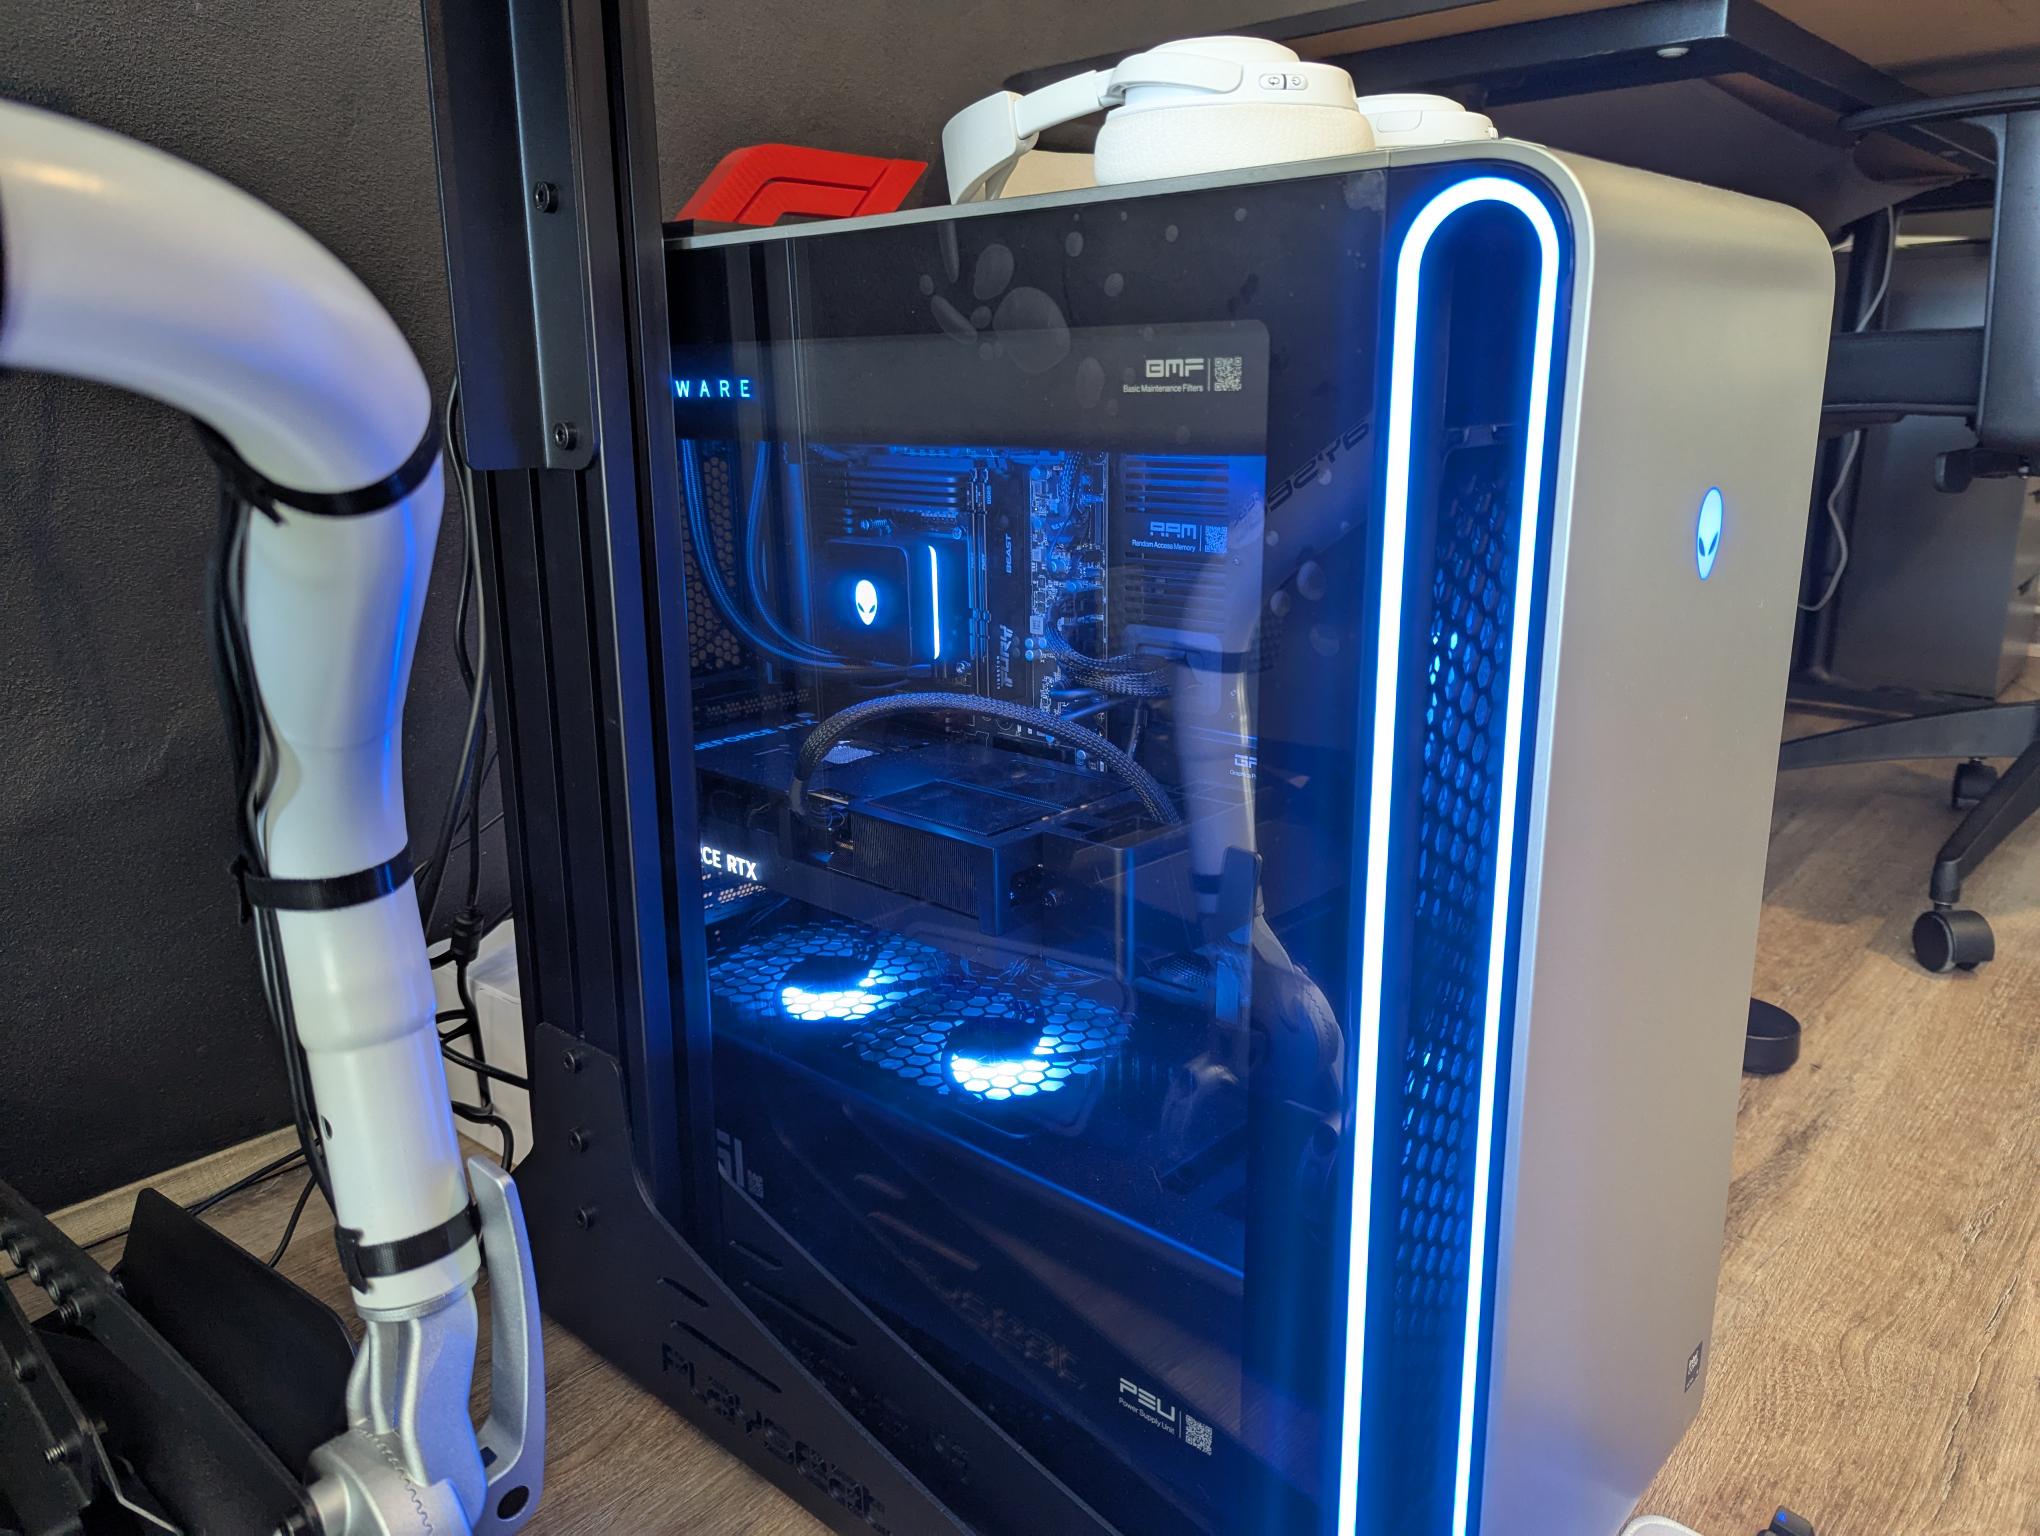
If you already own a PlayStation or a gaming PC, this will simplify things, as some of the decisions have already been made. As I didn’t have a very up-to-date gaming PC — and they can be rather expensive — I was initially looking to base my sim build around a PlayStation 5. My research later revealed that using a console can be rather limiting. Looking into wheels and pedals, I found that most brands are only compatible with PC. Furthermore, some of the more relevant games to sim racing, like iRacing, were only available on PC.
In the end, I decided that PC was the right choice for me, going with the Alienware Area-51 Gaming Desktop that comes with a hefty price tag, starting at $6,719.
I should add that there are options for steering wheels, pedals, etc, for consoles. Thrustmaster and Fanatec are the major players for the higher-end hardware, with Logitech also an option that has a great range, including some more budget-friendly options.
Overview of the core components
Before diving in too deep, it’s best to think about your sim racing setup holistically. Deciding which platform I wanted to use helped inform everything else that followed.
Once choosing a platform, the next big decisions are the seat or cockpit, and the sim racing hardware. To add some complexity, the number of companies producing high-quality sim racing gear has grown drastically over the last few years. This is great as brands are competing, meaning there are lots of new options at affordable prices. On the other hand, it can lead to decision paralysis.
As my goal was to create a realistic formula racing sim, I knew the seat, screen and driving gear would all play a crucial role. The level of quality and immersion I wanted would probably put my setup at mid to high-end, which also helped me narrow down the options.
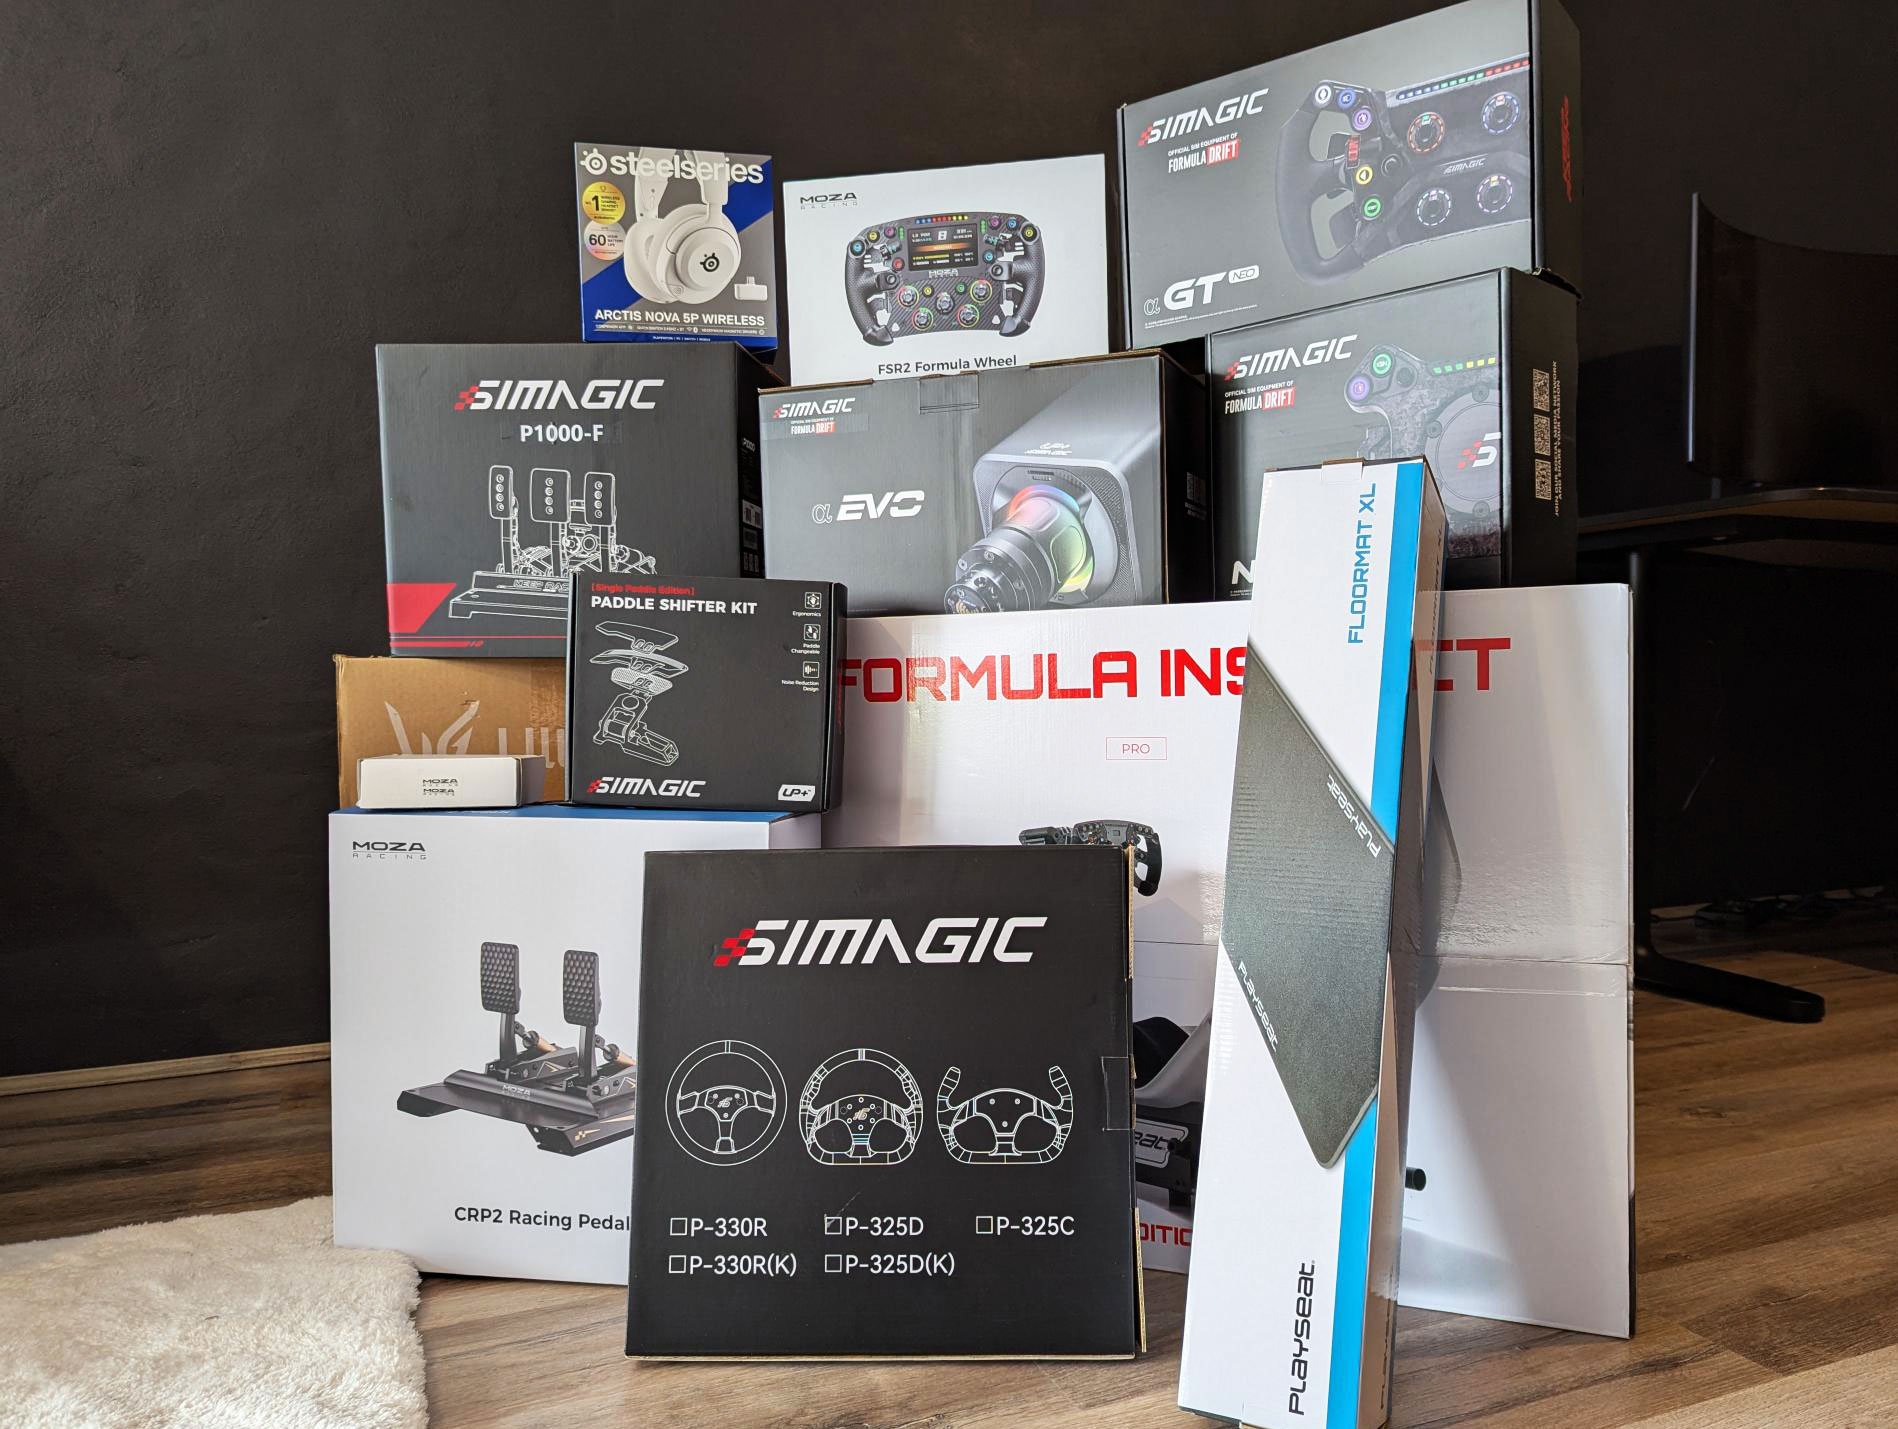
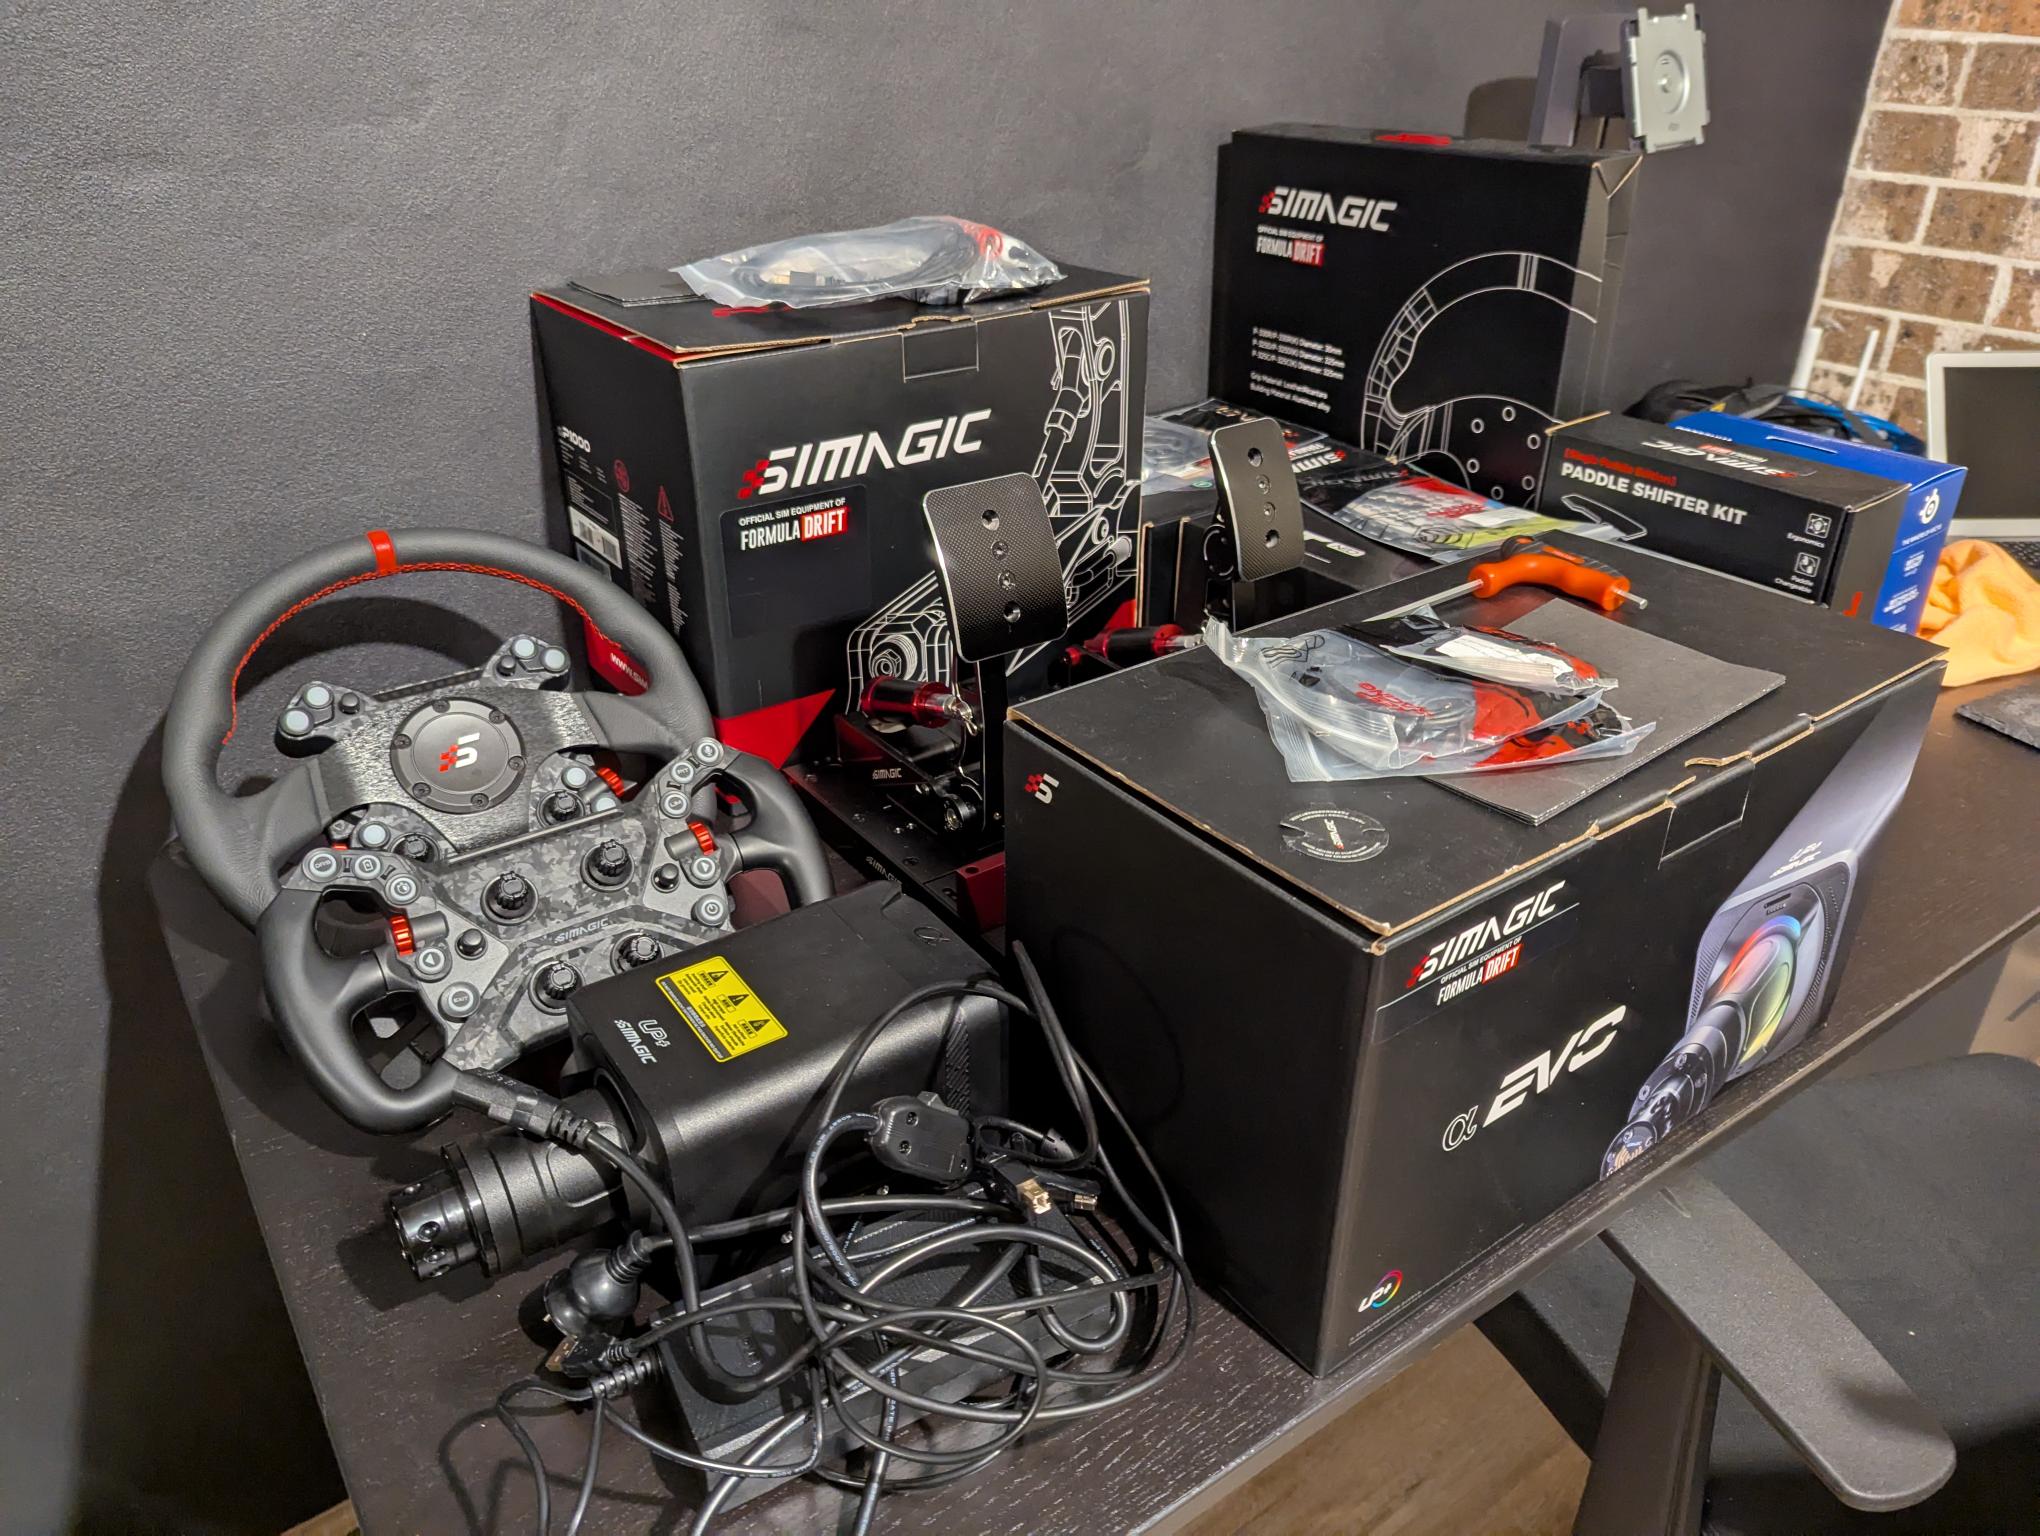
Some of the more popular brands or simulator hardware include Moza, Simagic, Thrustmaster, Fanatec and Simucube. For my build, Simagic and Moza sent me a range of different peripherals, all of which were great to use. More about them later.
Where to buy
To get your hands on Simagic products in Australia, SimRigs should be your first port of call. They have a huge range of products with free shipping on all things sim related. For all Moza related products, Five Star Gaming are the major distributor. You can also find a lot of simulator hardward at your local tech or computer stores like JB Hi-Fi, Mwave, PC Case Gear, The Gamesman, etc.
Seat or cockpit
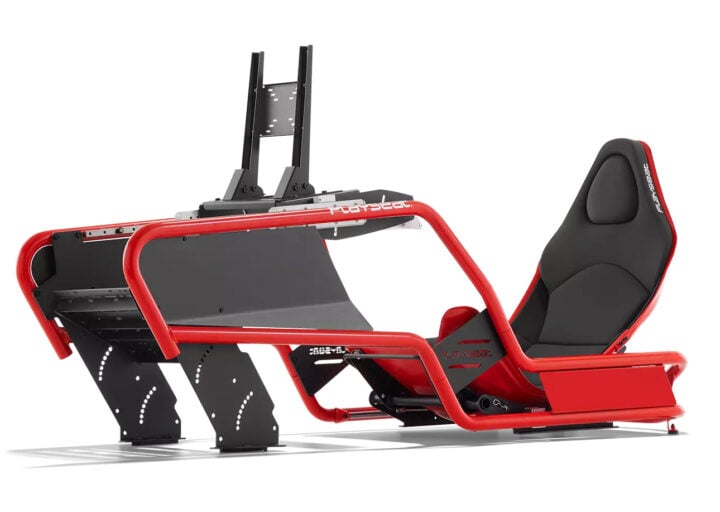
Now the fun begins with the choice of your cockpit. Although there are seemingly endless options, for the most part, there are three major directions to follow. The most common sim seat setup includes a frame that holds what I consider a traditional-looking racing car seat. These setups come in all shapes and sizes with lots of customisation options. Typically, these are rather large setups, and this is what serious and even professional drivers would use.
The second option revolves around a lower budget setup. This can take the shape of either a fold-up or collapsible rig that is light and compact for easy storage. This option is great if you are looking to use your lounge room TV or desk monitor as your simulator screen. You can simply set it up for a few hours while you race, then pack it away out of sight.
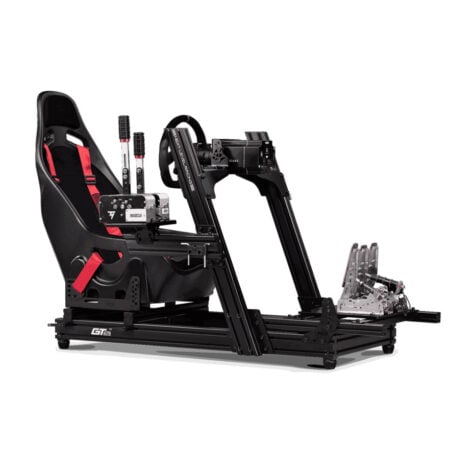
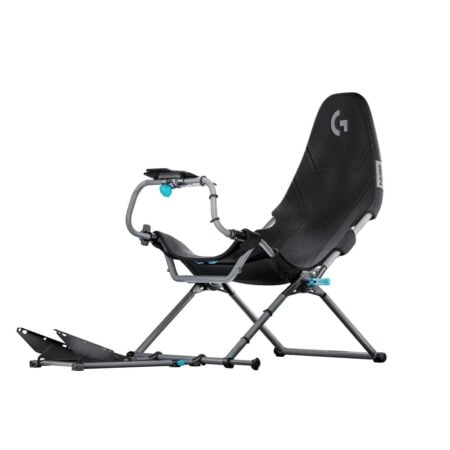
The third and final option is a formula-style seat. This is basically a low-slung, reclined seating position that mimics the cockpit of a formula racing car. This style of seat has only really surfaced in the last 10 years or so. It is easy to see why they have grown in popularity rapidly over the last few years; they are streamlined and look sleek. Like the other types of cockpits, they come in many different shapes and styles, yet they all aim to replicate the same racing position.

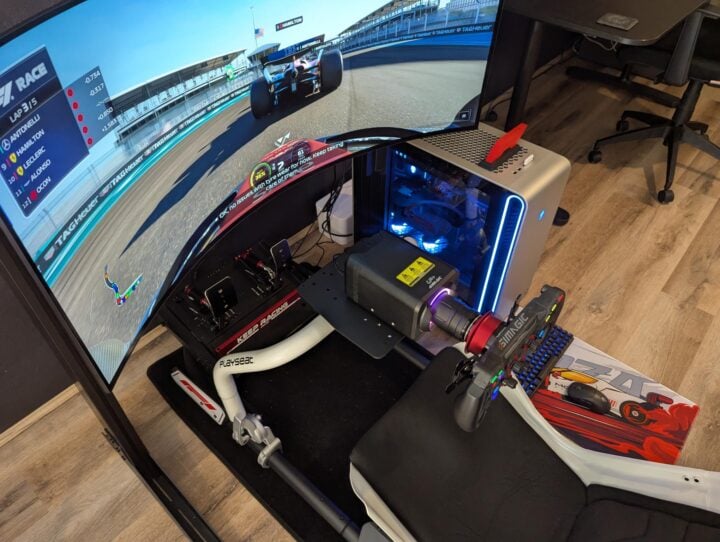
Naturally, the formula-style option was the perfect fit for my build. I spent some time looking through the different brands available, such as Next Level Racing, Exodus and Sim-Lab.
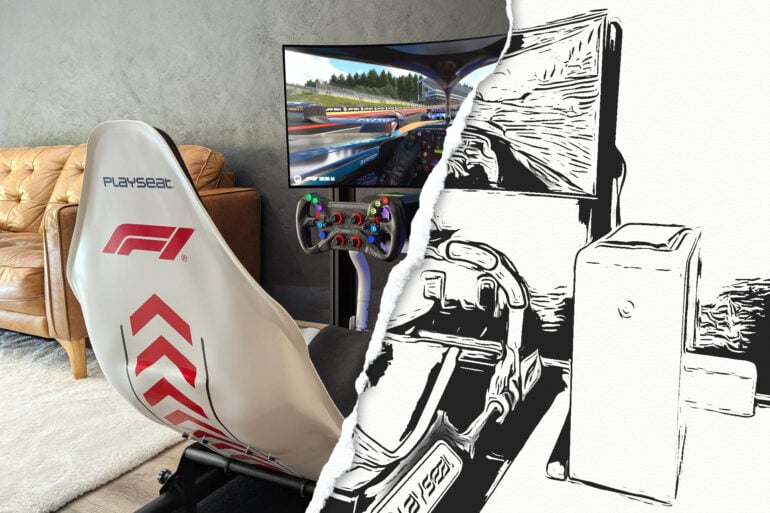
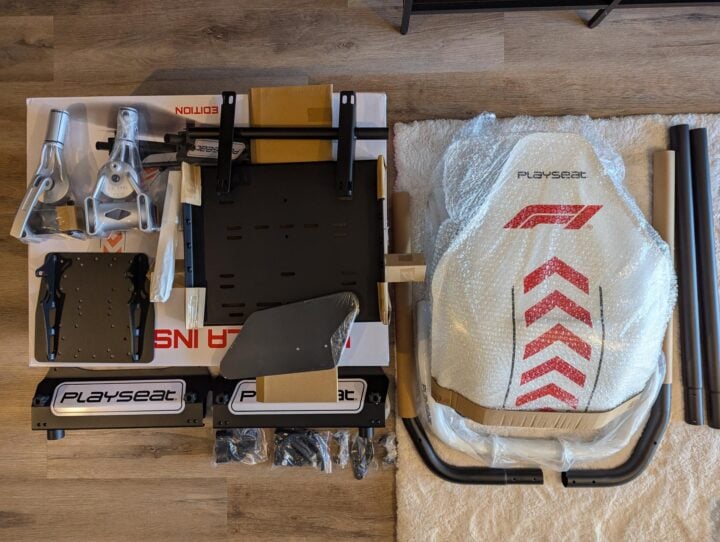
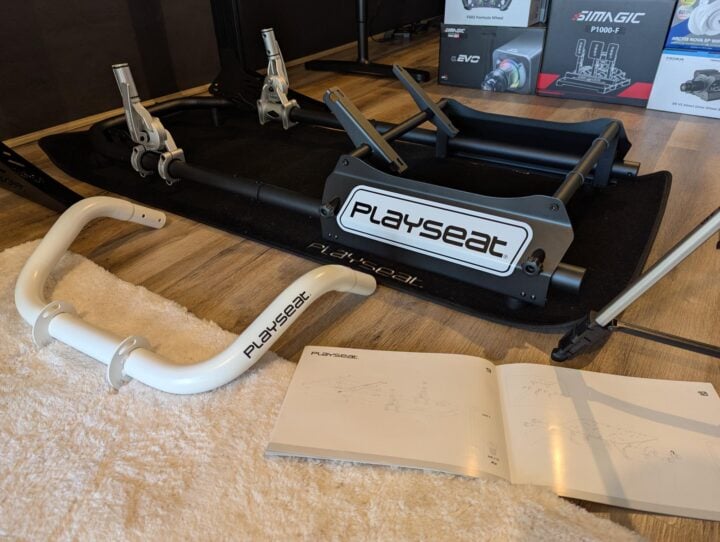
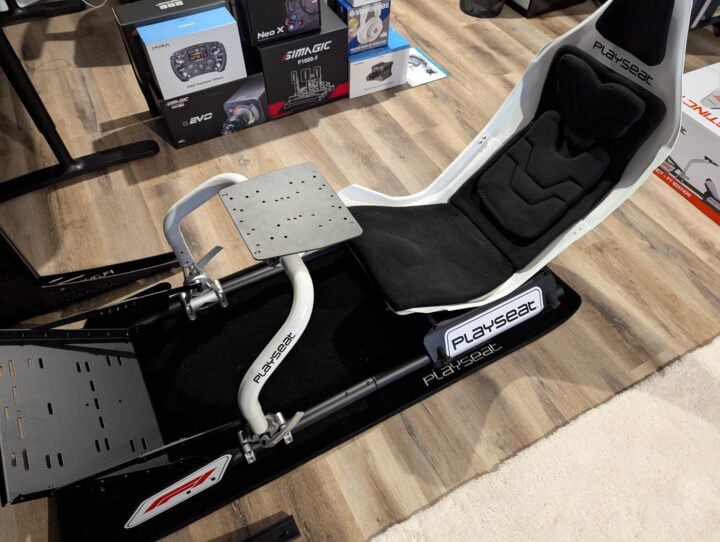
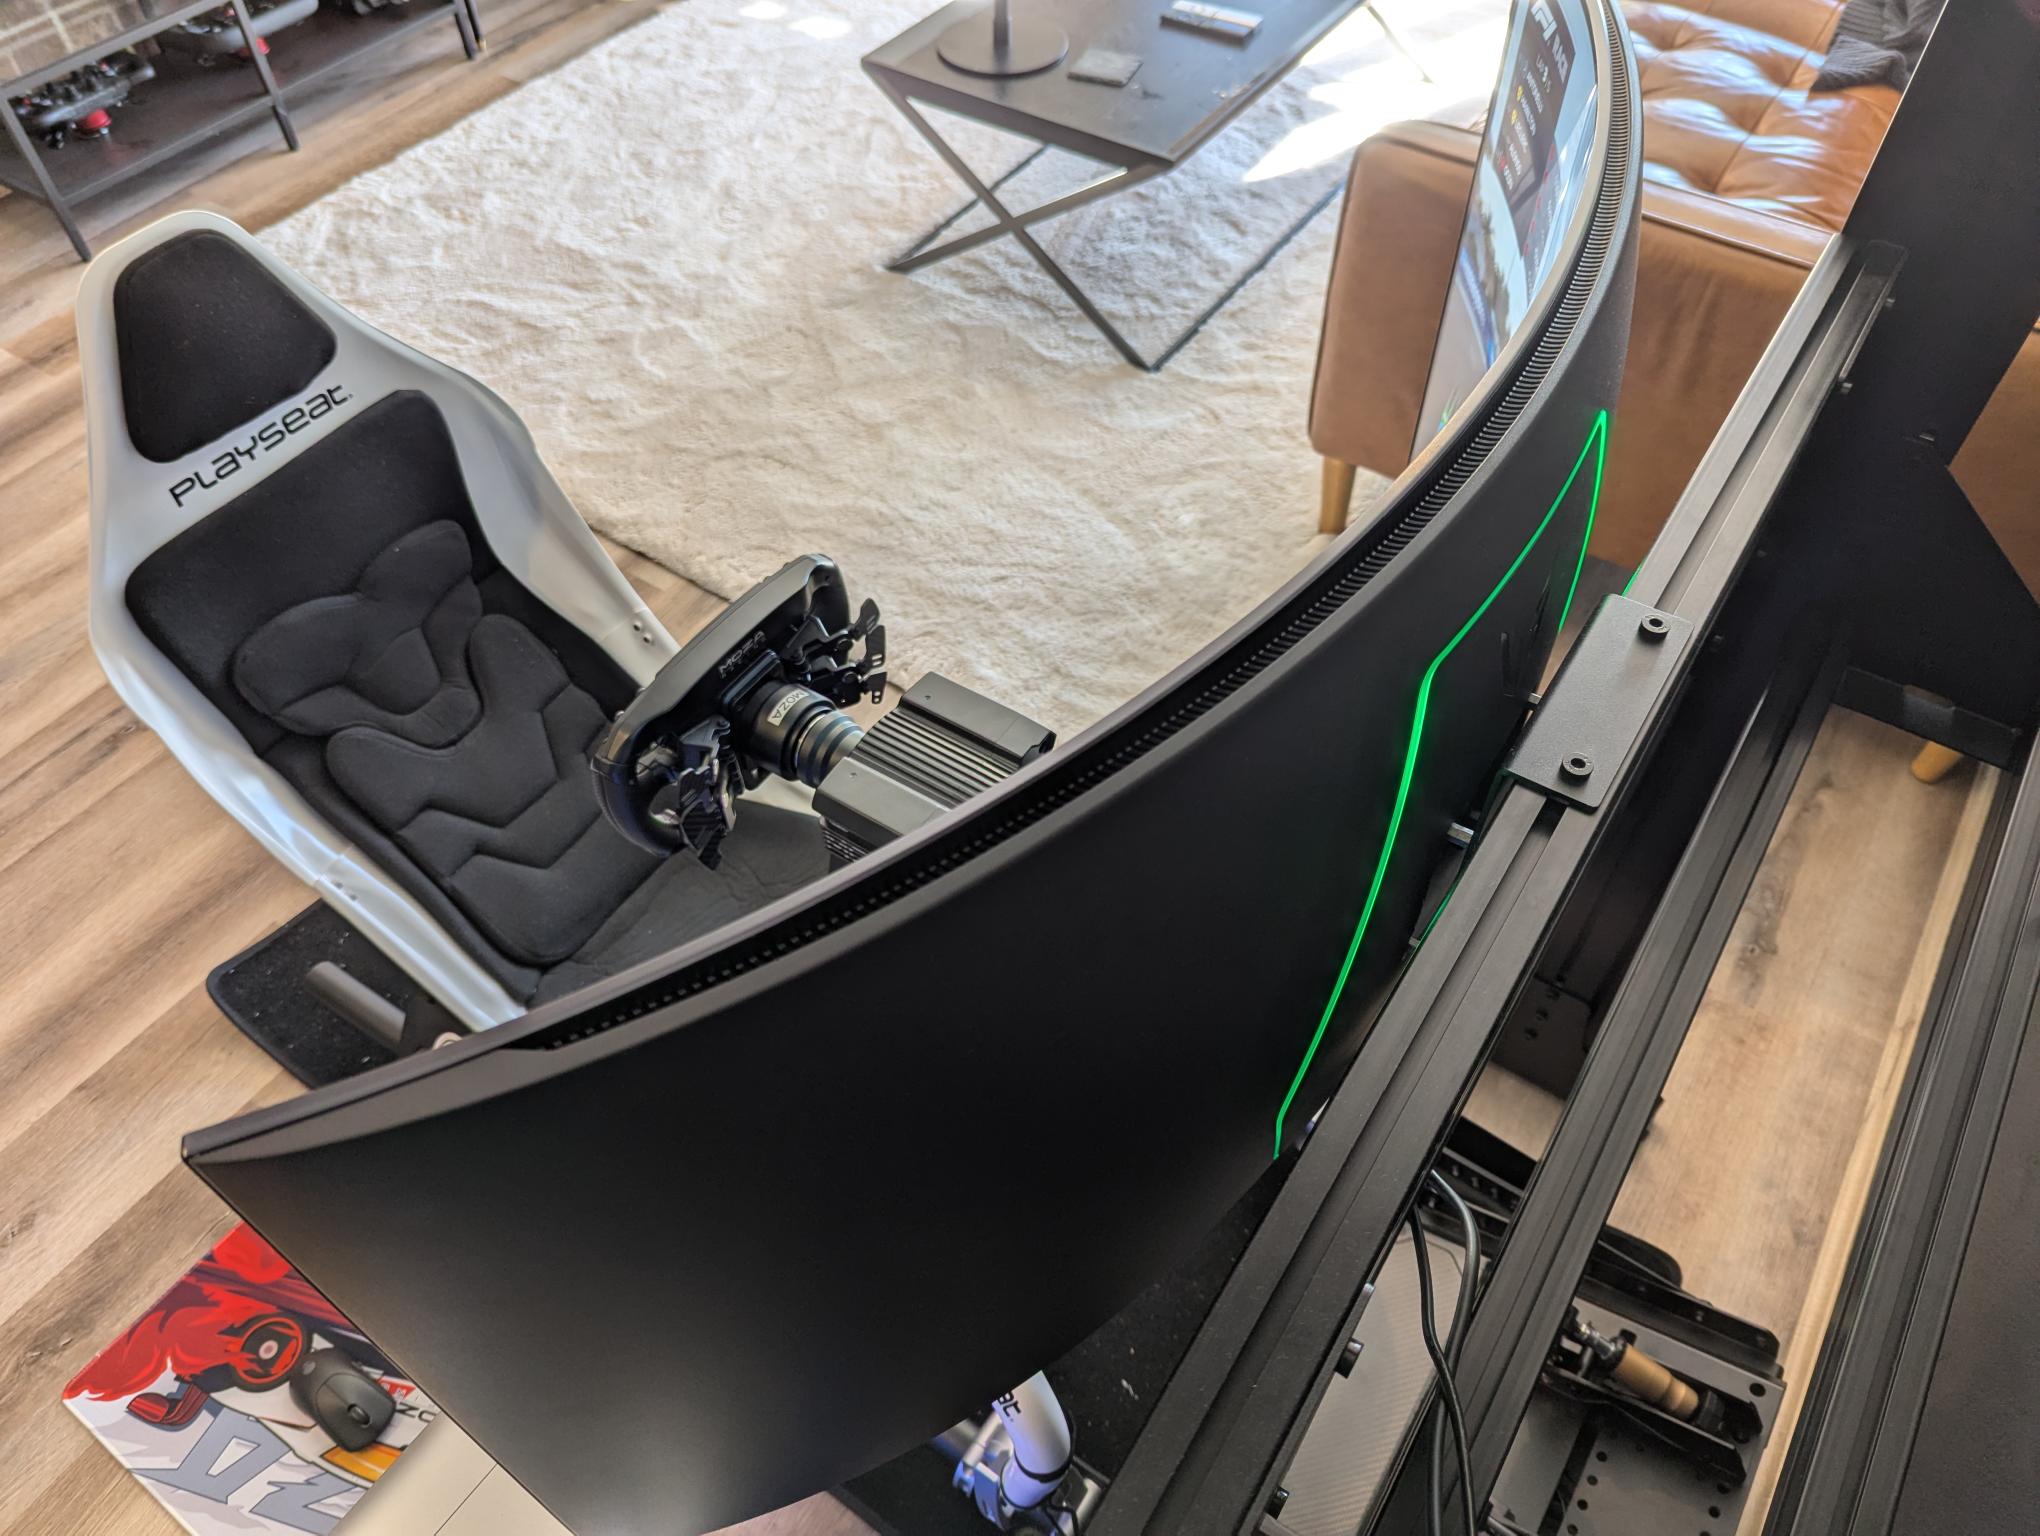
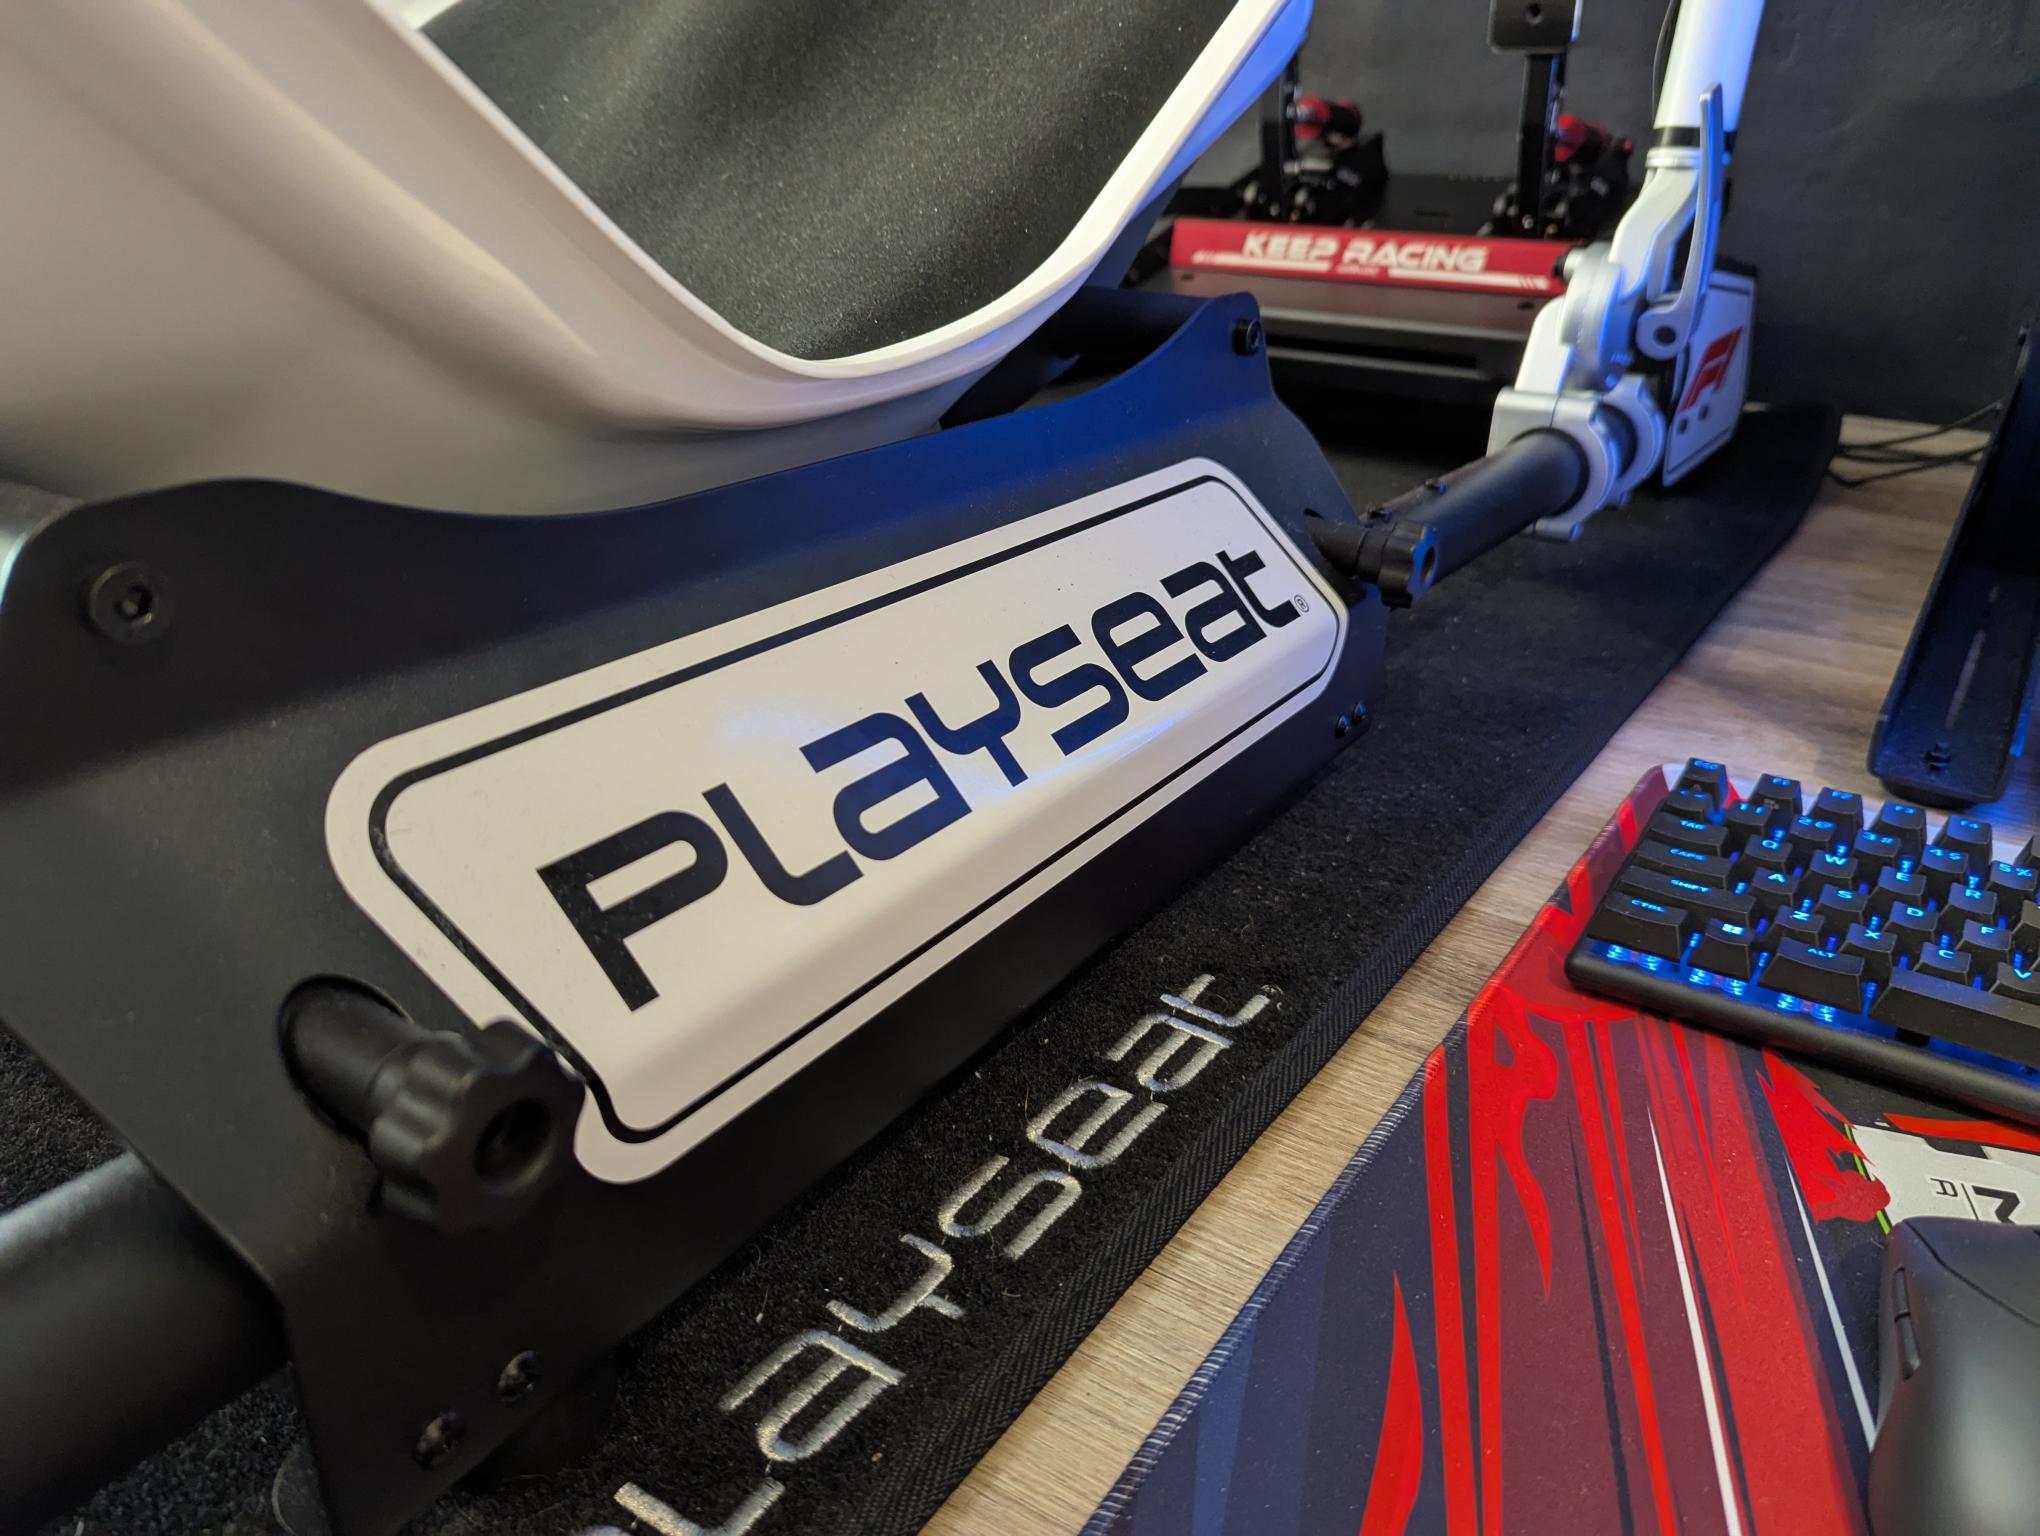
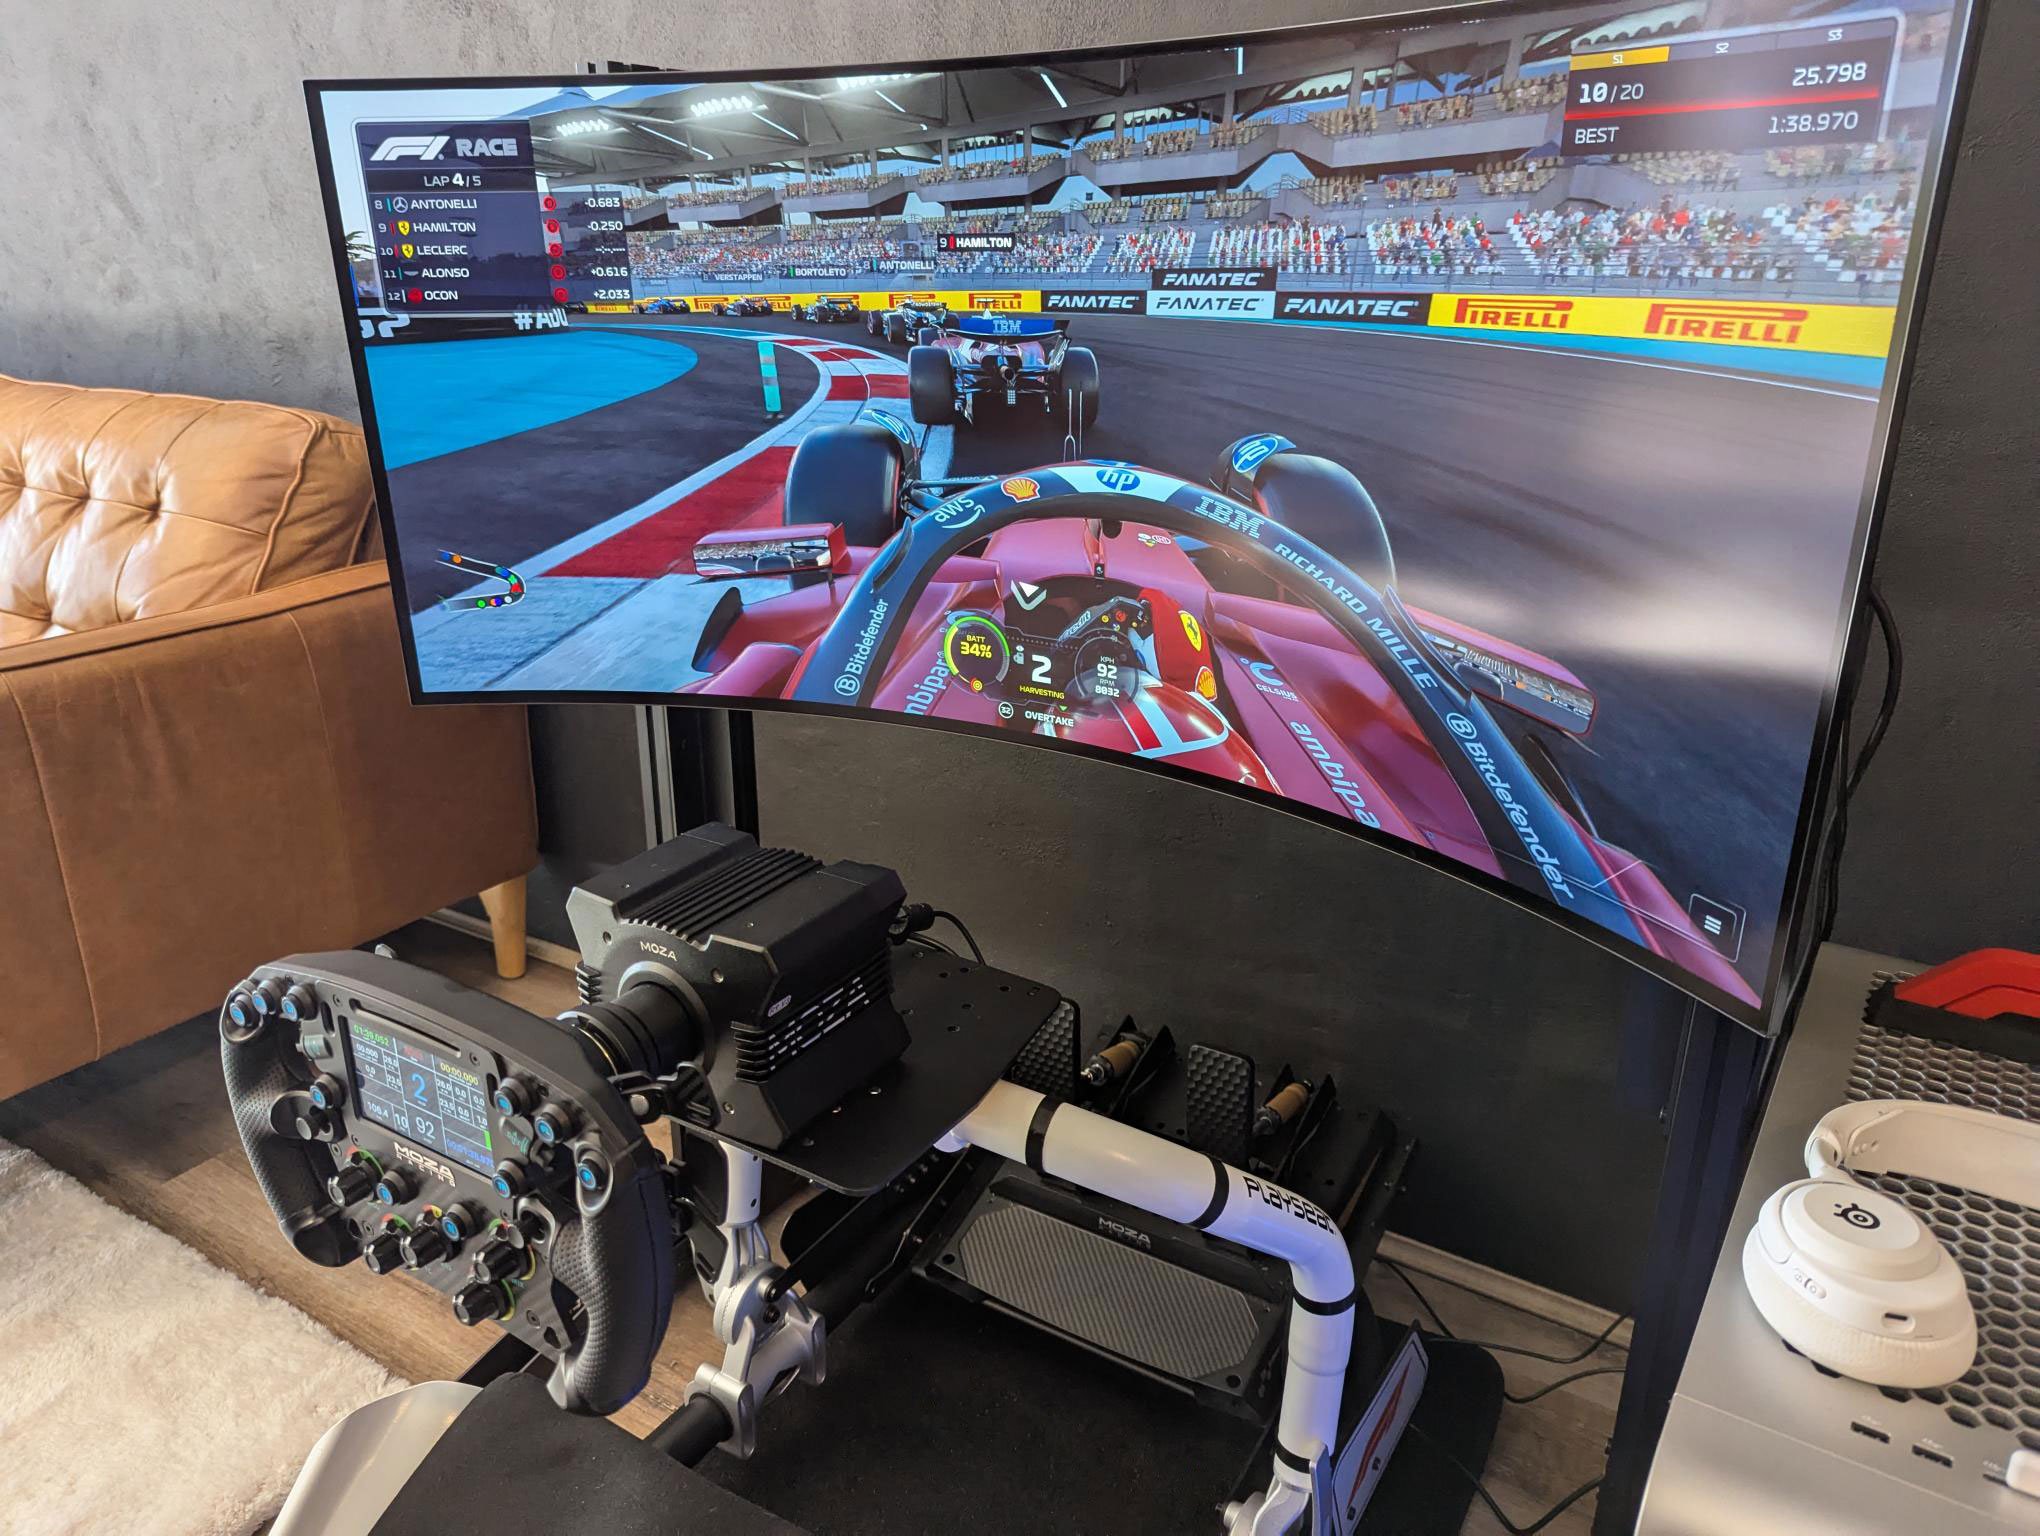
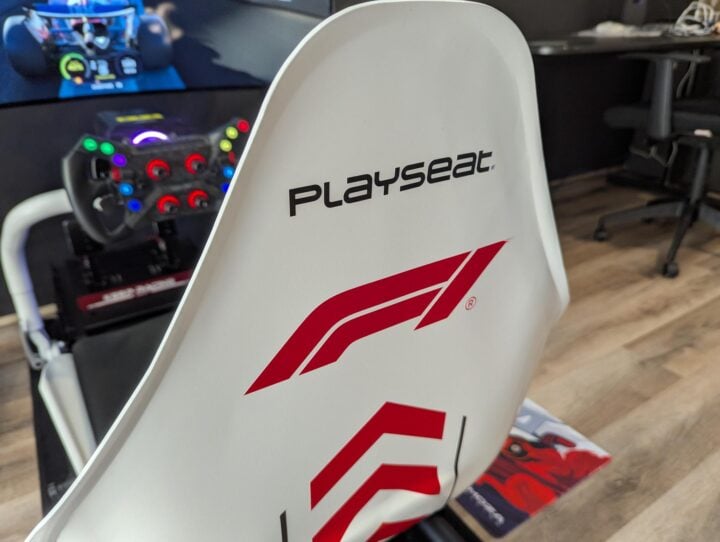
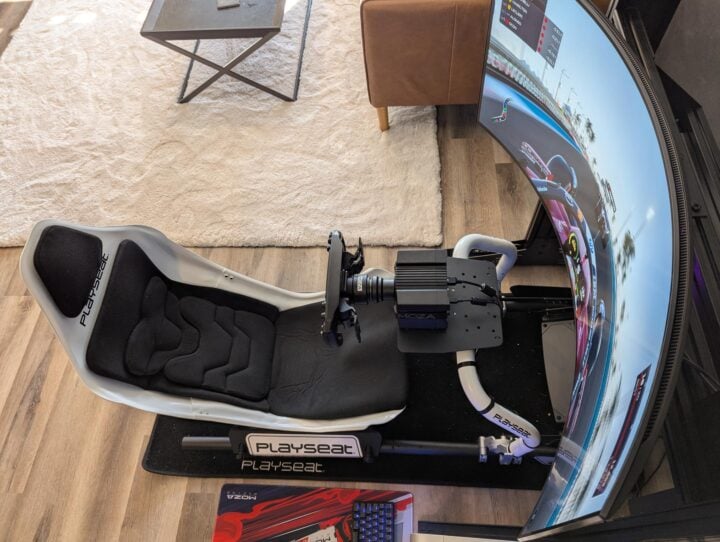
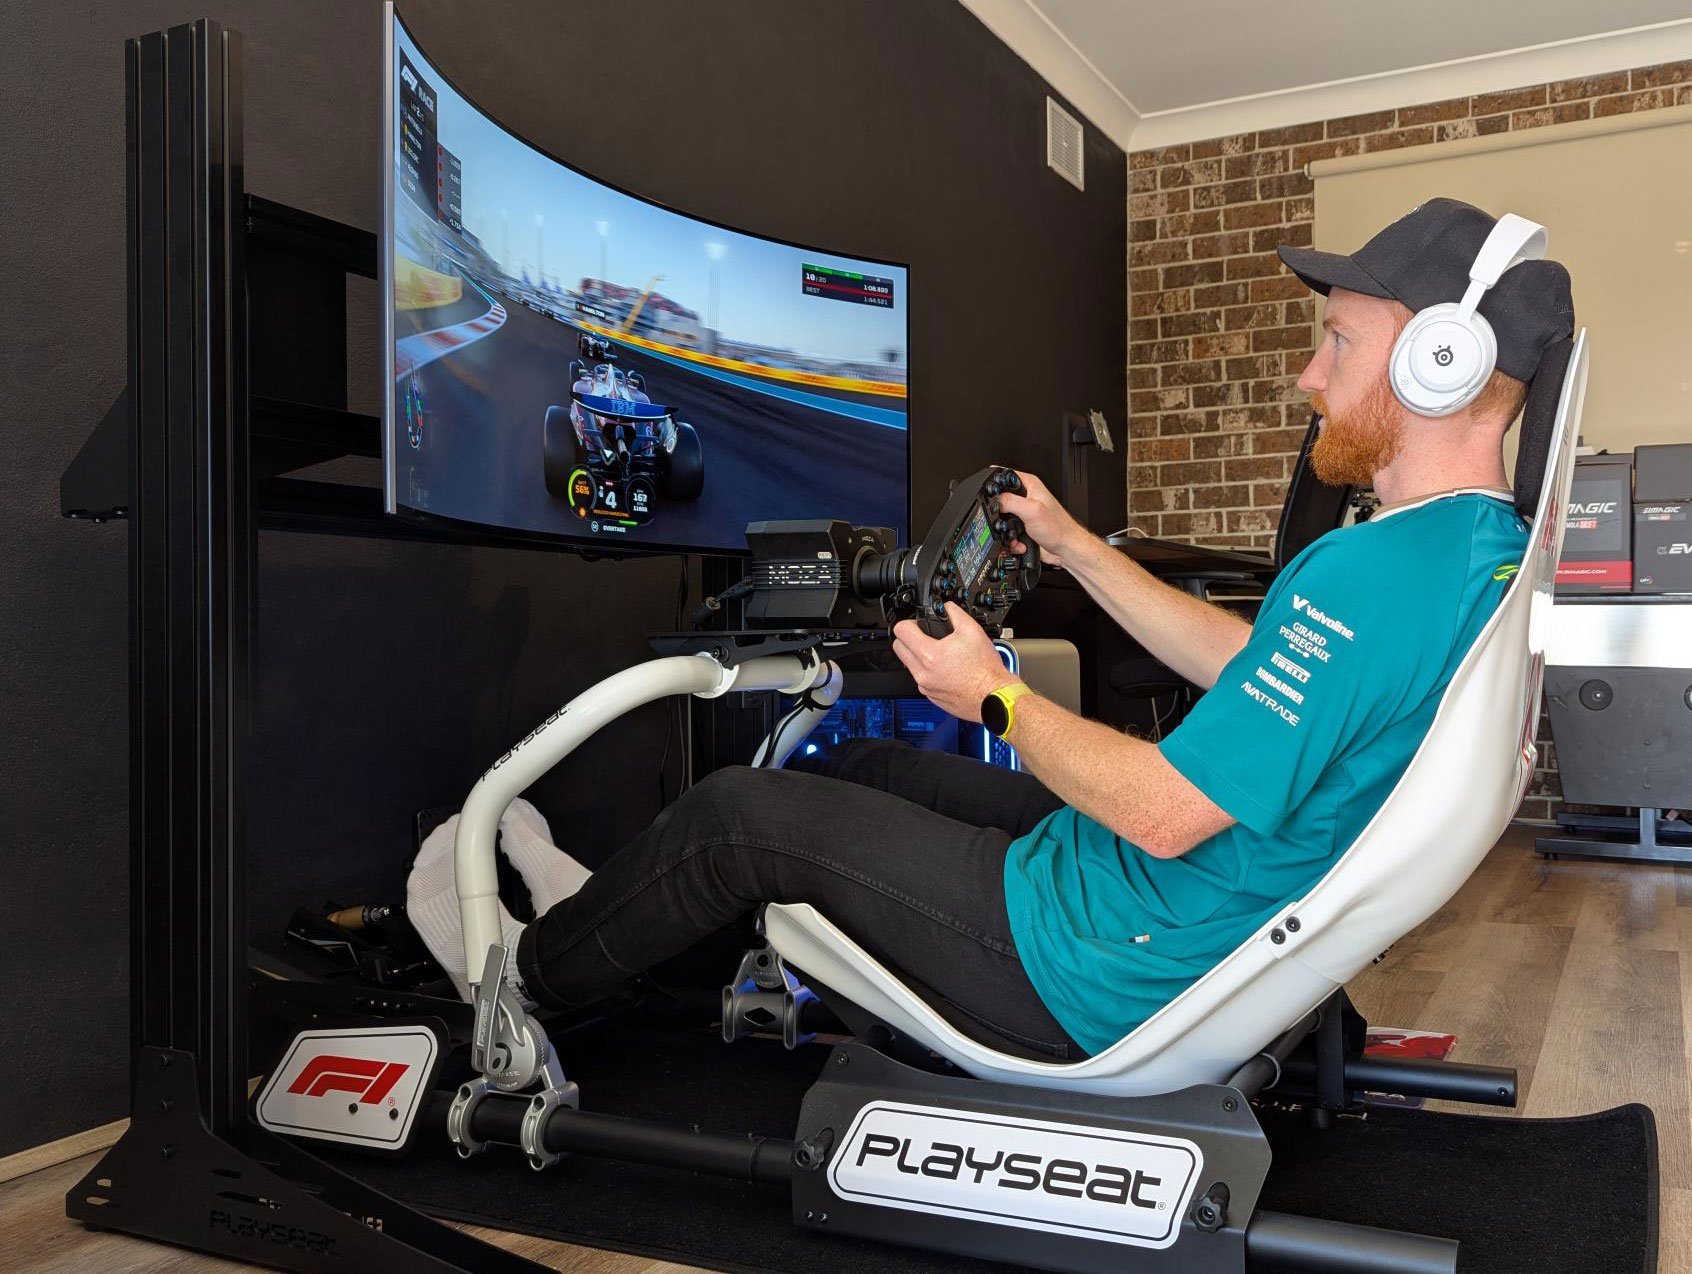
Ultimately, I was drawn to the stylish look of the Playseat cockpits. With F1 branding and a clean white aesthetic, I chose the Playseat Formula Instinct F1 Edition, priced at $1,098 in Australia. Playseat sent me one to help with this guide; it looks great with a rather minimalistic design. There are lots of mounting options for the pedals and the wheel base, allowing for essentially any brand of racing gear. It is also adjustable, able to slide backwards and forwards, while the arms holding the wheel base and steering wheel can tilt to suit. I couldn’t be happier with this affordable and stylish cockpit.
Wheel base
Now, for the main racing gear. These parts are how you control your simulator, and they individually connect to your computer or console. Building a high-quality racing simulator means the steering wheel and wheel base are separate components. The wheel base has a big part to play in your simulator setup, connecting directly to the steering wheel to work in harmony. The purpose of the wheel base is to provide feedback to you as you drive, simulating a realistic racing experience.

For a high-quality setup, I recommend that you need no more than 8 – 12 Nm (Newton-meters) of torque. This measures how much rotational force the wheelbase provides. The higher the Nm, the stronger and more detailed the force feedback you feel through your steering wheel.
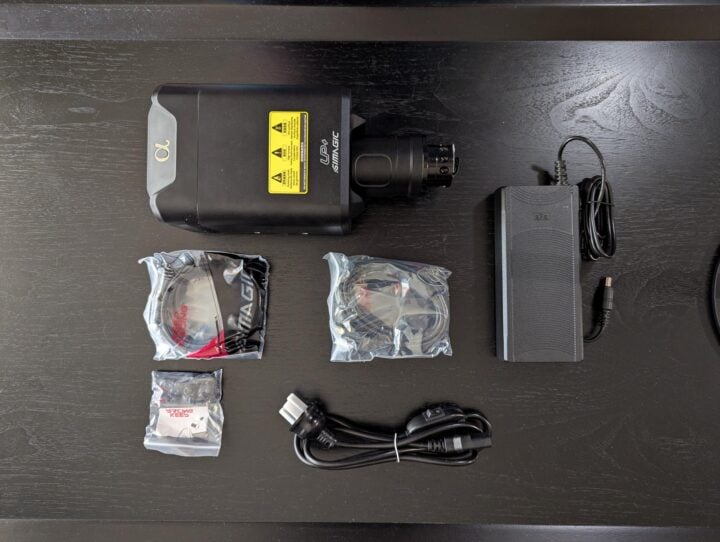
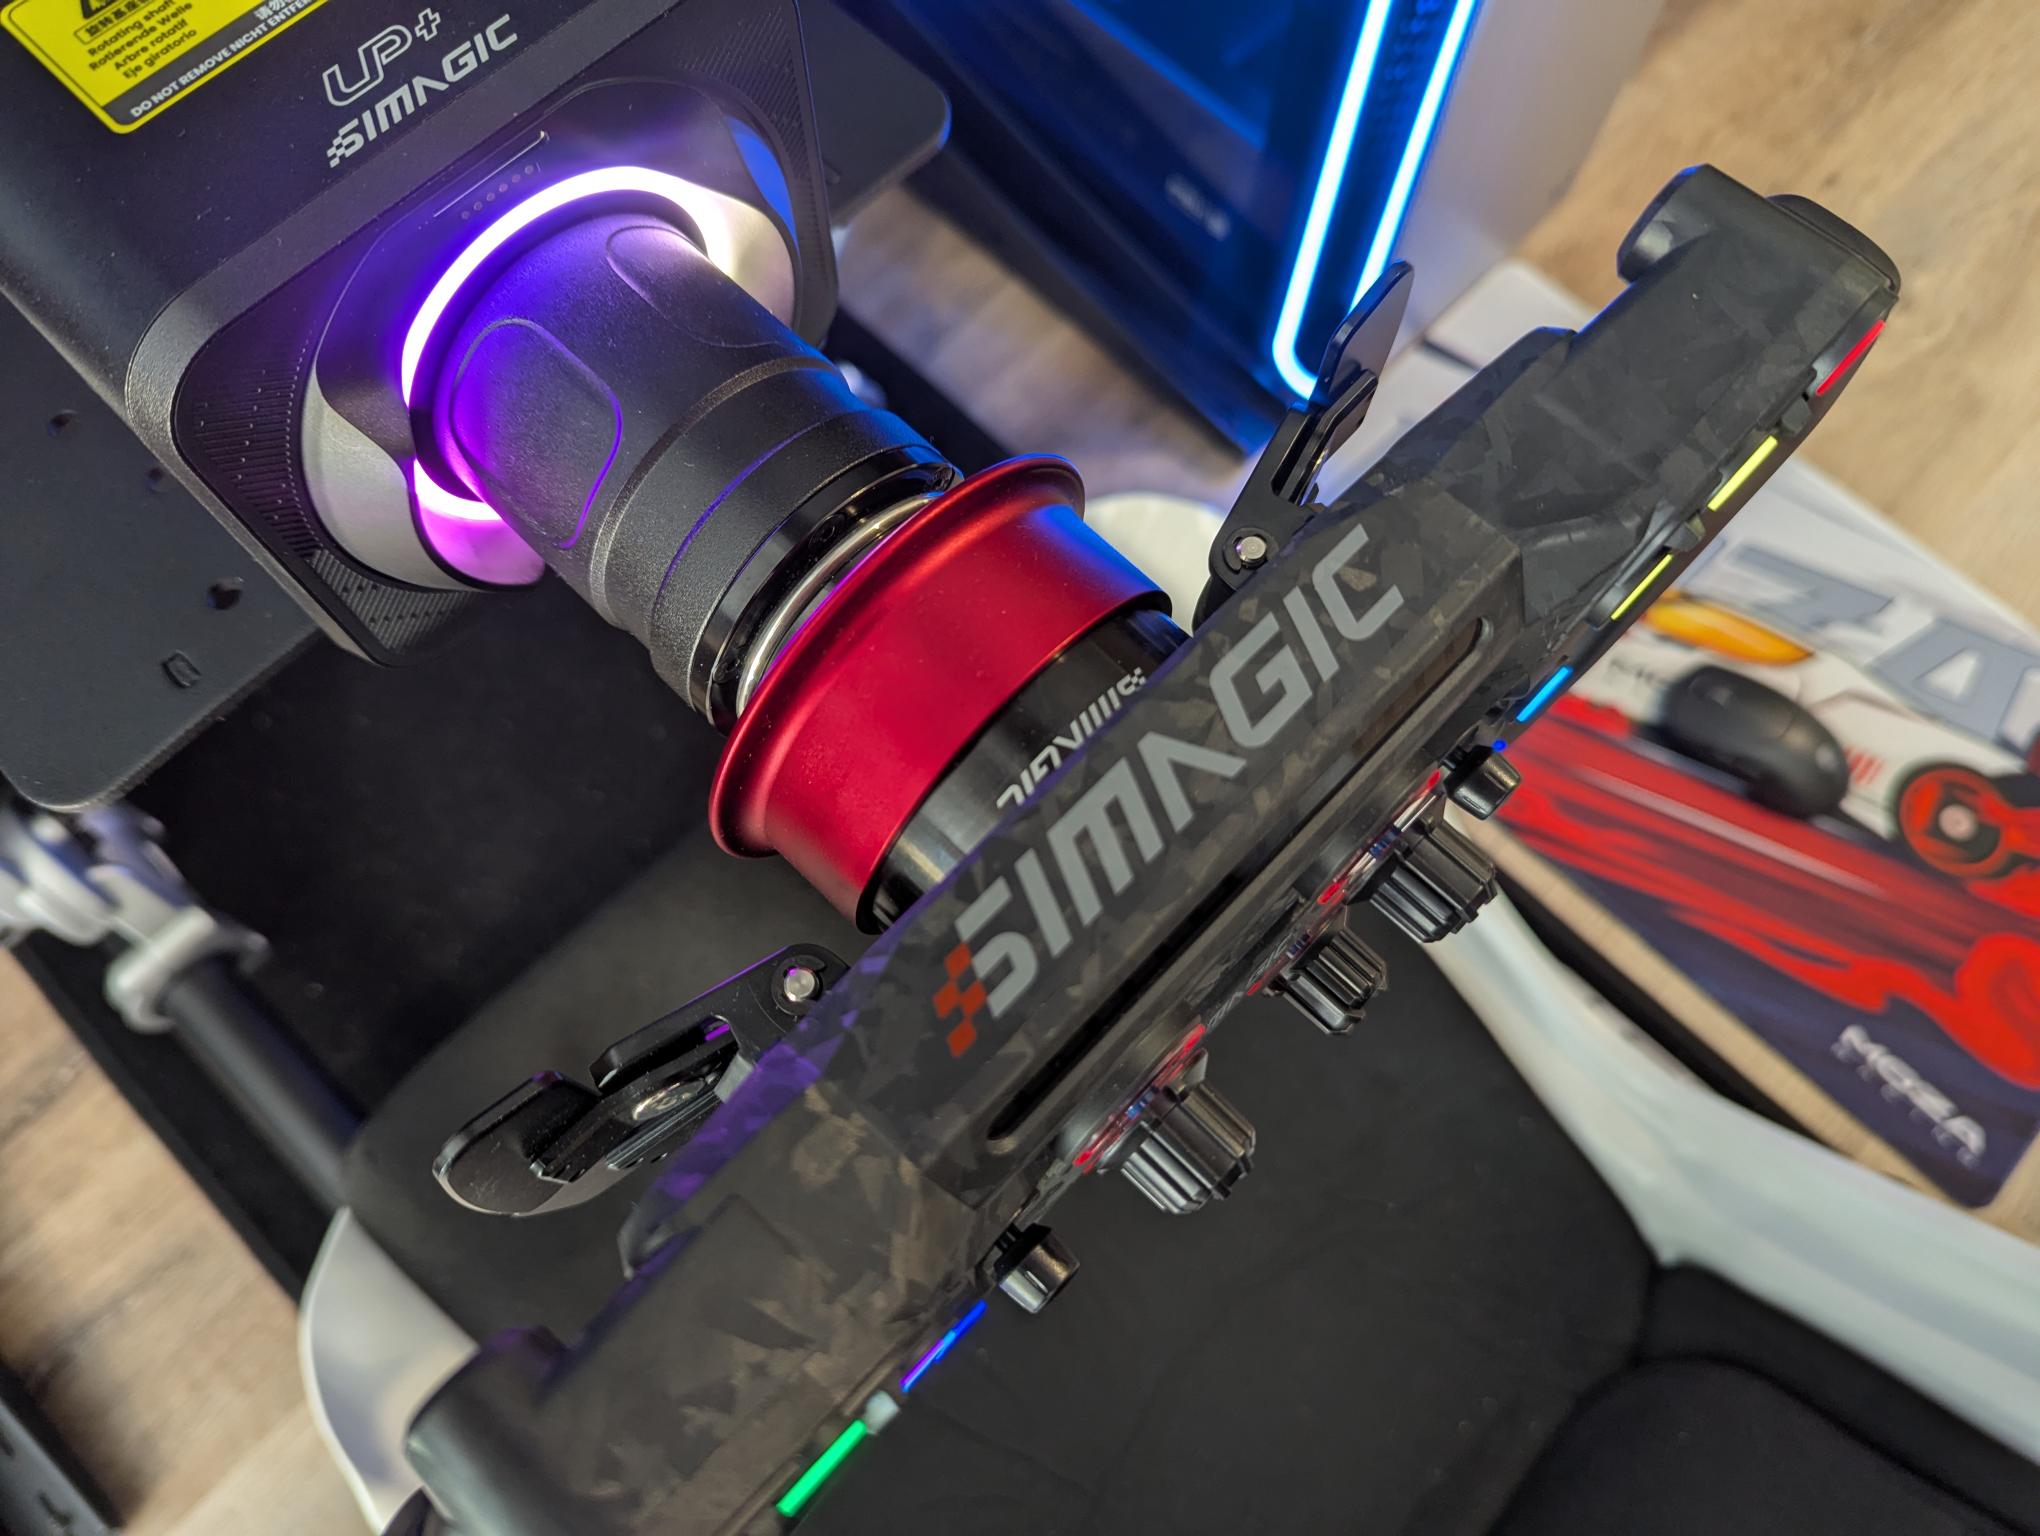
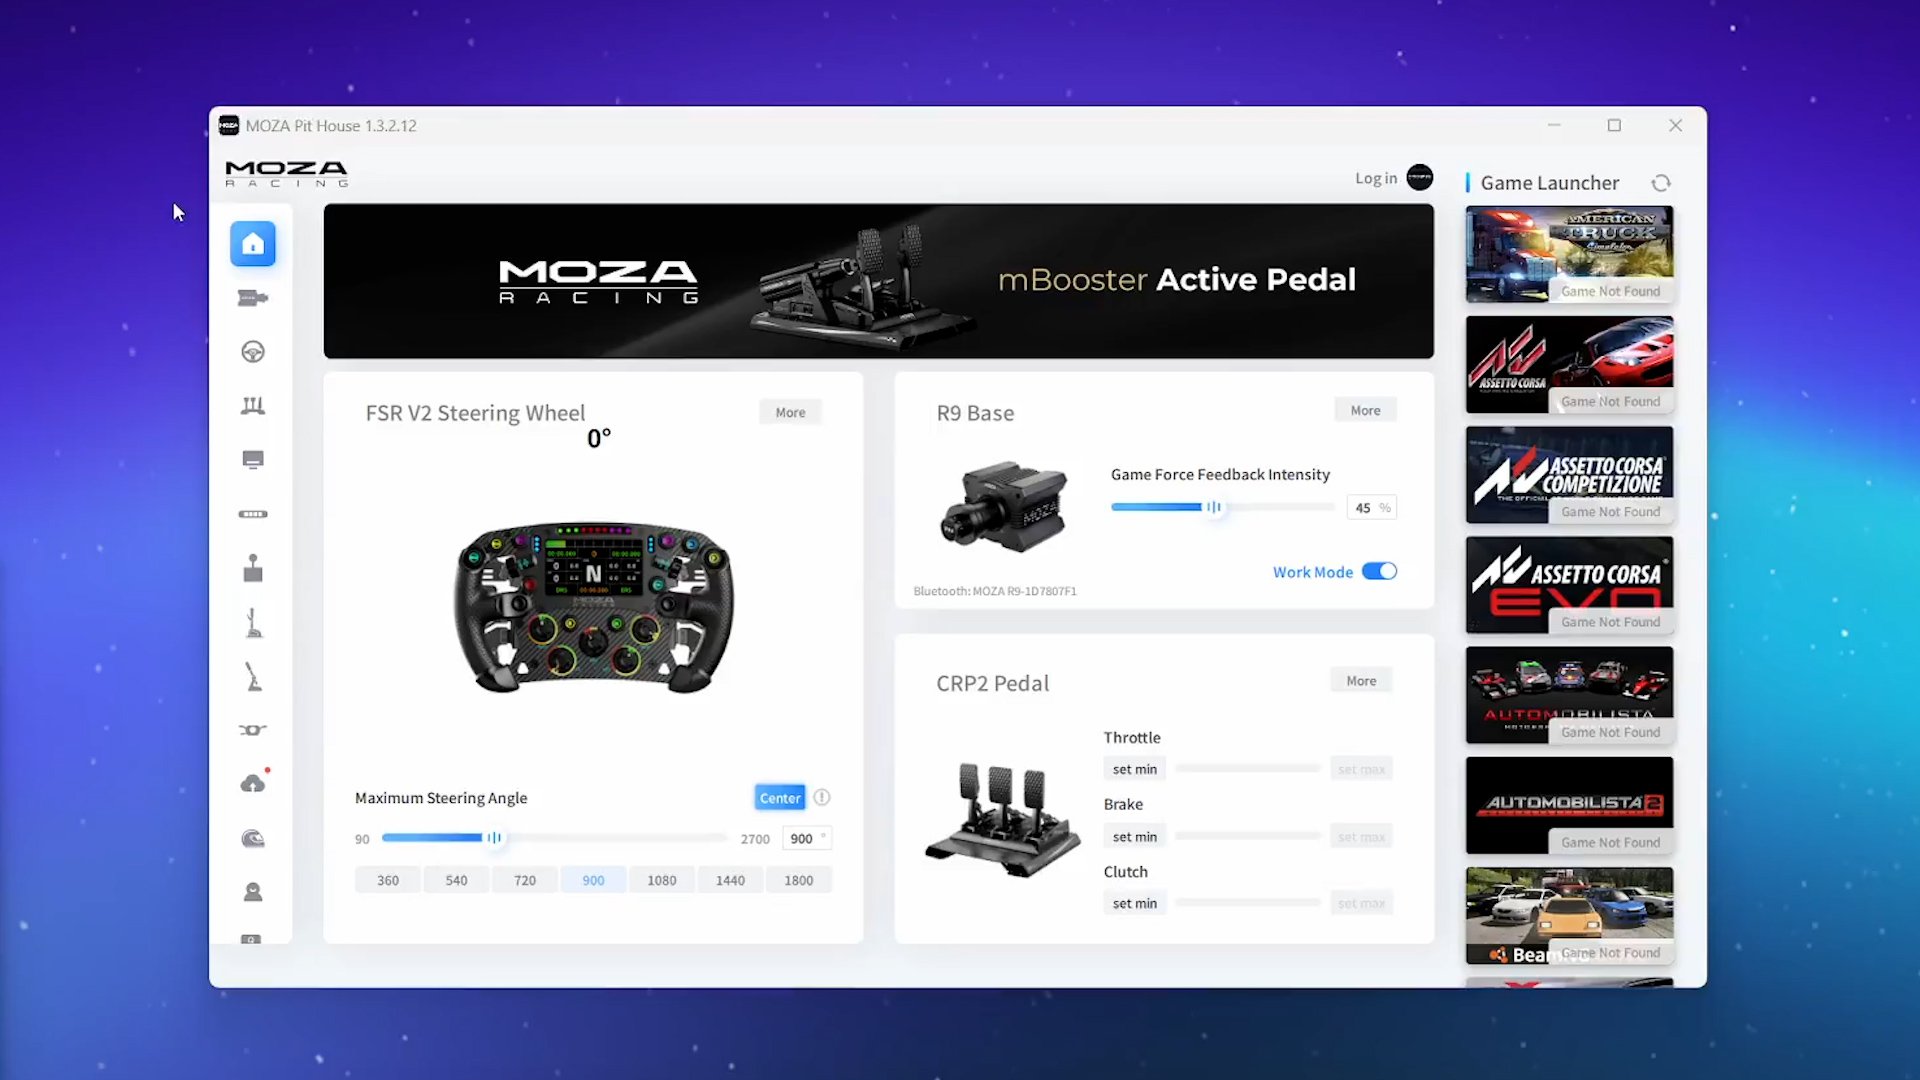
I used the Simagic Alpha EVO retiling for $1,099 as well as the $649 Moza R9 V3. It was interesting to have two wheel bases with differing power levels for comparison.
I certainly noticed the difference as I had to increase the feedback setting on the Moza to achieve a similar feel, yet 9 Nm is more than enough for a good experience.
Using a high-quality wheel base takes sim racing into a new dimension. You feel every bump of the track and every time you touch another car or the grass. People say you drive a car by feel, and for the most part, this is felt through either your feet or your hands. Through my experience building my simulator setup, the sentiment feels very accurate.
Racing wheel
Possibly the most exciting bit of kit you need to pick is the racing wheel. The good news is that a lot of wheel bases support different steering wheel brands. This means you don’t necessarily have to use the same brands all throughout your racing sim rig.
Make sure to research each component individually, as some attachments or additional cabling may be required. For the most part, though, I recommend sticking with the same brand of wheel base and steering wheel for several reasons. One, you know there won’t be any compatibility issues. Second, if you also have pedals from the same company, all three items will use the same software (more on that later). Also, the look and style of the hardware will be more consistent when sticking with the same brand. Aesthetics matter, after all!
Once again, your budget dictates how premium your steering wheel will be. There is everything from traditional, round, basic steering wheels without buttons, to the complex formula-style wheels with hundreds of buttons and switches.
One of the huge benefits of having a wheel base setup like I mentioned previously is that you are not stuck with one type of steering wheel. Because my build targets Formula racing, I naturally went with an appropriate steering wheel.
But what if I wanted to play something else? What if I wanted to drive around in a more standard car or a different style of game, like Forza Horizon? With a wheel base’s quick-release system, I can easily take one wheel off and replace it with another. No unscrewing anything or changing cables. It literally takes just a few seconds to swap between them.
The other great thing is that the software identifies which wheel is attached and will display customisation options accordingly.

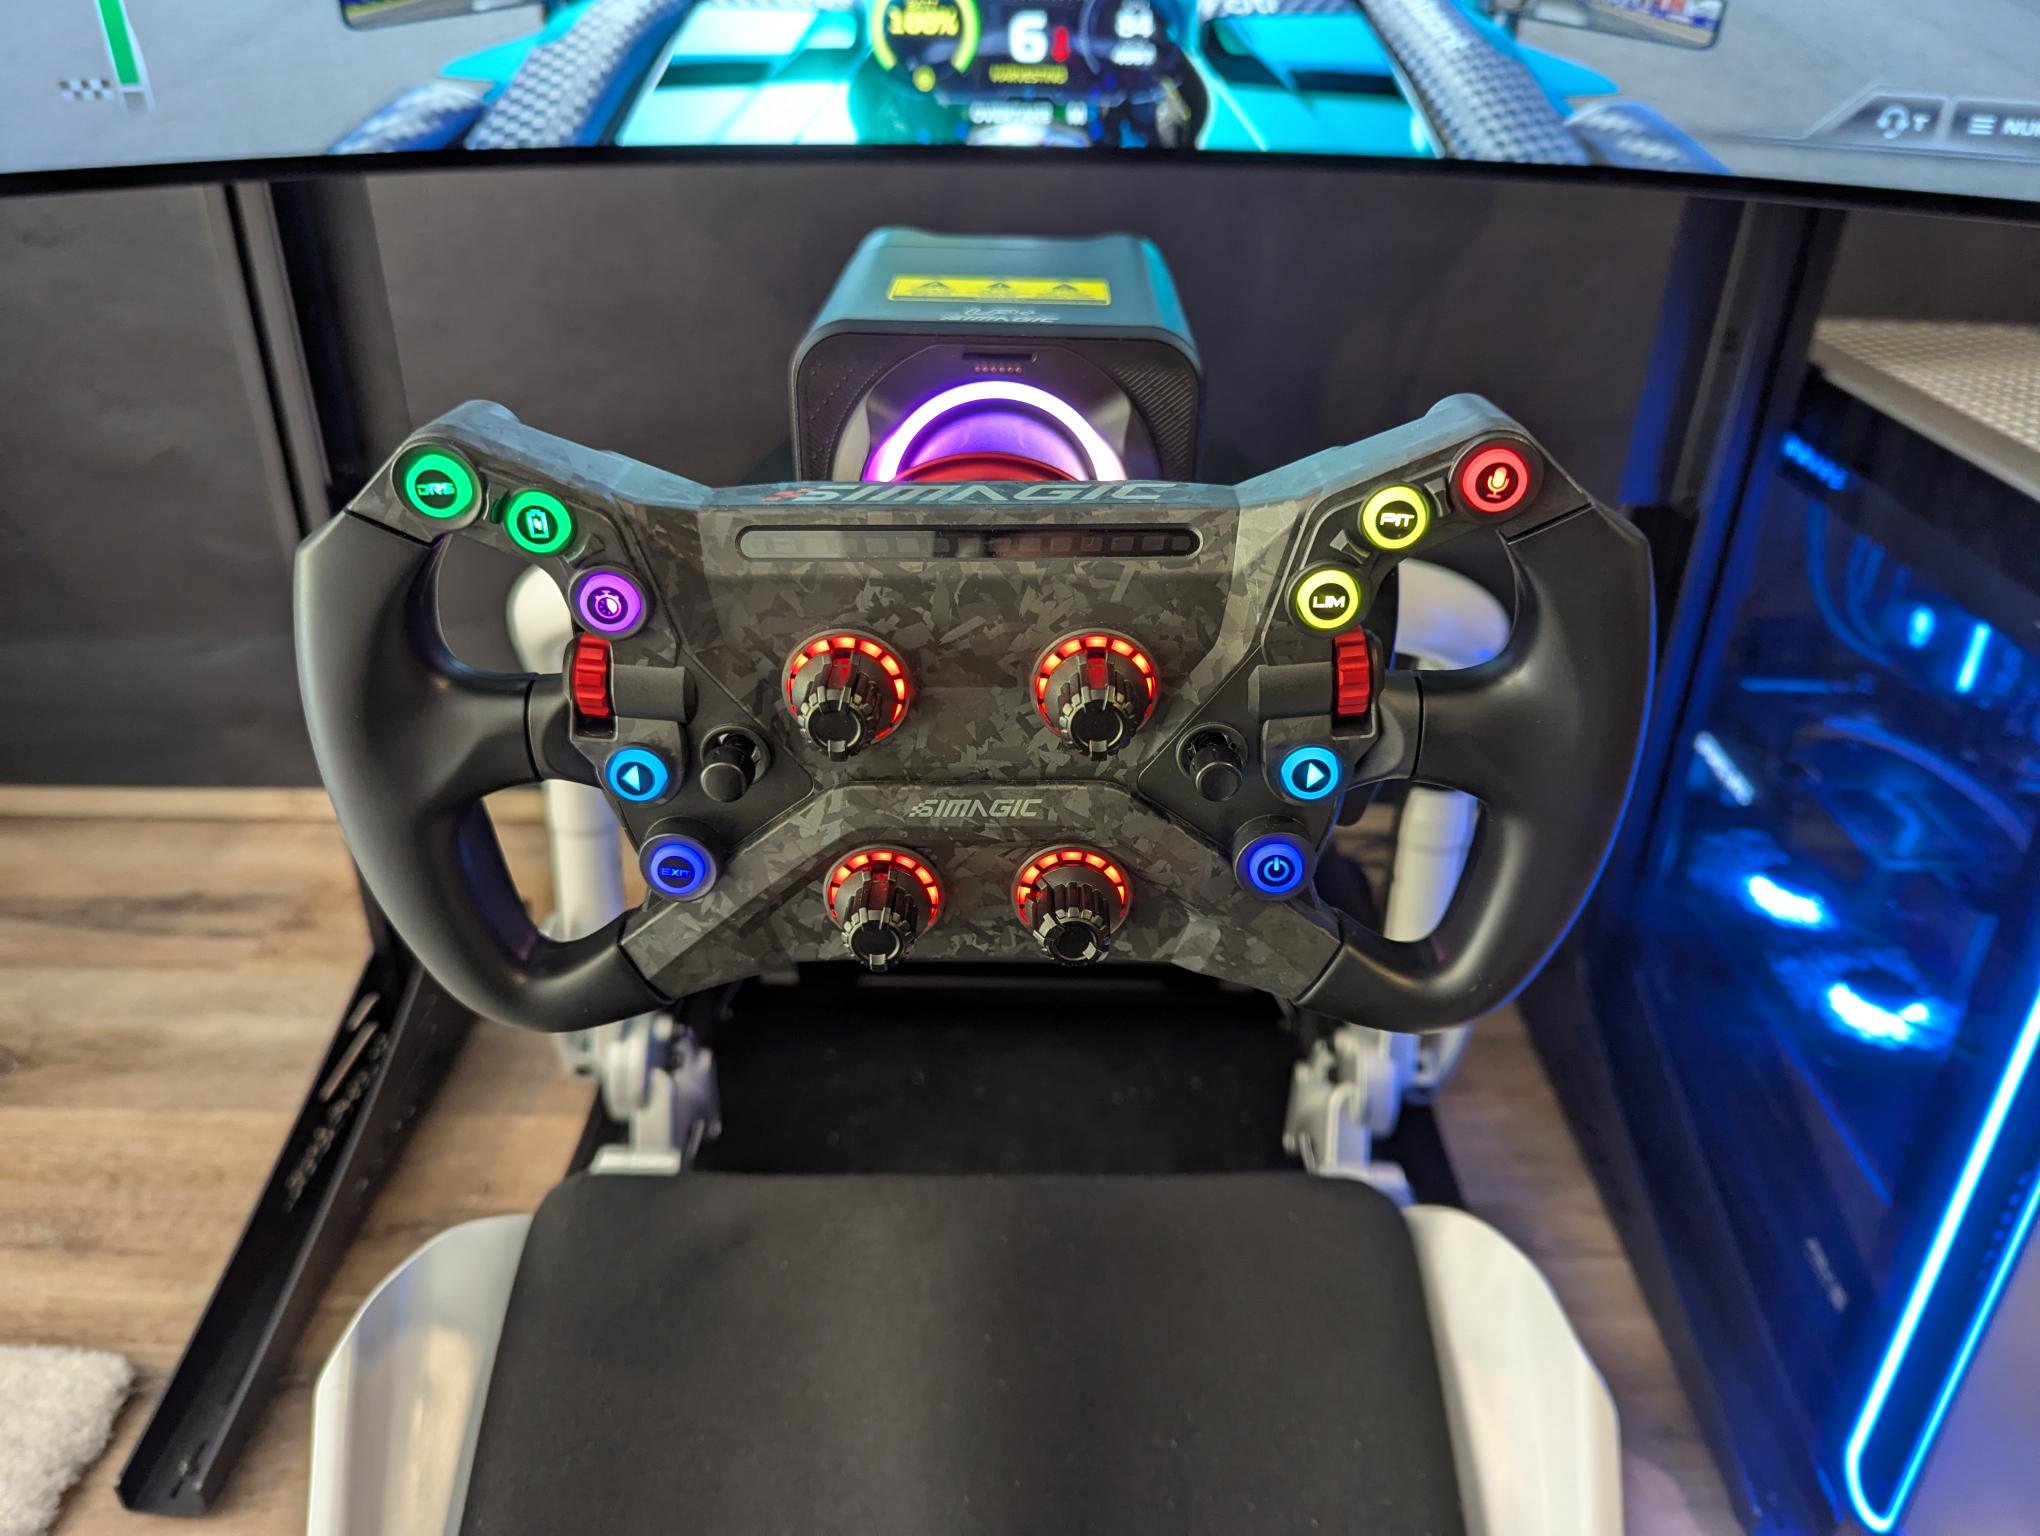
For my build, I tested the Simagic GT Neo, as well as the Moza FSR2 Formula Wheel. At $599, the Simagic GT Neo is relatively cheap for a formula racing wheel. It has a high-quality build, includes a lot of functionality, and looks great. I’d certainly recommend it to everyone.
The Simagic GT Neo comes with left and right paddles for changing gears, as well as additional paddles down low that are used for the clutch. Weighing in at 1,100g and measuring 300mm, it’s a little on the larger side. I feel this is a good thing; there is a lot of data suggesting the smaller racing wheels feel a little cramped. For example, most of the Fanatic sim wheels come in at 270mm, and some users find this too small.
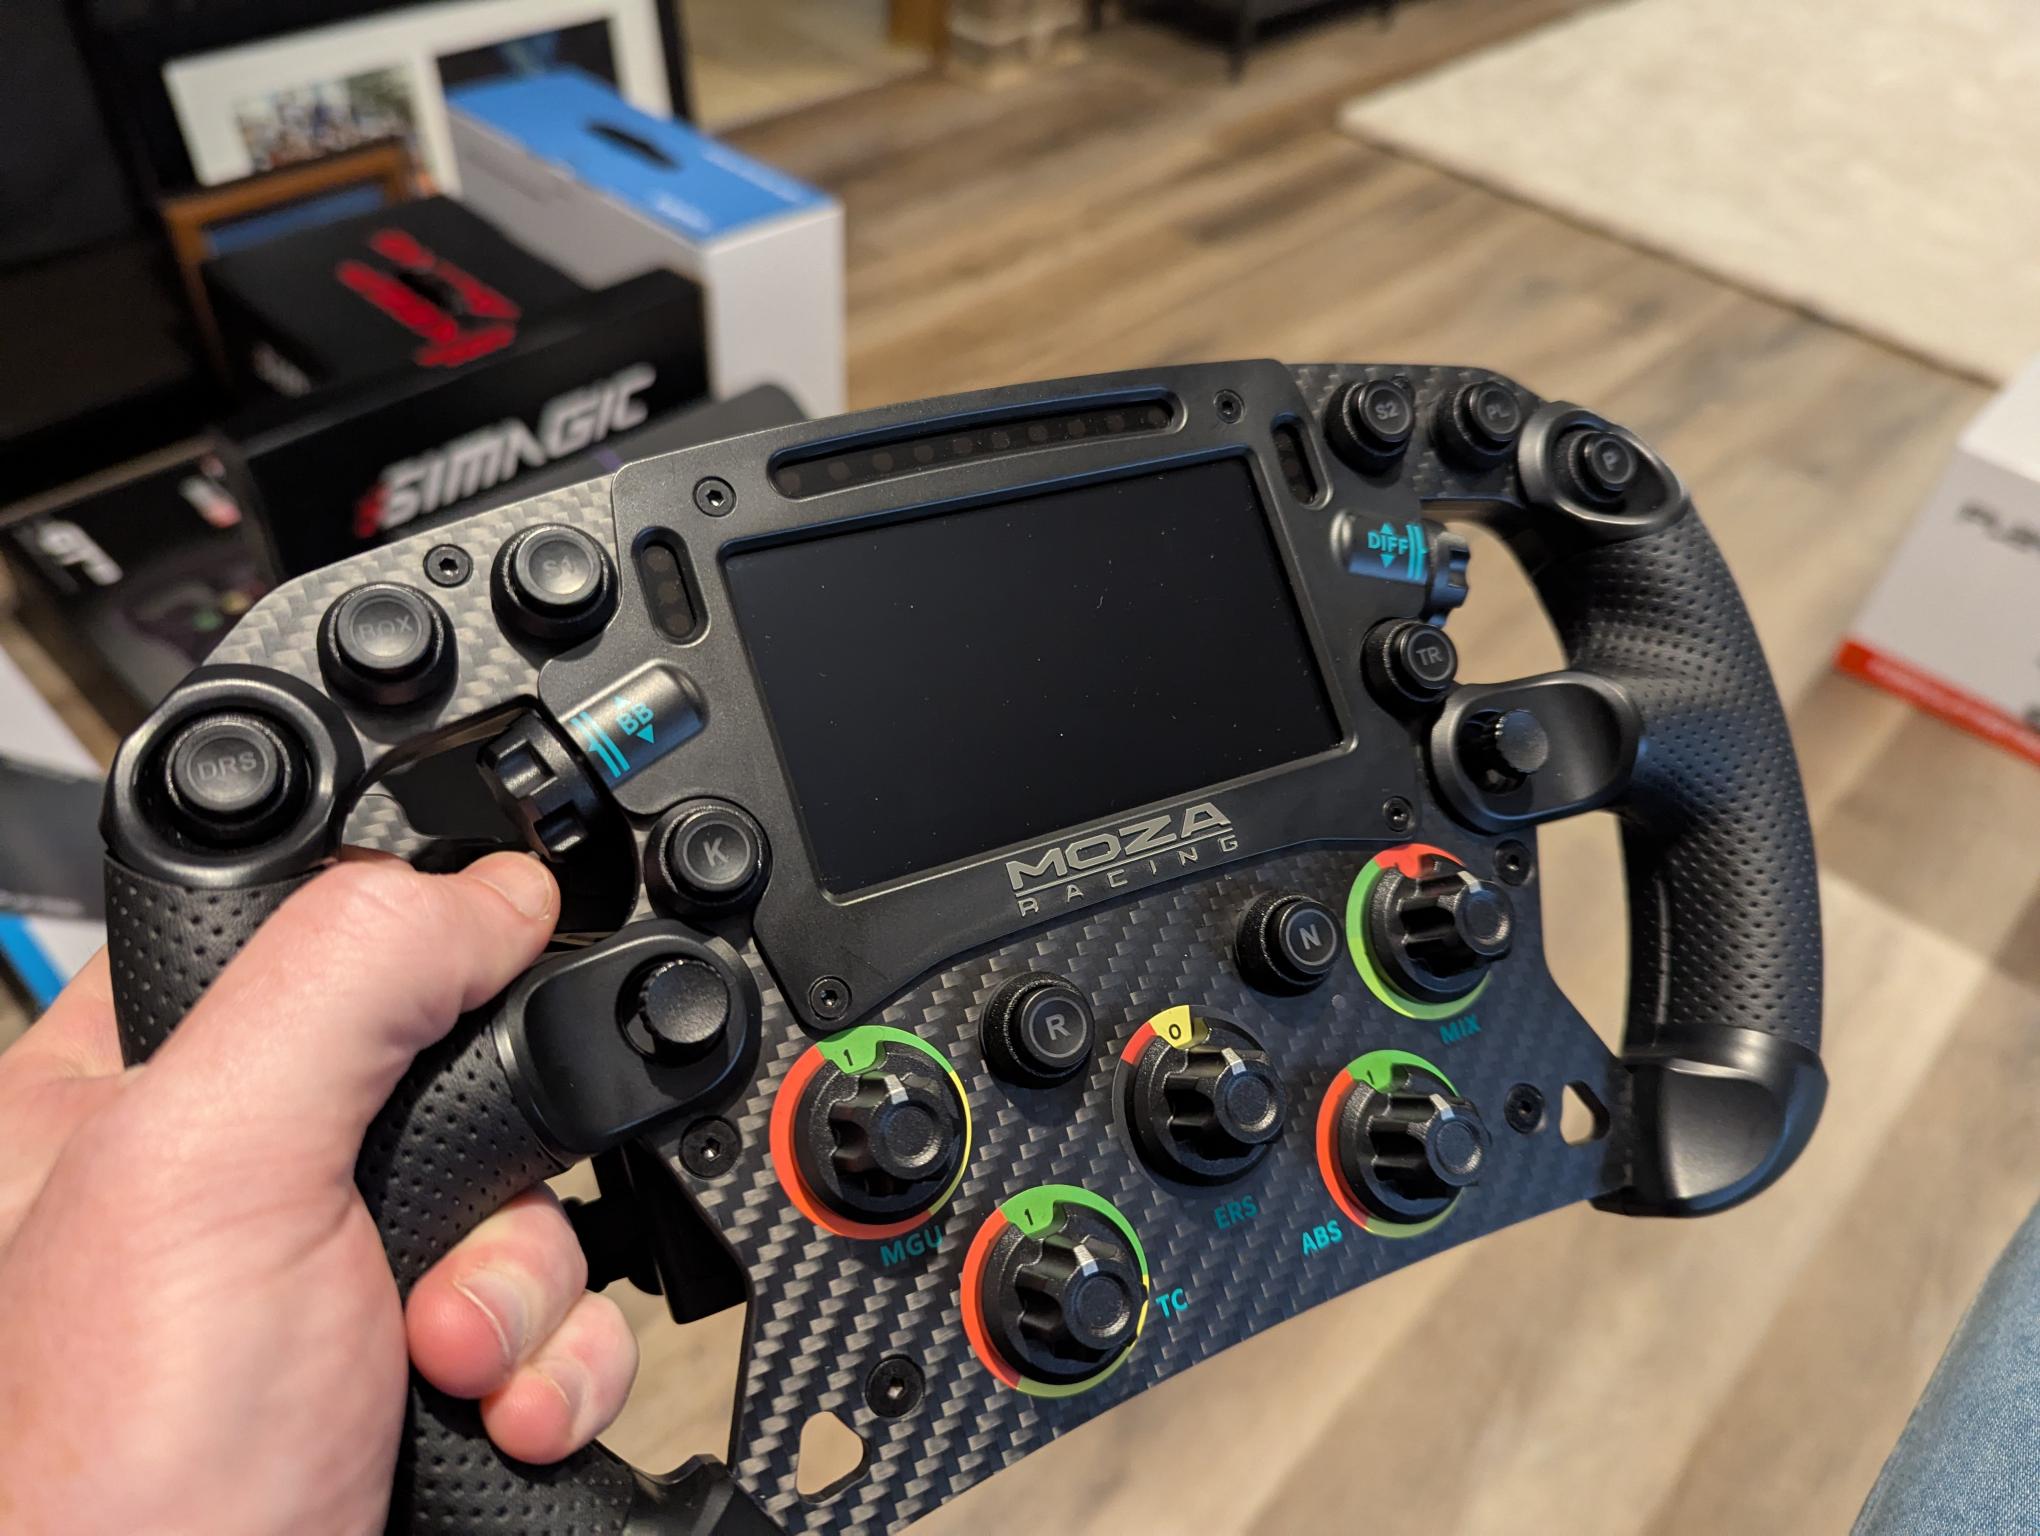
As for the Moza SFR2 Formula Wheel, it’s a little bit of a step up to a slightly higher price range, costing $999. This wheel includes a built-in screen, which comes in handy for formula racing’s data-intensive nature. The shape of the wheel feels comfortable and natural to use, along with a high-quality build, using leather on the grips and carbon fibre elsewhere.
Over to the back, the Moza wheel has a lot of paddles. Similar to the Simagic wheel, these are for shifting gears and the clutch. The Moza SFR2 Formula Wheel weighs 1,600g and measures 280mm, making it slightly smaller, yet heavier than the Simagic wheel. Overall, it provided a fantastic driving experience, and I love the built-in screen that adds that extra level of realism to the build.

Pedals
They say that pedals are the first item you should look to update on your racing sim. This was something I didn’t expect; I assumed the wheel or wheel base would have a greater impact. As I found out through my time testing and researching, you can lose and gain so much time through braking and accelerating in certain ways. Capable of taking your racing to another level, the feel for the pedals is such a vital element.
There are also lots of configurations and pedal options available, each customisable and adaptable in order to fit your simulator rig. Most pedal sets typically come with two pedals by default — a brake and an accelerator — with the ability to add a third (clutch) pedal.
You can also customise pedals to adjust how they perform under pressure. Changing out springs and damping blocks creates a different travel when braking. There is also the ability to reduce the travel length by swapping out for aluminium blocks. Positioning, angle and lighting are among the other ways you can further customise your pedals. There are even hydraulic and rumble attachments that can further simulate the feel of a real car.
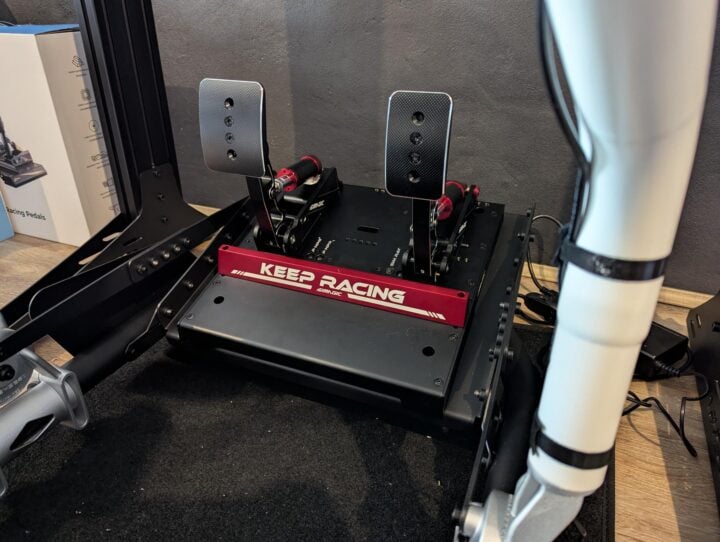

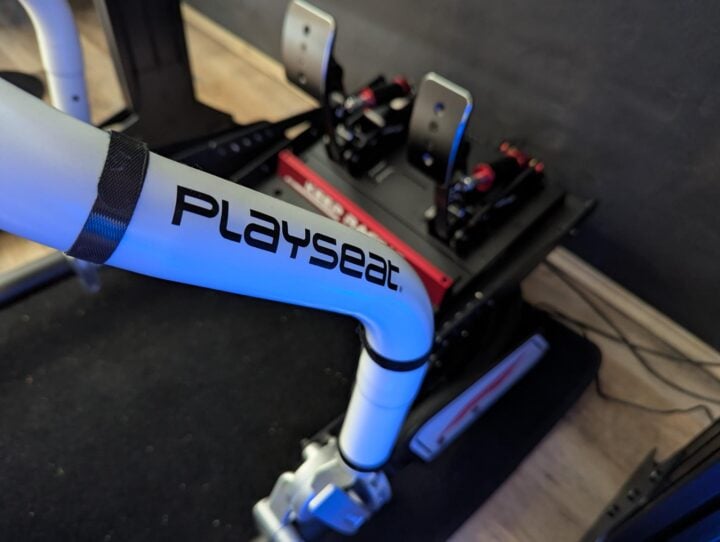
I tested the $699 Moza CRP2 Load Cell Pedals and the $849 Simagic P1000-F Modular Pedals. Both are high-quality pedal sets that feel comfortable and are easy to adjust. They also both only have two pedals included, which is all I need for formula-style racing because the steering wheel controls the gear changes. As I don’t yet have any added attachments, there was no need to plug them into power. They simply connected to my PC via USB, and away they went. I couldn’t fault either set of pedals, even though they each had a unique feel to them.
Screen

When picking a screen for your racing sim, do you choose a TV or a monitor? Depending on space and budget, there’s the option of one larger screen or three smaller screens that wrap around you for a more immersive experience.
To save some money, you can set up your racing sim rig in front of your existing lounge room TV. The preference typically is to have a more permanent setup that doesn’t require you to move your rig after use. For this, you will need a dedicated TV or monitor.
Some cockpits can hold a monitor, with mounting brackets included as part of the rig. If the seat you have selected doesn’t have screen mounting capabilities, you will need to look into either a monitor attachment or an independent monitor stand. To go with a three-screen setup, you will require a specific stand to hold them, but it’s certainly a popular option these days.
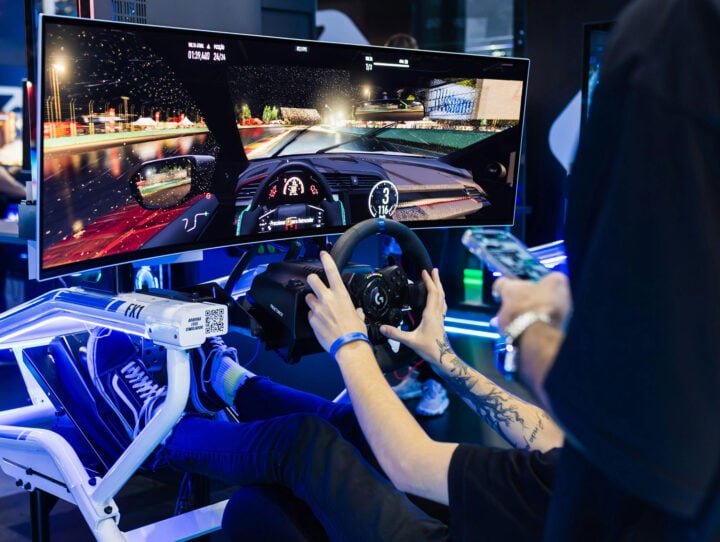
I chose an option that is somewhat the best of both worlds: a large, curved widescreen gaming monitor. This way, the screen wraps around, similar to a triple-monitor setup, while only needing to configure one screen.
For this, I used the 45-inch LG UltraGear OLED 5K2K Gaming Monitor priced at $3,499. With an ultrawide ratio of 21:9, a curve of 800R, and lightning-quick 0.03ms response time, it ticked all the boxes. It also saved on space. A single monitor setup doesn’t take up my whole lounge room, and it looks fantastic. I highly recommend this type of screen for your sim racing setups. There are lots of sizes and configurations available from different brands, too


Accessories and add-ons
As you have probably picked up by now, sim setups are very customisable. The first additional item I recommend looking into is a floor mat. It’s always nice to use a mat to determine the dedicated area for your simulator. Not only that, it can help protect the floor and keep things still when in use. It also looks great when you use a branded mat like the one I chose from Playseat, the Playseat Racing Floor Mat XL.
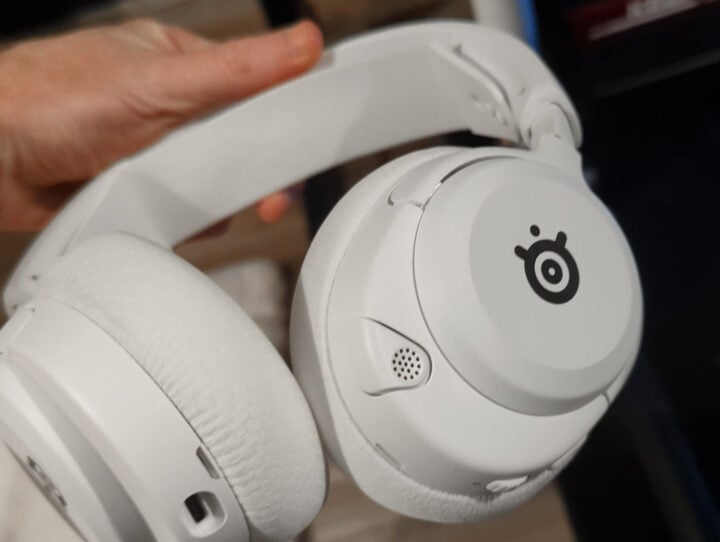
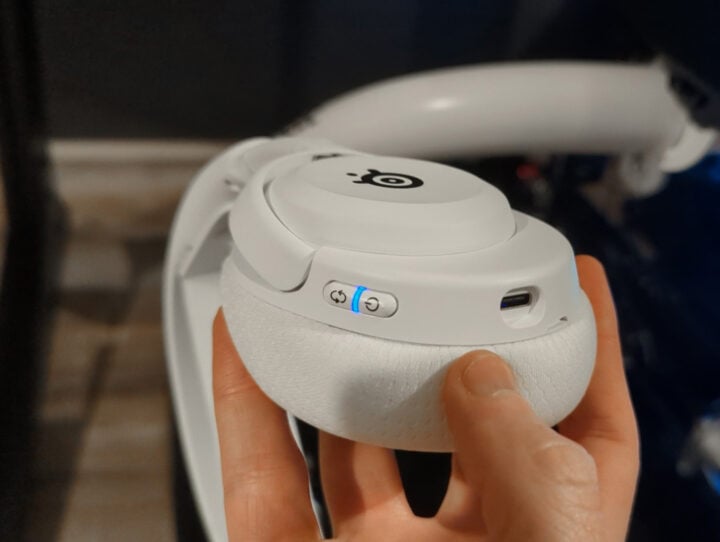
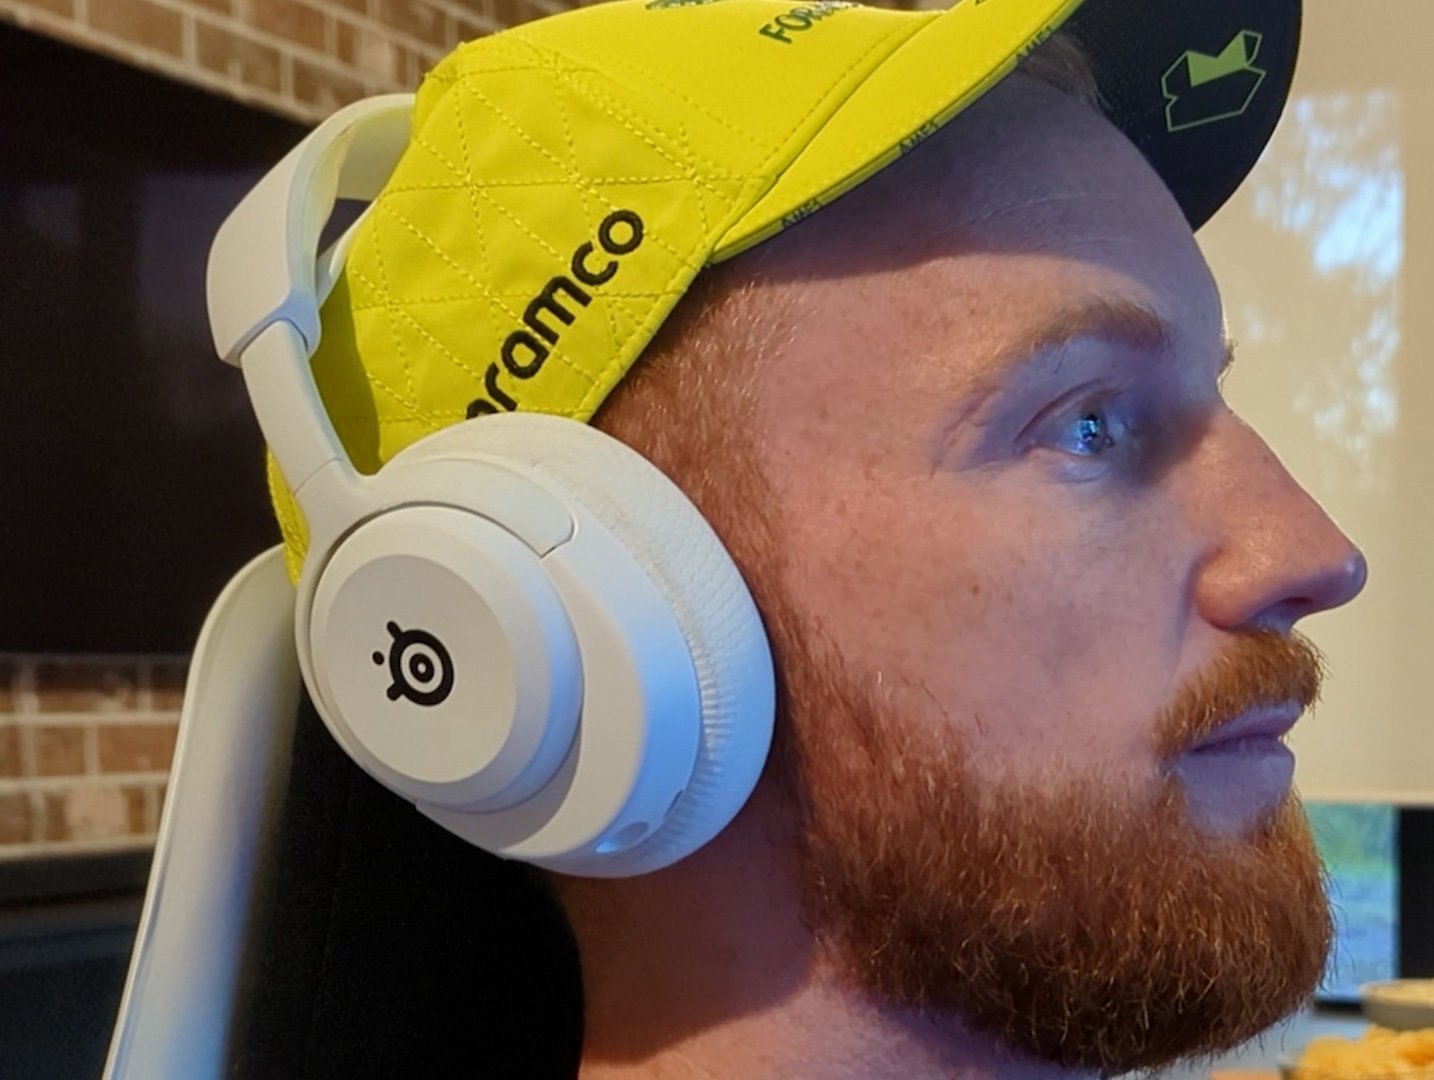
The second accessory I think is all but necessary is a good quality set of headphones. Racing simulators are about immersion, so you don’t want to forget about the audio. Just like any gaming experience, the spatial awareness gained through sound cues is vitally important.
When thinking about my criteria for these headphones, outside of good audio quality, the main thing on my list was to ensure they are wireless. I didn’t want hanging cords that would be annoying and possibly get in the way. In the end, I went with the well-known brand SteelSeries, specifically the $299 SteelSeries Arctis Nova 5P wireless headphones. These are completely wireless with both 2.4GHz and Bluetooth connectivity. They also managed to match the rest of my sim build with a nice white option!
Software setup
I must admit, I was initially apprehensive about the software side of things. I was worried about configuring so many different parts, thinking it would be complicated and time-consuming. In the end, this couldn’t be further from the truth.
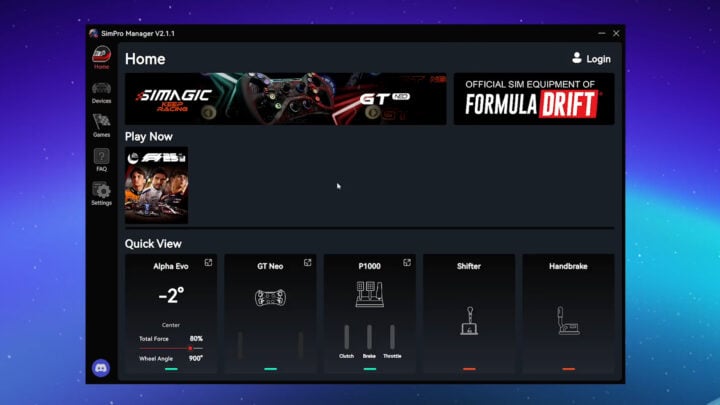
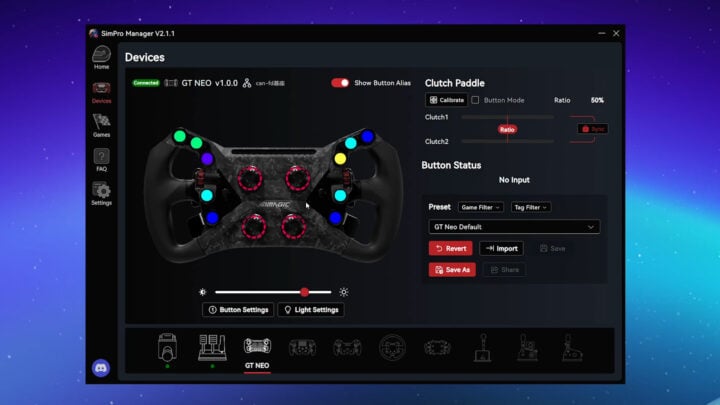
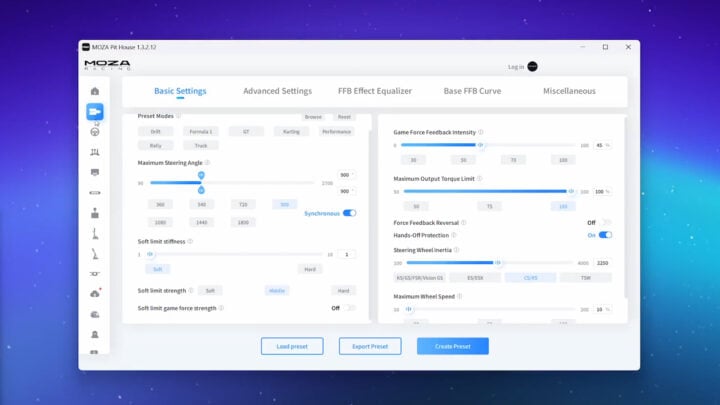
It’s as simple as downloading one program that does it all for you. Simagic has SimPro Manager, and Moza has Moza Pit House. I look at these as my dedicated sim racing control centre. They can customise the lights and buttons, calibrate pedal pressure, change the force feedback and lots of other adjustments. I was pleasantly surprised by how simple it all was, and you don’t have to be a tech genius to work it out.

Final thoughts
Building this Formula 1-inspired racing simulator has been such a fun and rewarding experience. It’s one thing to play racing games casually, but it’s something else entirely to build a setup that really makes you feel like you’re in the car. From researching gear to assembling all the components, I’ve learned so much along the way. Hopefully, this guide has helped shed some light on what to expect if you’re looking to build your own.
There’s no perfect formula (pun intended) when it comes to sim racing builds. It really comes down to your own goals, space, and budget. Whether you’re chasing realism, just getting started, or somewhere in between, there’s a path for everyone. The most important thing is to enjoy the process, because once it all comes together, there’s nothing quite like that feeling of being on track — all from the comfort of your home.
The post The ultimate guide to building your own F1 racing simulator appeared first on GadgetGuy.


0 comments:
Post a Comment